
I STEPPED BACK FROM THE VELVET SACK
I do really need to fit and fix the neckline on the stand. The stay tape is brilliant, I do need twice the width for the front though.
I do really need to fit and fix the neckline on the stand. The stay tape is brilliant, I do need twice the width for the front though.
Filed under projects: media recreations, Uncategorized
I’ve had a few questions about patterns so I thought I’d do a quickie update 🙂
Dress exhibit notes:
The train has been totally removed and we cannot see the back, but this shows some great details that may help with decisions on what effects to choose and what to not.
The collar: you can clearly see the wired struts underneath. The edges are cut not stitched so I’m going a bit crazy trying to find the thinest russet I can to dye and polish. I have used russet before for(my Mass Effect Blood Dragon armour as well as my Shaak Ti apron.) The collars are quite flat, using the maleable nature of leather and the wires to hold the shape.
The sleeves: the sleeves are a front and back with a seam along the top (very narrow tucks that are more like easing than full pleats at about elbow) and narrow inserts on the inside panels only. The sleeve edges also look overlocked rather than seamed normally. I hand prickstitched my first gown to get this effect. It’s hard to see but you can see some classic fuzzing of the overlock threads- my skirt hem has this effect!) The sleeves are also sewn in to the side seams. The outer seam has a slight S shape with a good curve as expected but it curls back towards the hem rather than following the same arc.
The dress body: you can see the skirt side front and side seams. If you follow the hip decorations to hide the top seam you can get some good shaping and fit over the hips regardless of your proportions. There are no visible bust or underbust darts or seams. This is in part due to the use of the bias and the pleats to form to curves.
The fabric: it is an arashi shibori and a very soft and thin fabric.
Doll references/simpler pattern options:
I have the Disney exclusive doll and I think the pattern of her dress would scale up beautifully. If you can’t get hold of her (she is a bit pricey just for a pattern) then this page has a really good comparison with the Jakks and close up views of the dress:
http://www.toyboxphilosopher.com/2014/05/a-maleficent-doll-comparison-review.html
The Jakks doll is another option for getting another more simplified style. The Disney exclusive is much much closer with the alternating bias of the train and even the unseen shaping (there is a triangle under arm piece from armscye to waist to allow for the dress to fit as a single piece rather than having the sleeve partially mounted to a shell lining like I did. This will require a bit more care in shaping but if you make a pattern from lining fabric with a similar stretch to the outer shell it is a really good option.
The only issue with the dolls really are the lack of a back of skirt, the train is a bit more complicated in the real dress in that it is partially inserted in/on a side back seam and there is a clear ground length skirt underneath. But this is a costume nerd factor and for not going sheer bloody crazy I’d go for the doll version which is essentially a godet or several godets inserted in to the centre back seam.
I can get some photos of the inside of the doll dress, I have already swapped Elsa and Maleficent and had them play dress ups with Zam and Eowyn. The doll dress is sewn a little far up so I had to unpick a few stitches to get it off the doll so she is not in mint condition anyway 🙂 And to see lots of Maleficents for Halloween would make little feery heart flutter 🙂
The doll also shows how you can reverse a fabric for effect- in this case a satin backed shantung so you don’t need to then try and wrangle leather or pleather!
And the Hot toys doll is just staggeringly beautiful. The bust shaping is something I’d recommend for the lining/support layer and to then smooth the shell fabric over.
http://www.hottoys.com.hk/productDetail.php?productID=236
The dart/seam under the bust merges in to the skirt seam really well so even if it is not visible in the original it is a really well scaled and nalanced alternative. The sleeves also taper and twist much like the original though perhaps a little more tapered. But it does show how much excess fabric you can eliminate (great for if you have smaller amounts of fabric.)
Fabric amounts:
I made my first gown from 10.4m (1m=40″) of 1.6m wide fabric and cut off a fair amount of excess fabric. I managed to beg a further 6.5m and 1.4m length of the same fabric which is being hoarded! With my blog getting so high in google searches I suspect there may be a bit of a run on the alternative heat set foil knit fabric. In Aus/NZ/Singapore it is still available at Spotlight in the 100% Dance section (black on black and gold on black is very readily available.) It is about $NZ25/m so I’d highly recommend at least 11m for the full train and gown. And I’d recommend a lining, either a stretch charmeuse or another slinky knit. You want stretch to only go in the same direction as across the fabric/perpendicular to the wrinkles/pleats so the fabrics hang on the bias well. I wouldn’t recommend a lining cut on the straight with the fabric on the bias due to the amount of stretch you get with a crinkled fabric.
I’d recommend a good 15m/yards for narrower fabric. It is a fiddly dress to pattern on the bias so it is easier to have extra- work areas need to be quite large to support the fabric and not cause over stretching of one layer or area.
Clip or cut off the selvages. Especially for a fabric like I used which had a very firm selvage. I lost a bit of width but it allowed the fabric to rest at a mid stretch when laid on the the floor.
i may have a few more notes to add to this, but I don’t want to make any definitive statements about the parts of the gown not clearly visible or open to interpretation.
Filed under projects: media recreations, Uncategorized

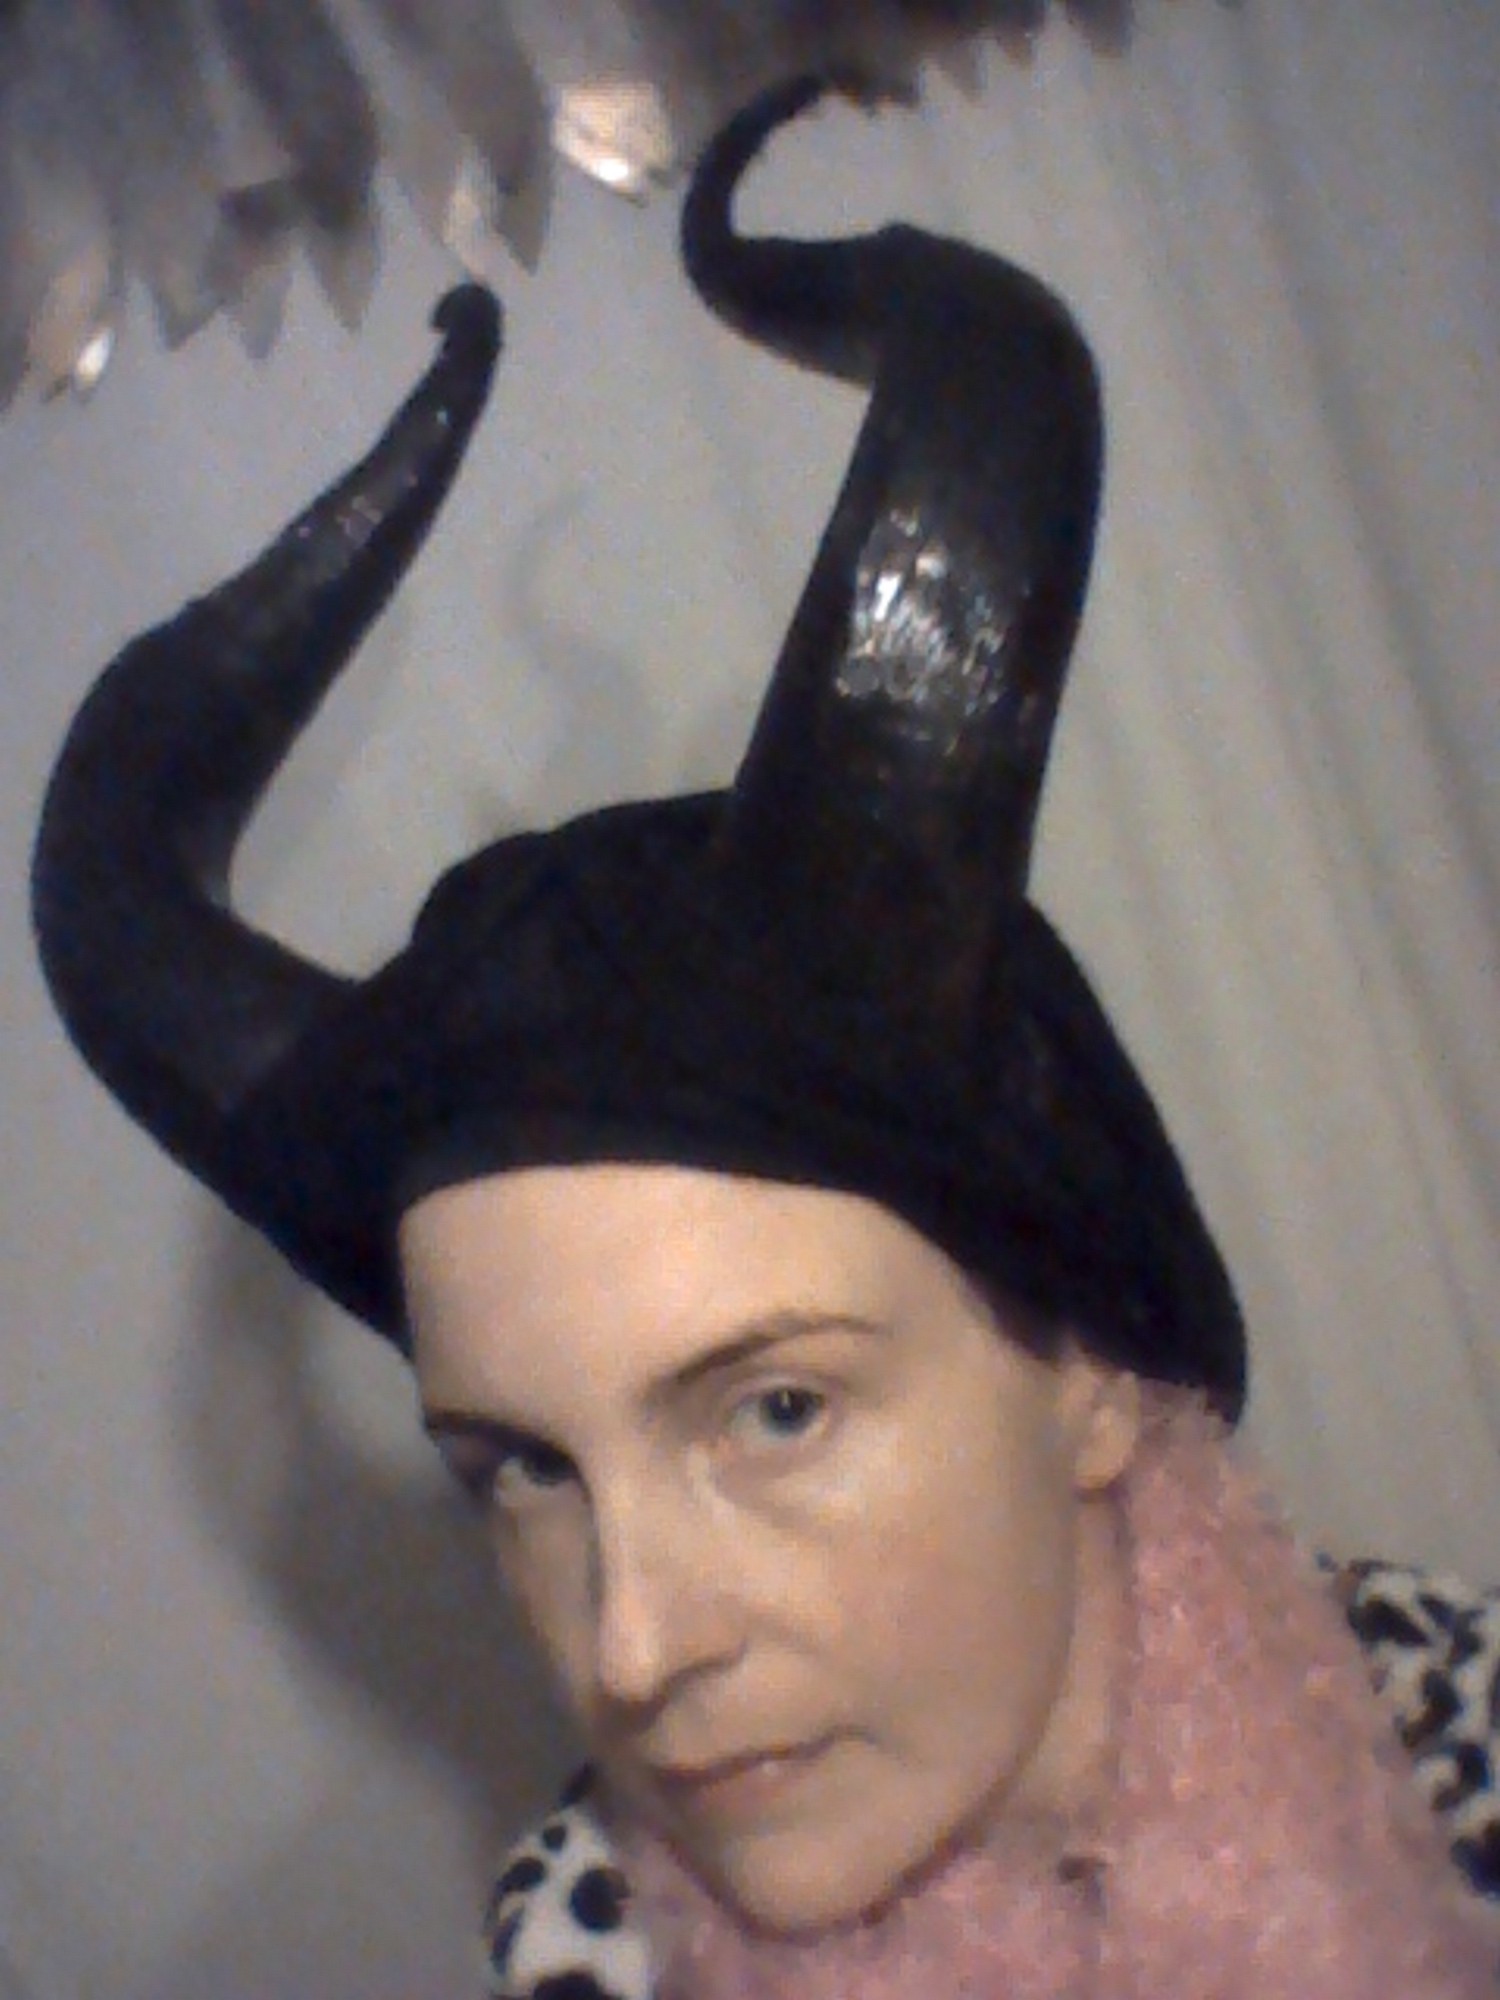
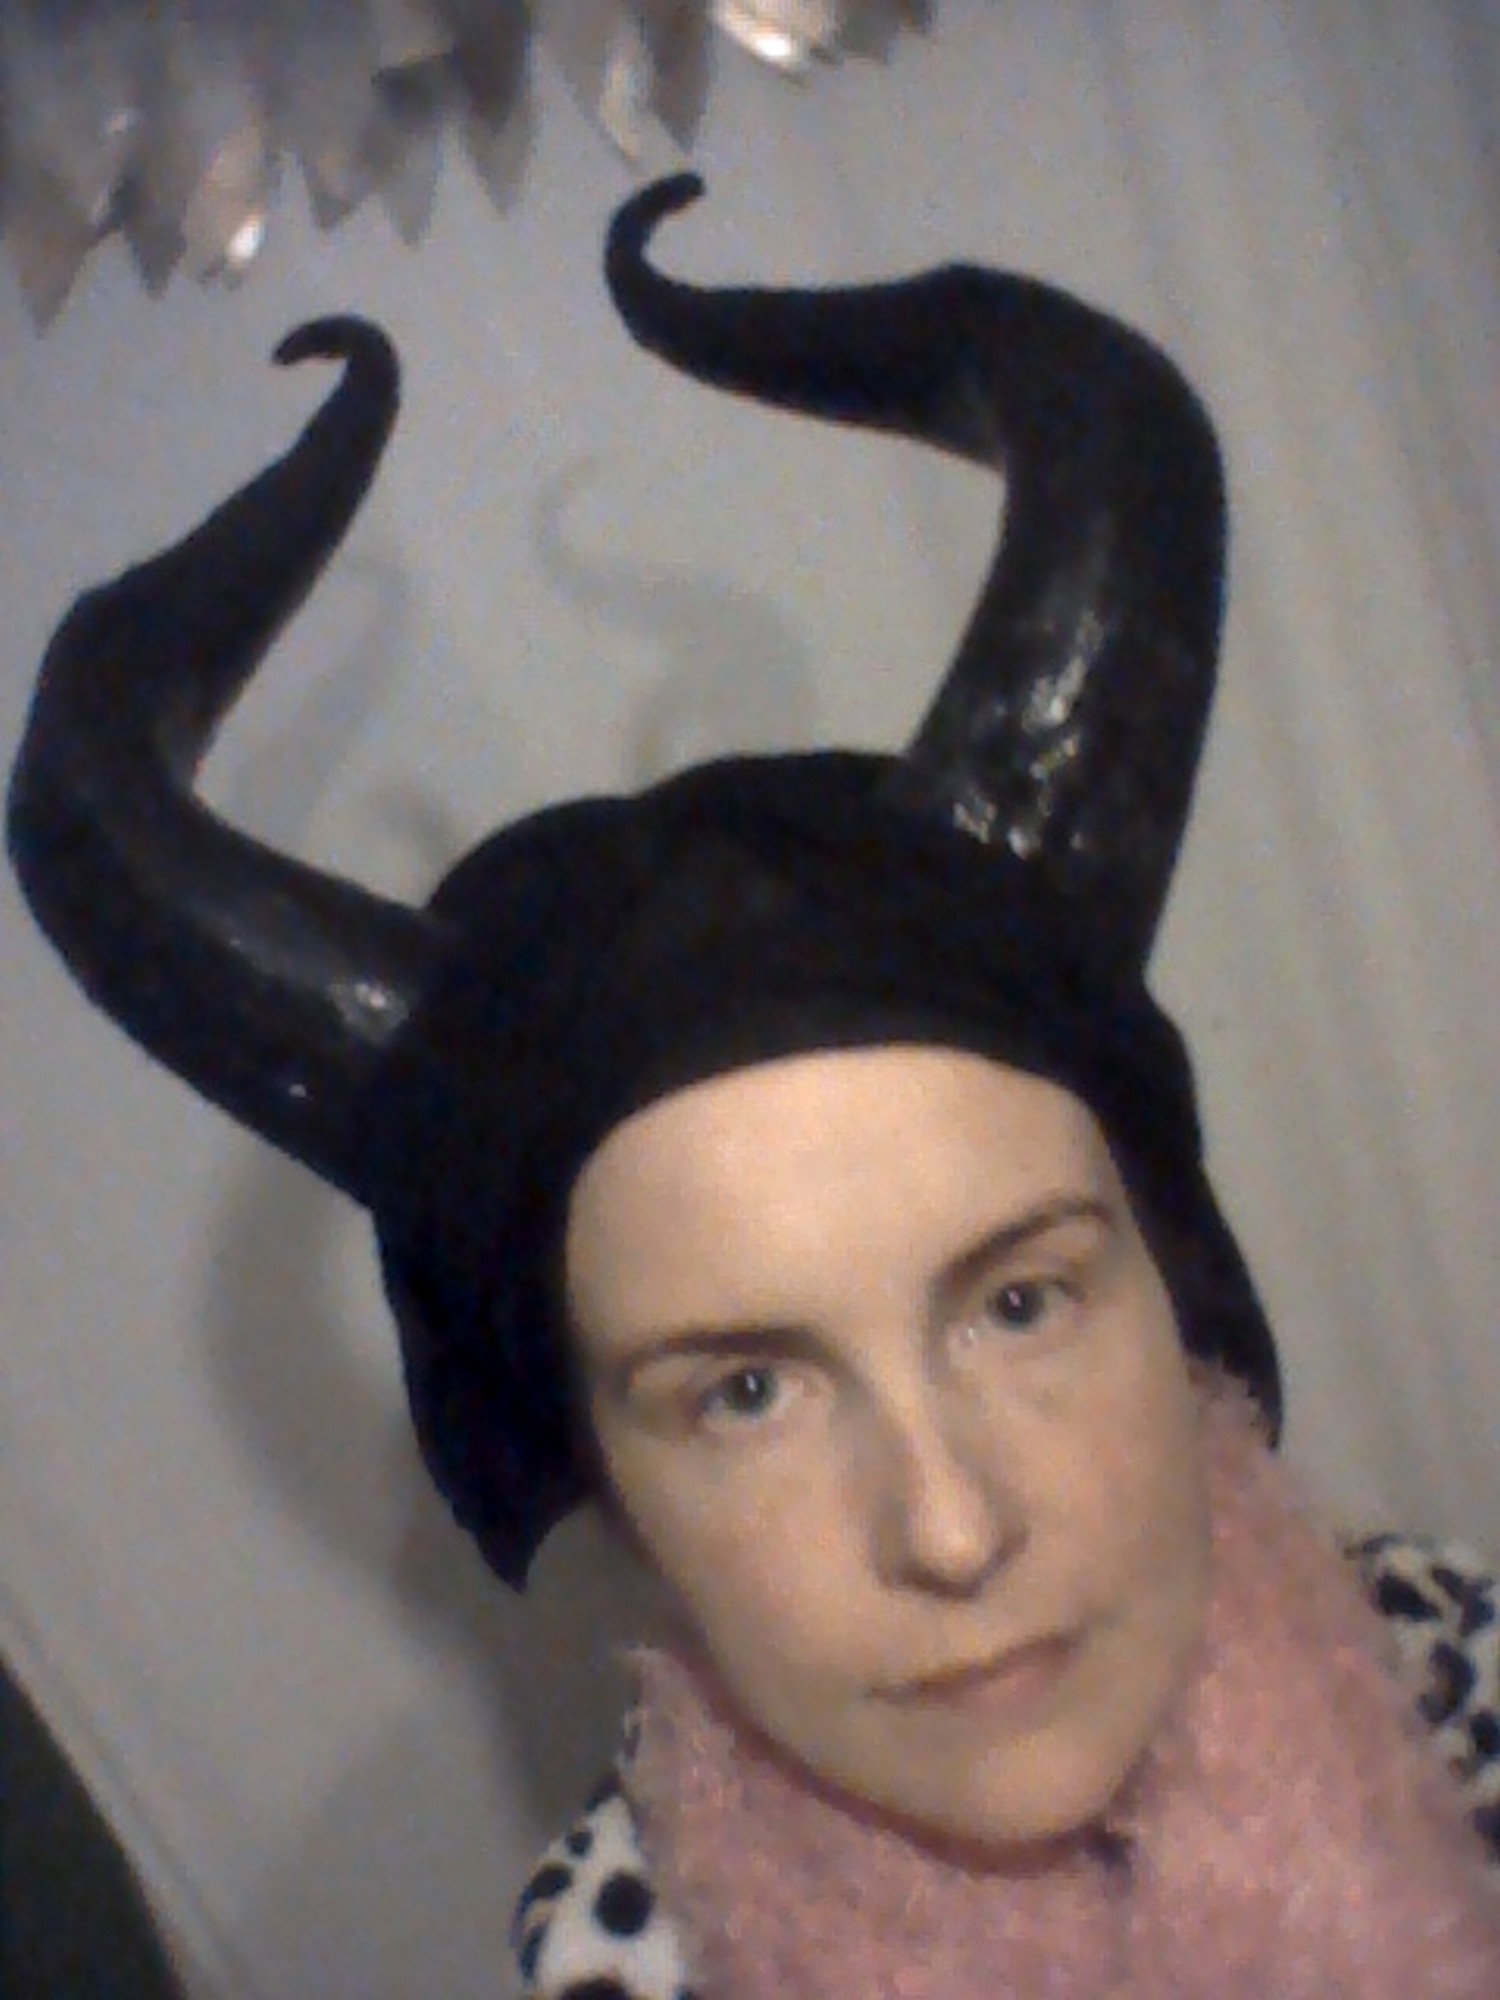
Sorry for the blur, but low lights and I can’t be bummed trying to set up my good camera.
I am also coming down from an andrenal high. Mr Boo Boo went missing for a few hours. He was actually on the garage roof, just on the side I couldn’t see. So I went on a sanding spree once he was found. So now I have a headache from the horns and the worry. I think the neighbours will be happy though. But I try to have a Don’t Piss Off the Neighbours’ rule that coincidentally should hit the stop before breaking rule.
Filed under projects: media recreations, Uncategorized
I need to use dyes with far less pigment and this has a bubble and is not well trimmed. But it is self adhesive so….. Back up!
Filed under projects: media recreations, Uncategorized
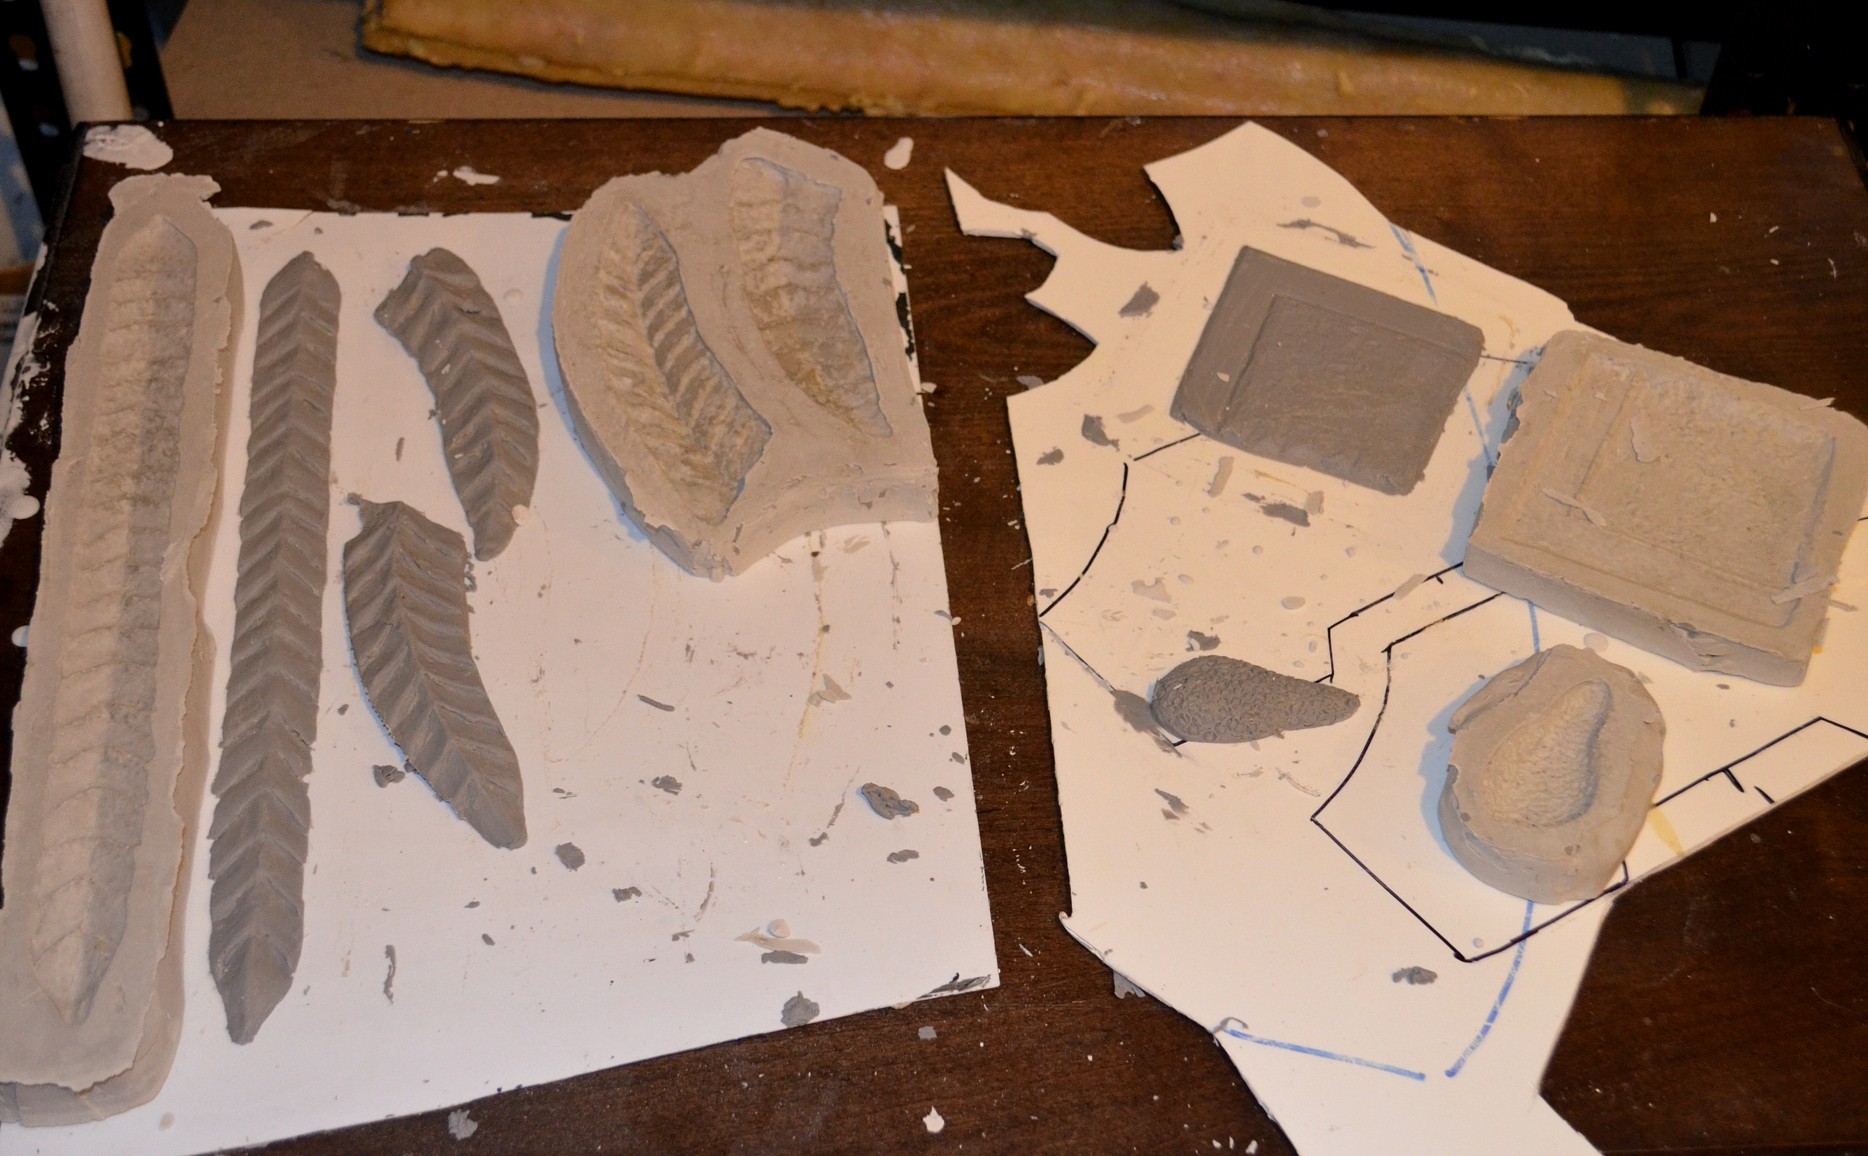
What I may do is sculpt them flat, I’ll be able to then make two part ultracal molds that can be stacked away and also be easier to cast. But I can also make the pieces absolutely identical and also get some texture on more easily.
So it seems a waste but it’s not, I want to make really thin casts and make them more even too. So these little pieces will be a guide 🙂
Heya hun. Found an awesome magazine that has close up images of Maleficent’s makeup including the prosthetics in their moulds. You get get a digital version of the magazine by going to makeupmag.com/digital issue AUg/Sept 14. it has two covers one is Mal the other a vampire from the show penny dreadful. Says what BJB Enterprises eurathane and polyeurathane mix they used for the horns too. if you cant get it ill try and scan in the pics from the mag for you.
I’ll see if I can get an app for my netbook 🙂 It is elligible for android apps and I can get back copies that way 🙂 But A lick of thr lolly may make me just go and get the magazine as a subscription as I’m interested in everything anyway 🙂 http://www.arrayedindreams.com/2014/07/19/did-i-post-this-artisan-article/ Did you see this link? The article is mainly text and interrupted by a few pages of ads 🙂
Yeah the magazine is fascinating. and that link is interesting too!
Filed under projects: media recreations, Uncategorized
So far I have just tested unaltered glue, unaltered blade, and half altered spine. So right now it’s a feather if you squint at it and look sideways.
Once I start on bulk blade processing and finding some sort of press (okay all my art books wrapped in plastic to protect them) I’ll be able to get assembly going.
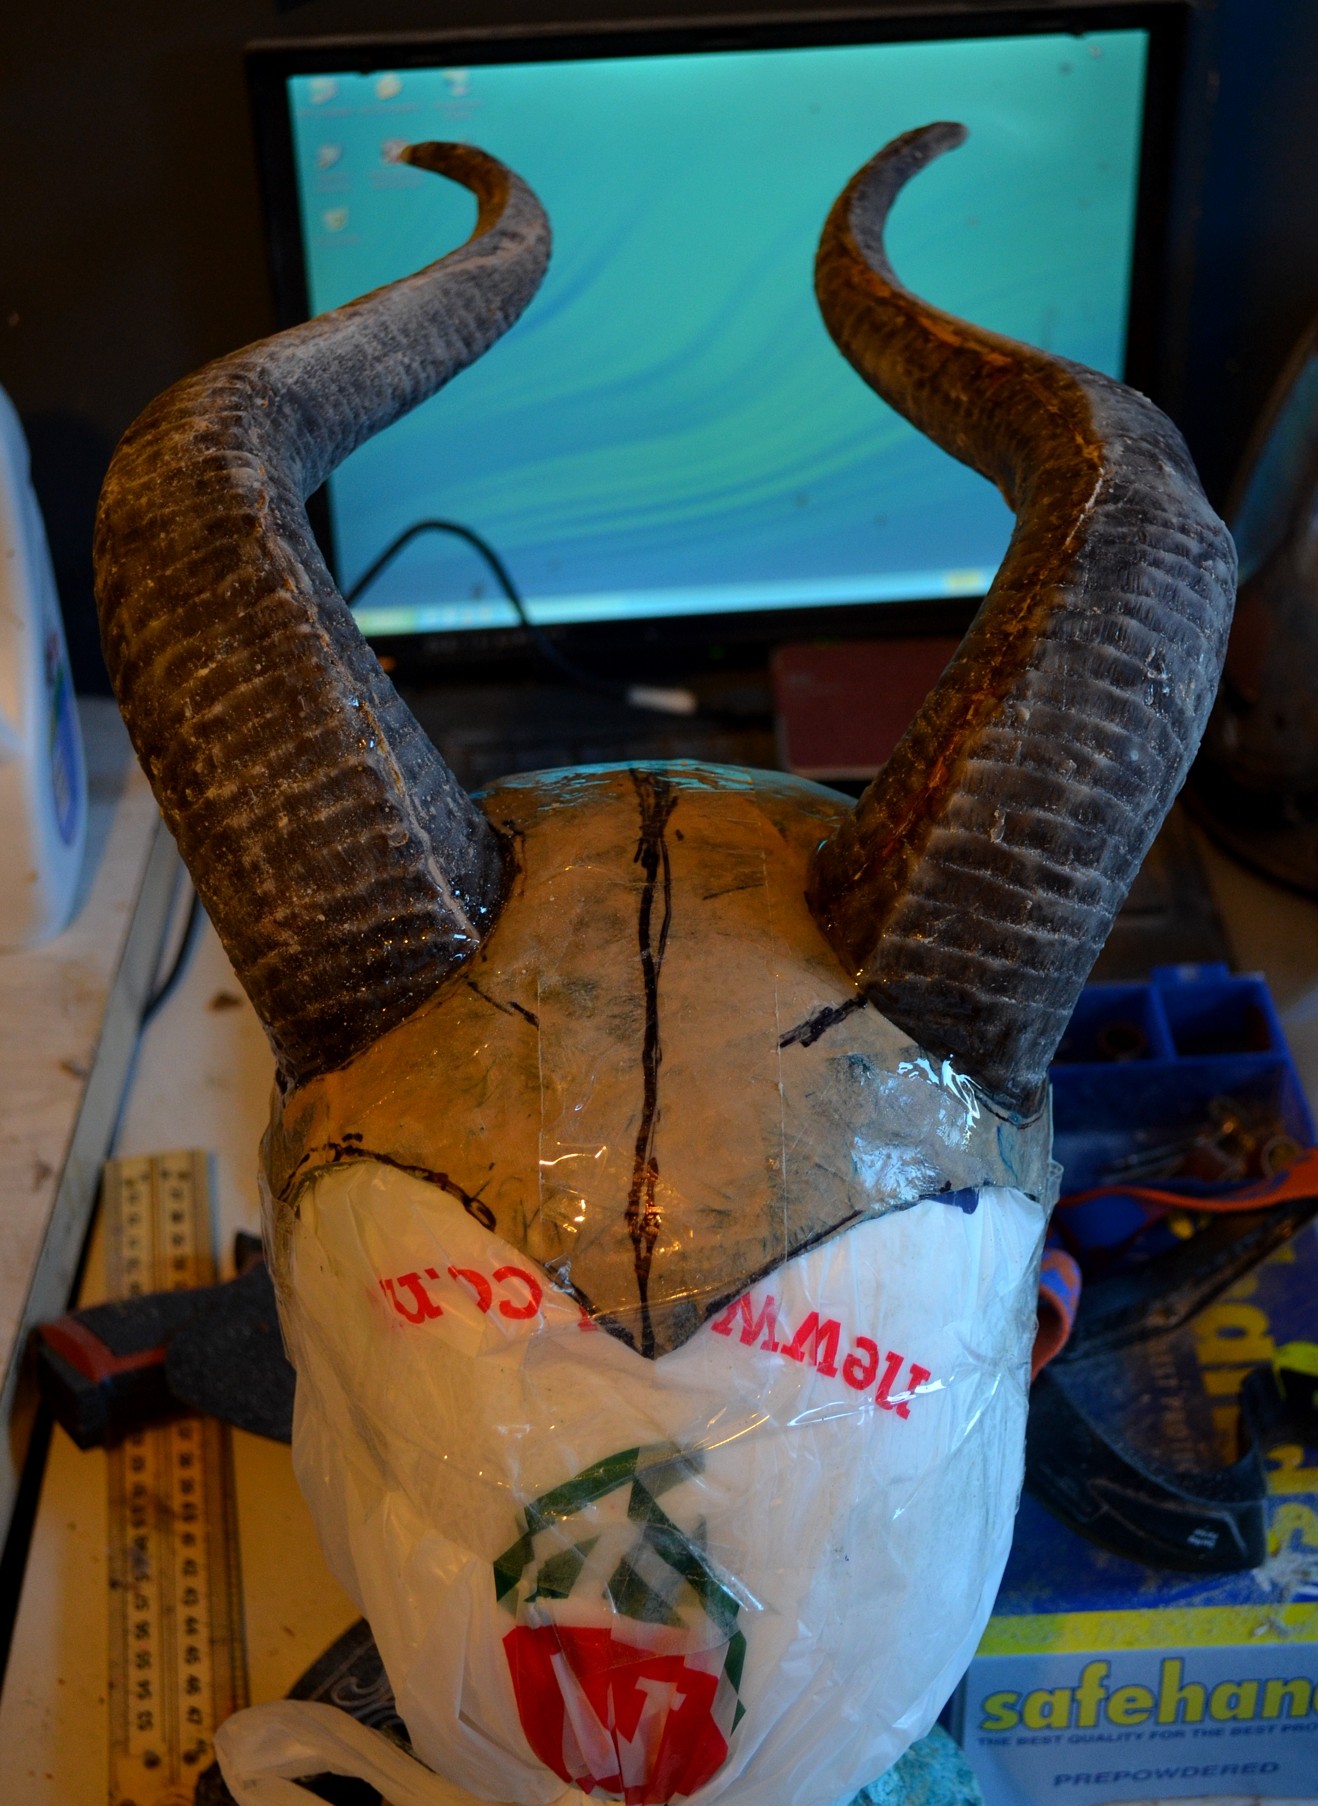
My horns are very close fitting- which is great but it shows how uneven a skull is- I have to line up the hairline then swing the sides down from the top of my head. If I try to line up sides first it won’t work. They need to be sanded back ready for the final thin layer of soft texture too. I may or may not be able to cut a tool to shape…. I’d like to but the putty needs to be sticky to hold in place, so then I’ll need to use some sort of release agent on the tool and that will then build up in the resin.
I also have a new set of lenses. Currently sterilising them, then will soak them for a day in my own solution (and will buy some of the newly recommended stuff as my eyes are drier than they used to be. But they can be a good back up for pretty much all the lenses I want for costumes, so long as my eyes are happy.
No photos as I’m about to have a catch up nap- and I need to evade the fumes ?
What else.. oh I forgot to make resin samples. Will have to catch up on that later.
Filed under projects: media recreations, Uncategorized
These look much bigger in person! So I’ll need to put a little bit more on tomorrow.
Filed under projects: media recreations, Uncategorized
I managed to snaggle some Madonna blue Dylon. They have the tiny pots again! Well not as pots but as sachets. So like the old silver top with colour sun packs, not the cold water dyes. Technically this is the right warm tinted blue for the Elsa cape. I had a rummage in my pile of stashes and I will have to switch out the fabric, I got some dye on a spot but it was a layered spot…. so…. meh.
I also got more sequins online and worked out how to layer my current fabrics to make the skirt and lining, yay! I’ll have to make all the seams as per the movie to make sure the fabrics stay nicely in line if I do, and also try and get a layer of super sheer tulle over the top to avoid catching. But there will be the right weight to the skirt. The reason my mind went to Mackie immediately is not just the sparkle but the weight you get in that classic beaded and sequined fabric. It swings, it flows, and slinks. And from the top to the bottom, not just at the hem. It may be worth watching a few Cher videos of her Vegas shows…
And I got some RIT colour remover to knock out the salmon of my viscose satin (used also for my Mina drapery lining) so I can tint that up to line the skirt and bodice.
I almost bought some large circular sequins to cut up but decided I may just wind up buying some already cut. I do wish I could get bigger shapes or that the sequin film I have was more durable but ah well. There are places to get wholesale bulk amounts but I’d need to really make sure about shapes and colours.
Also I grabbed some idye for my silk. My marroon silk should definitely dye, it has grippy but not waxy finish so should absorb the dye well.
The horns will be cut back a little more. With fitting so well over the top I can cut in at the side. But my head cast then does need to be cut back a good 6mm in on one side! So yes, I’ll have to do that later as well 🙂
Looks like my local hardware store sells aerosil! But it’s labeled as glue powder so I need to check it out online, because hooray if it is just aerosil!
Filed under Uncategorized
Firstly going back to the preshow last minute stuff!
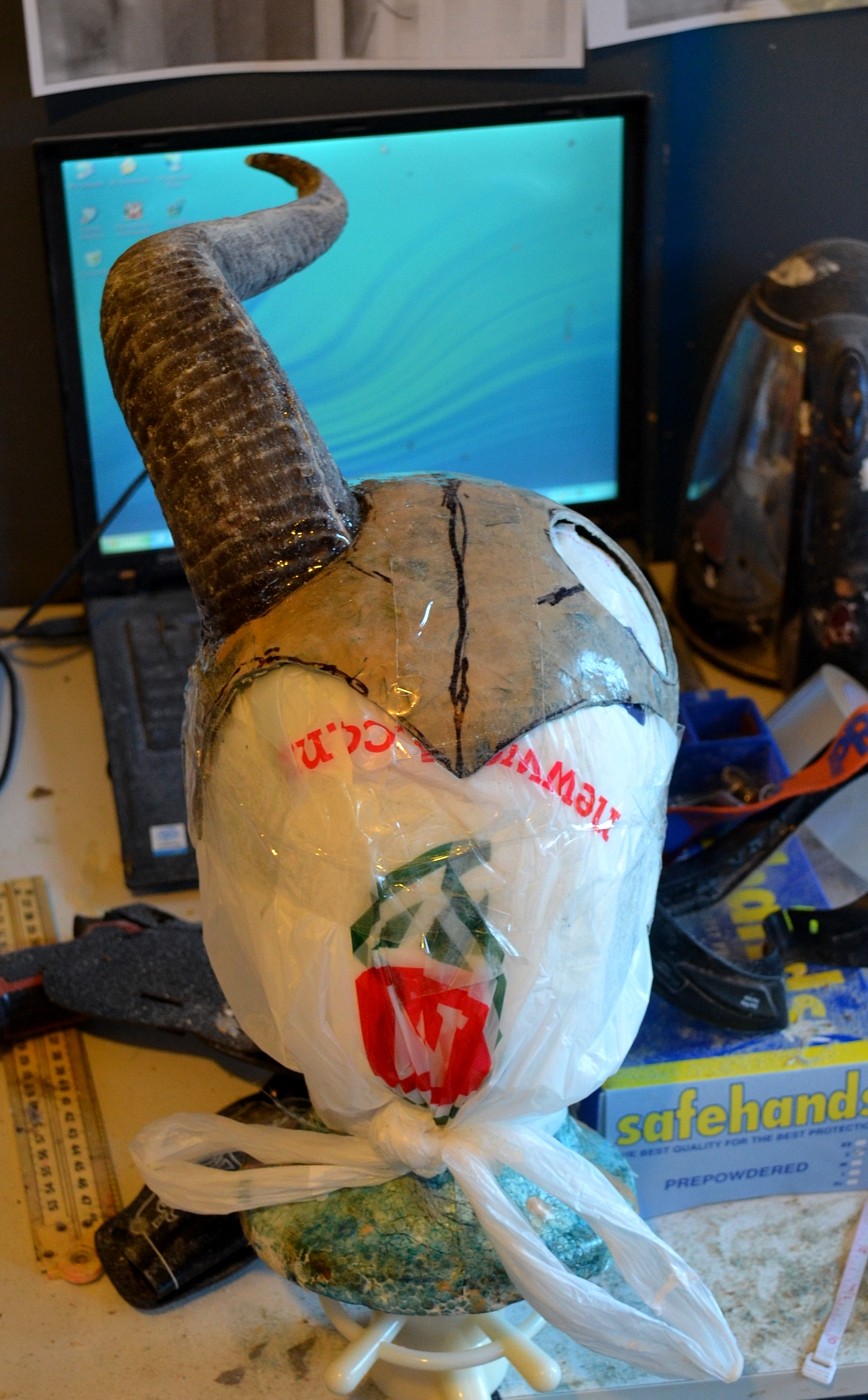
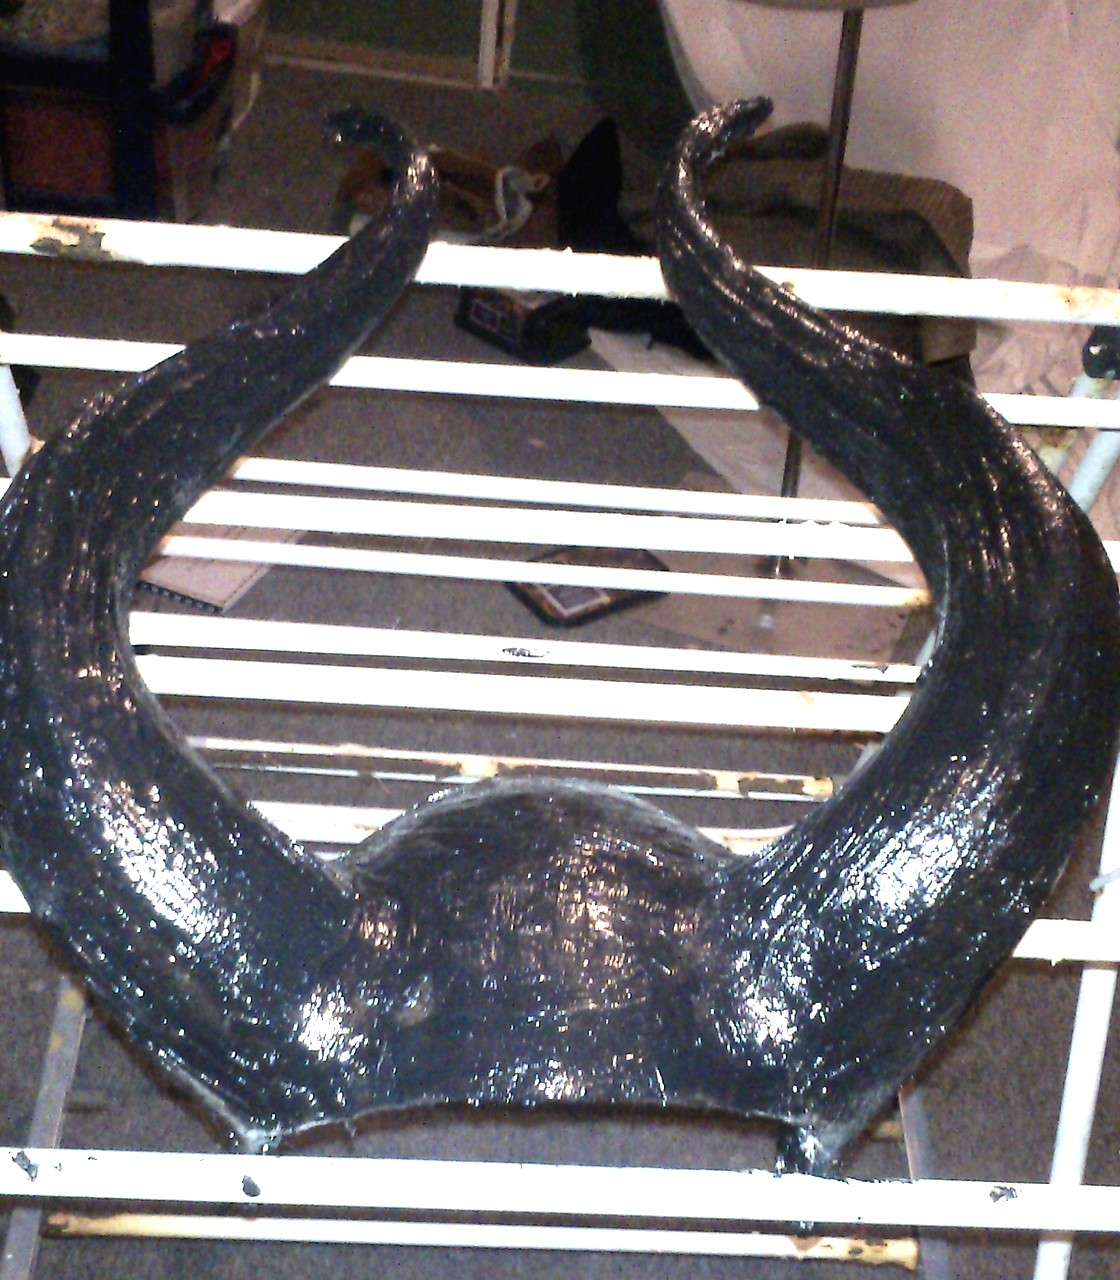
Horns: cut to shape then glued in place. You can see the dip on the horn on the right hand side. I do still like this effect but having seen the movie now I don’t need to go mad trying to do this again! they are much more opaque and with a less defined series of growth rings, so yay 🙂
Yes, I like my shadow in these things!
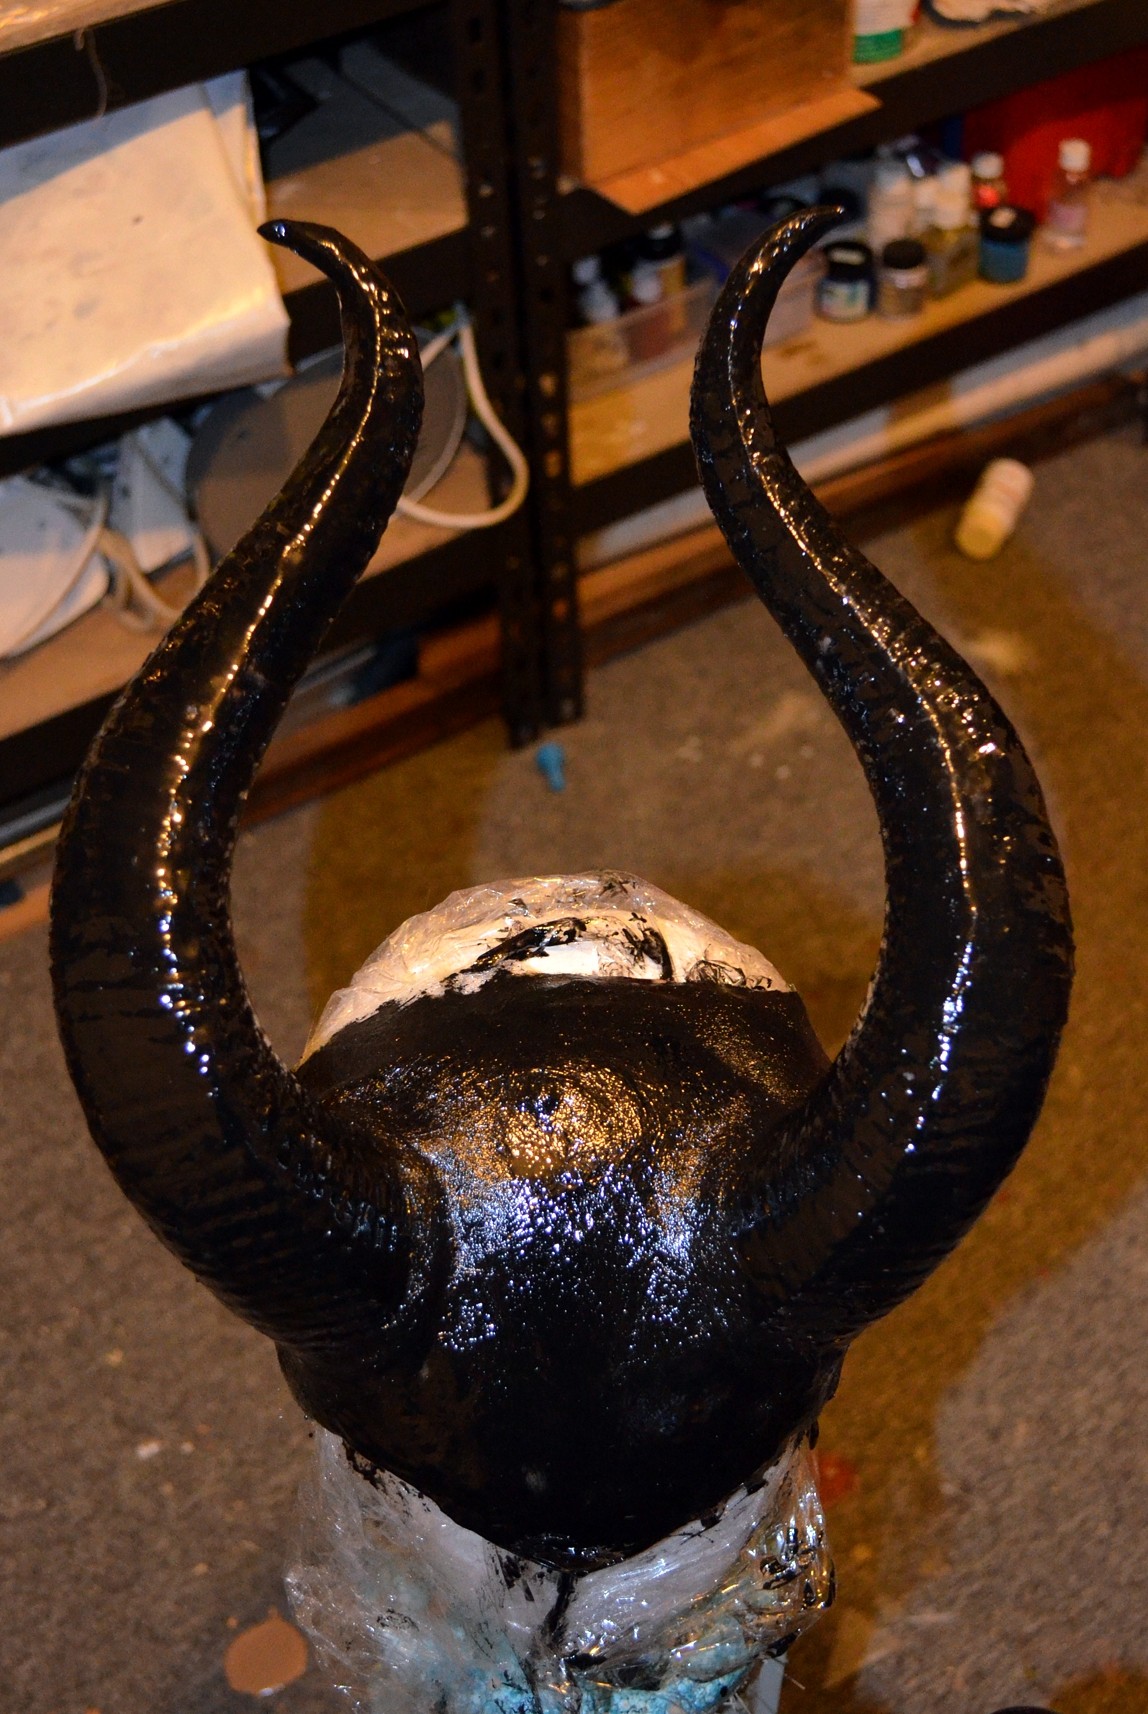
With the layer of black resin straight over! Also more fibreglass on the crown. This made it more rigid and actually in hind sight it wasn’t needed.
Sculptures and casts for the soft parts on the costume. I can’t believe I did that all in one evening!
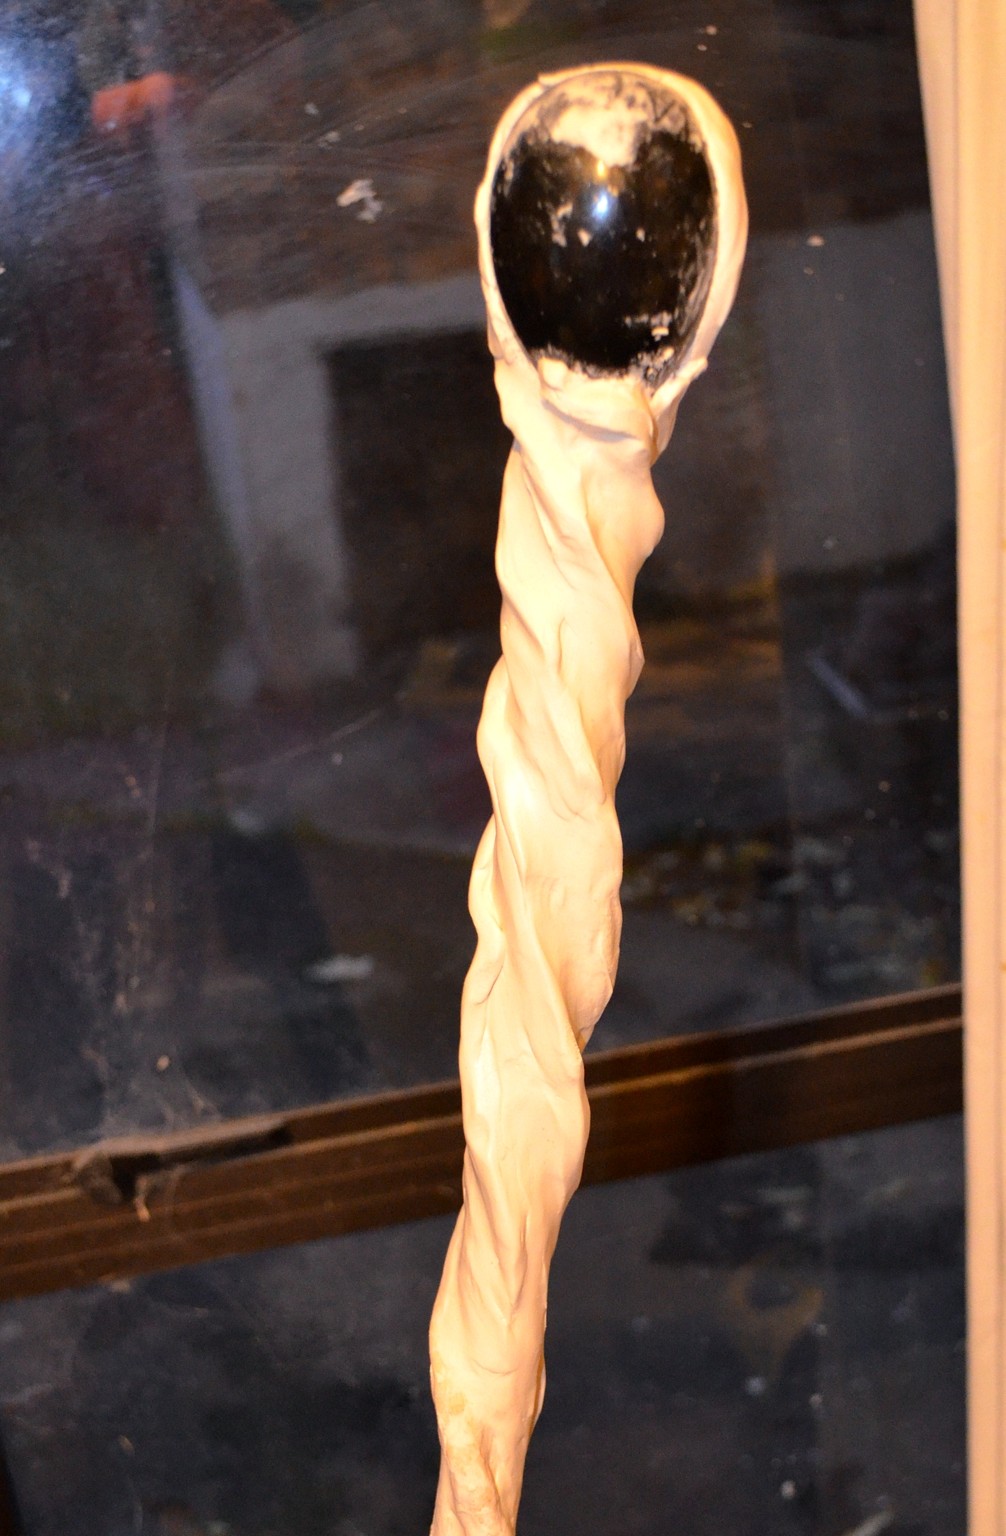
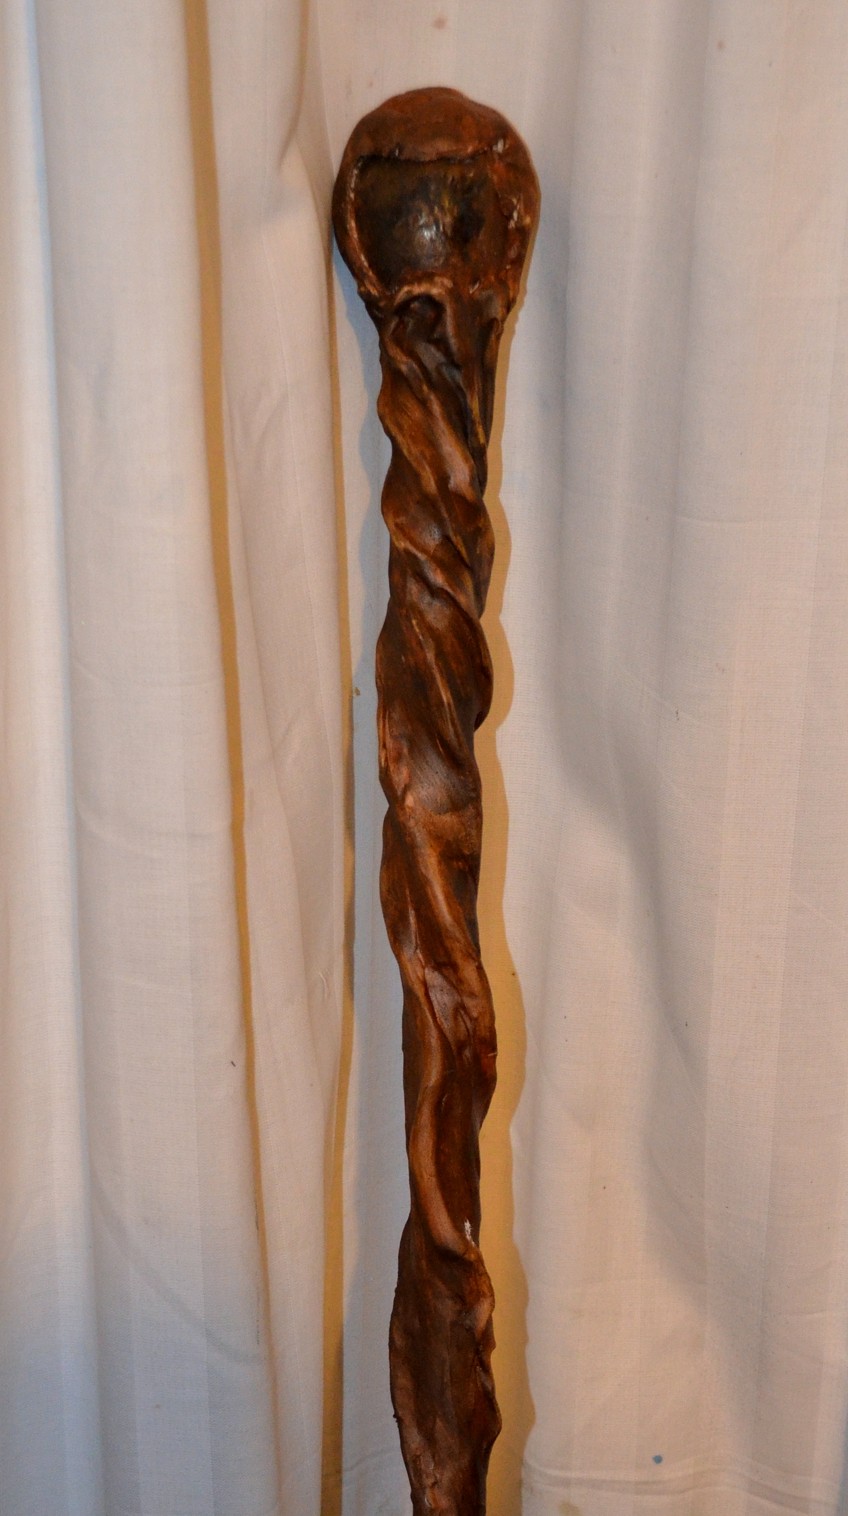
And the staff. This may be why my ring finger was so bad…. that’s hand modeled epoxy 🙂 With microballons it’s a beautiful putty but epoxy is not my friend!
oh hey and that paint was just acrylic ink and paint mixed with IA and brushed on with a chipping brush. It was not fully cured. But handy hint: ochre and yellow ink, with a smidge of black paint and then a small dab of gold paint mixed with IA makes for a slightly curdled paint mix that creates a great wood grain effect.
And now… my head cast:
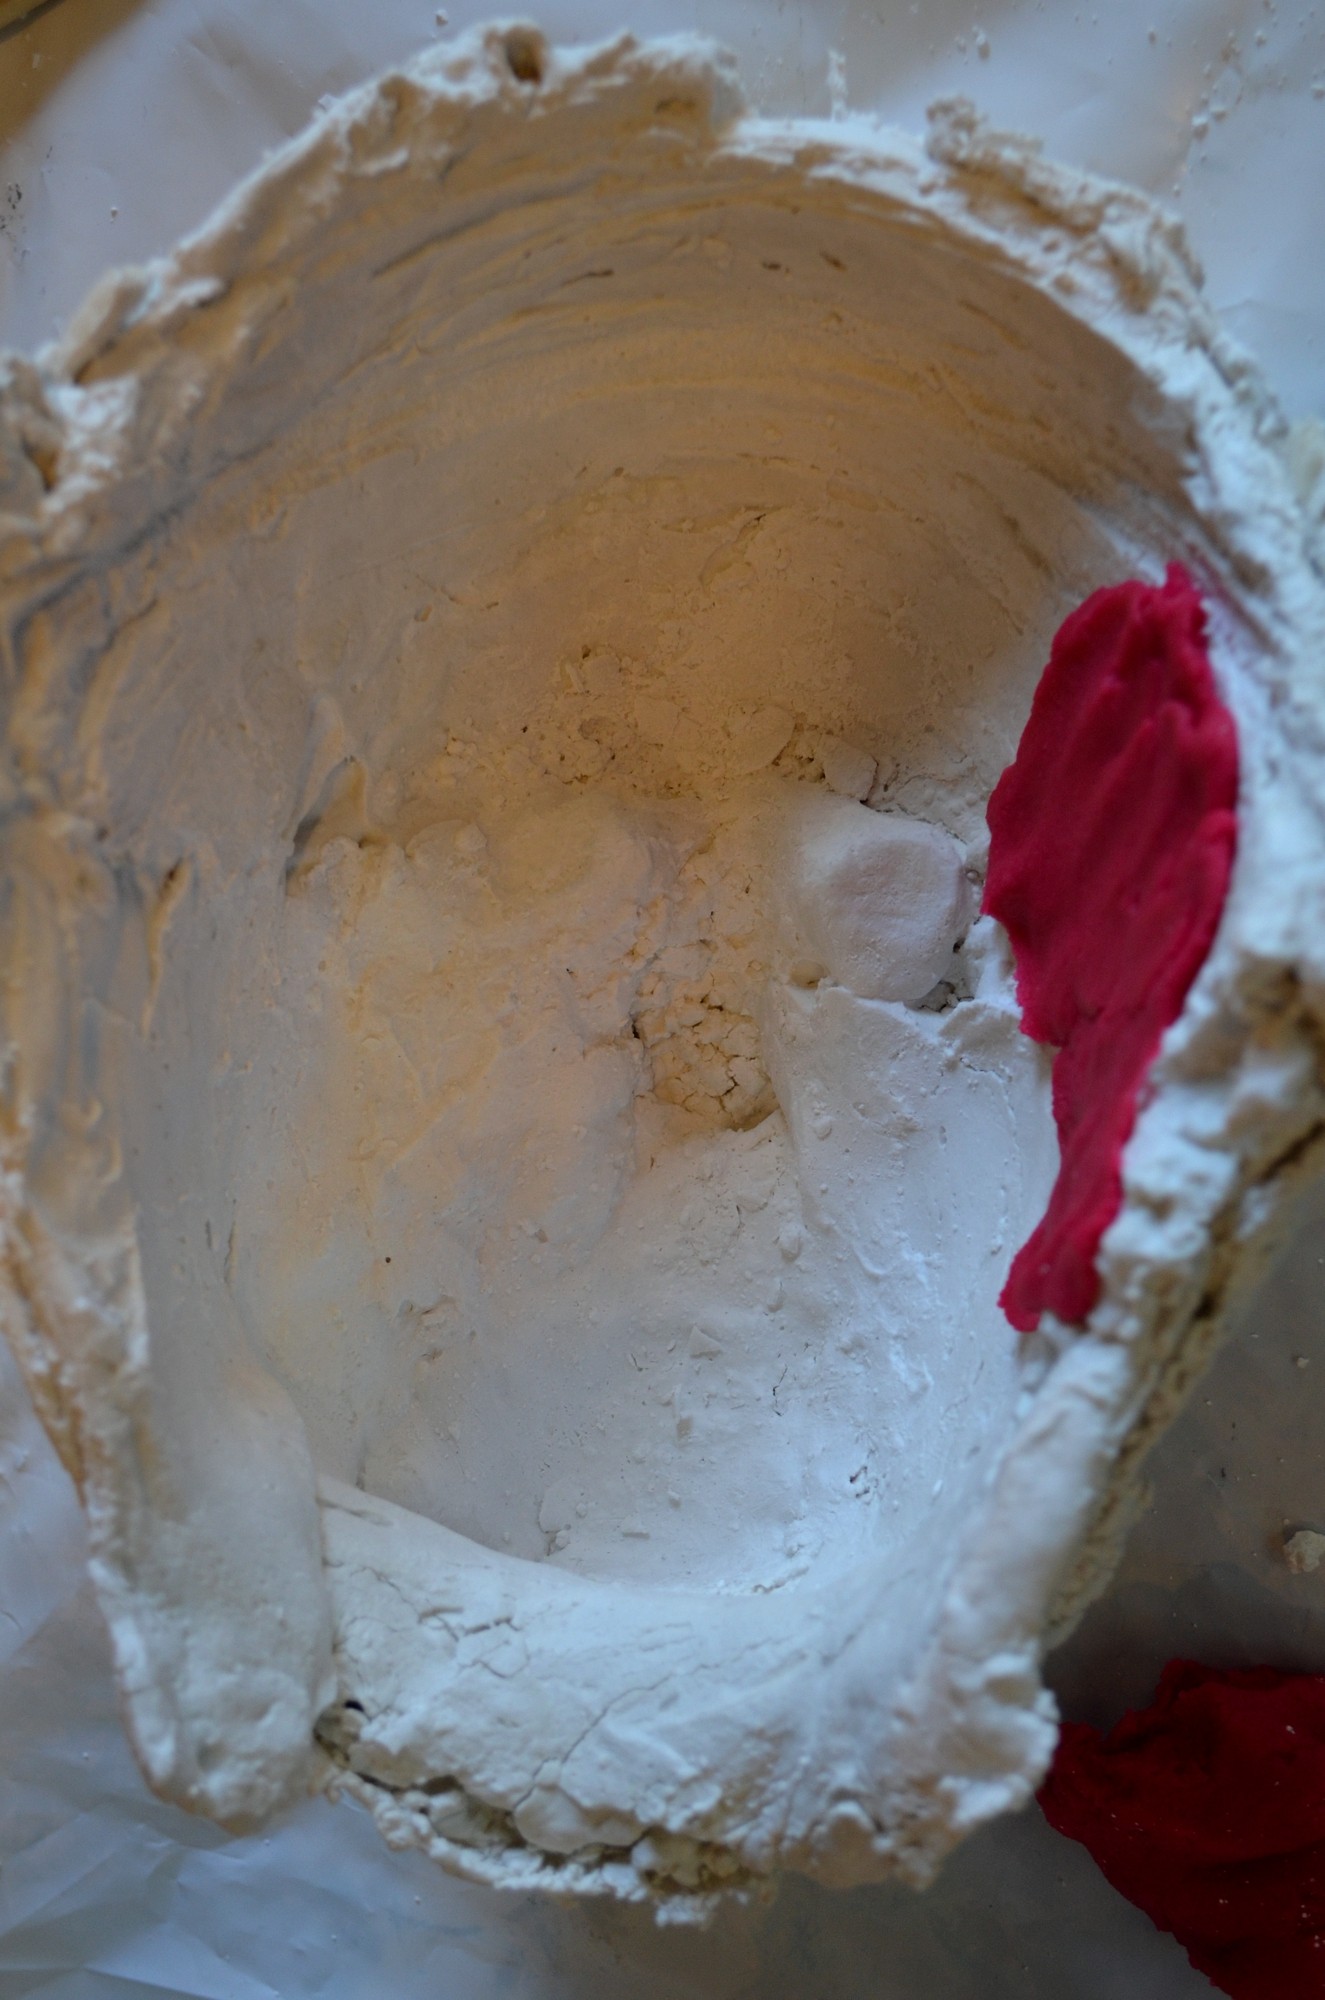
Plaster mother with some of my home made playdough smooshed in. I pressed a thin layer then pressed my face in then added more on my face then pressed in. It’s not perfect but it has my proportions and may be a bit more true than my previous cast.
Resined! OMG!!! Chopped strand filler is a game changer! I mix a slurry of resin with pigments and a little cabosil, then while it is starting to slump use glass tissue to hold it up. Paint a more liquid slurry on the back then throw (literally, like dusting a bread board) the chopped strand in side and press and move any excess further up. Then paint another layer and do the same. There is a lot of excess strand in the mold that can be brushed out when cured.
Also I found my pink suede boots and realised the heel is a bit chunky but super sturdy so will be a good base for the boots at the end of the film 🙂
So yes, tabbard to action suit to winged form is happening. Funnily enough it may take up less room than the current gown…
June 26, 2014 michaela de bruce
Meilin / 26 Jun 2014 7:18pm #For the epoxy + microballoons, did you mix that up so that it’s putty consistency or is there some store-bought mix that you use? Also, do you use gloves and get a reaction anyway or do you forgo the gloves to get better artistic control? I don’t have an allergy to epoxy (knock on wood) but I hear you can get sensitized to it…
In any case, the staff and horns look great!
Reply
/ 2 Jul 2014 6:51am #Thank you 🙂
I do wear gloves and the more dense kind of coveralls as well as a mask. I should get a full reperator but I need dust and chemical filters and I think you can only get one or the other. Pretty sure a solvent filter will also filter these larger particles though…
I mix the resin then stand added filler by equal parts. I think it wind up 4:1 powder to resin. And it is then hand (in glove!) mixed to a dry dough (think scone dough) before being applied. I thin dip my (gloved!) hand in water and use that to smooth and push the surface to shape.
I have longer fingers but small hands so I usually wind up with my hand breaking through gloves. SO I may just have to start wearing to sets at a time or hunting out the more durable sort. Once my hands break through I try to work as fast as I can.
My current ptoblem is in part beacuse I need the three main kinds of antihistamines and I only have Loratadine on hand. Also I got some resin on my forearms when I took my coveralls off. I thought I had cleaned it off but actually not. Releasing my Shae helmet cause some fibreglass rash and so I got the stuff under my skin and poof! ALong with the synacthen test I am really riding the crest of a fairly full on allergy! Luckily skin only. A bit of coughing but that could be dust.
Thank you for your questions 🙂 It’s always lovely to know people are reading and also thinking about it 🙂
Reply
Filed under Uncategorized

You ROCK! As always.
Thank you 🙂
This is hands down the best maleficent costume I’ve seen! Wonderful job. I want one 🙂
Thank you 🙂 Super fun to wear, a total pain to make but worthwhile 🙂
I love this!!!! Is the headpiece available for purchase?
Thank you 🙂 I still have my molds and am thinking of doing a number of casts while I have the product (finally got a large amount of aerosil/cabosil which makes it lay up easily in a curved mold and not run out everywhere!
Filed under projects: media recreations, Uncategorized
REPLAY
Wonderful! ive never noticed the wire in the collar until now! Makes total sense how it stands up now.
REPLAY
I had spotted it on another image, but not the shorter ones at the front, I think they have memory so as to keep shape and not warp. The small collar on the velvet gown is made totally differently with the edges sewn and a thin layer of foam but I cn’t find a really clear view to see if the raised tuck is wired or just in the top layer or what. No idea where to get a super smooth leather like that too. And I need it asap! Actually.. I have some lime green shorts I cut up to use.. I think that has the same buttery surface and it should dye and polish well.. oooh. Yay! And I think the pleated collar can be made from my dark green leather again tinted and polished 🙂
REPLAY
I love all these little notes! I’ve been researching for my own costume and finally settled on crushed taffeta for the outer, I’m just crossing my fingers that it will drape the way I want 🙂 I’m wondering if you estimate 11m each for the outer and lining or 11m of overall fabric? Sorry to be nosy, but your blog is pretty inspirational! <3
REPLAY
Thank you 🙂 I think crushed taffeta is a lovely choice 🙂 Oh, the original dress has some top stitching holding the crinkles over the bust 🙂 The lines of stitches follow the creases and are used to shape the outer layer to fit over the bust 🙂 http://www.therpf.com/showthread.php?t=225201 I put a list of references here to keep them all in one place, and I’ll add them to each of my costume pages here as I get to them 🙂 It’s about 11m for the lining and the shell fabric each sorry :/ It’s a bit of a monster in that regard! I mean I did chop off a fair bit but it was better than trying to add extra 🙂