I am very slow at this, yay for the fatigue and the pain hitting at different times, anyway:
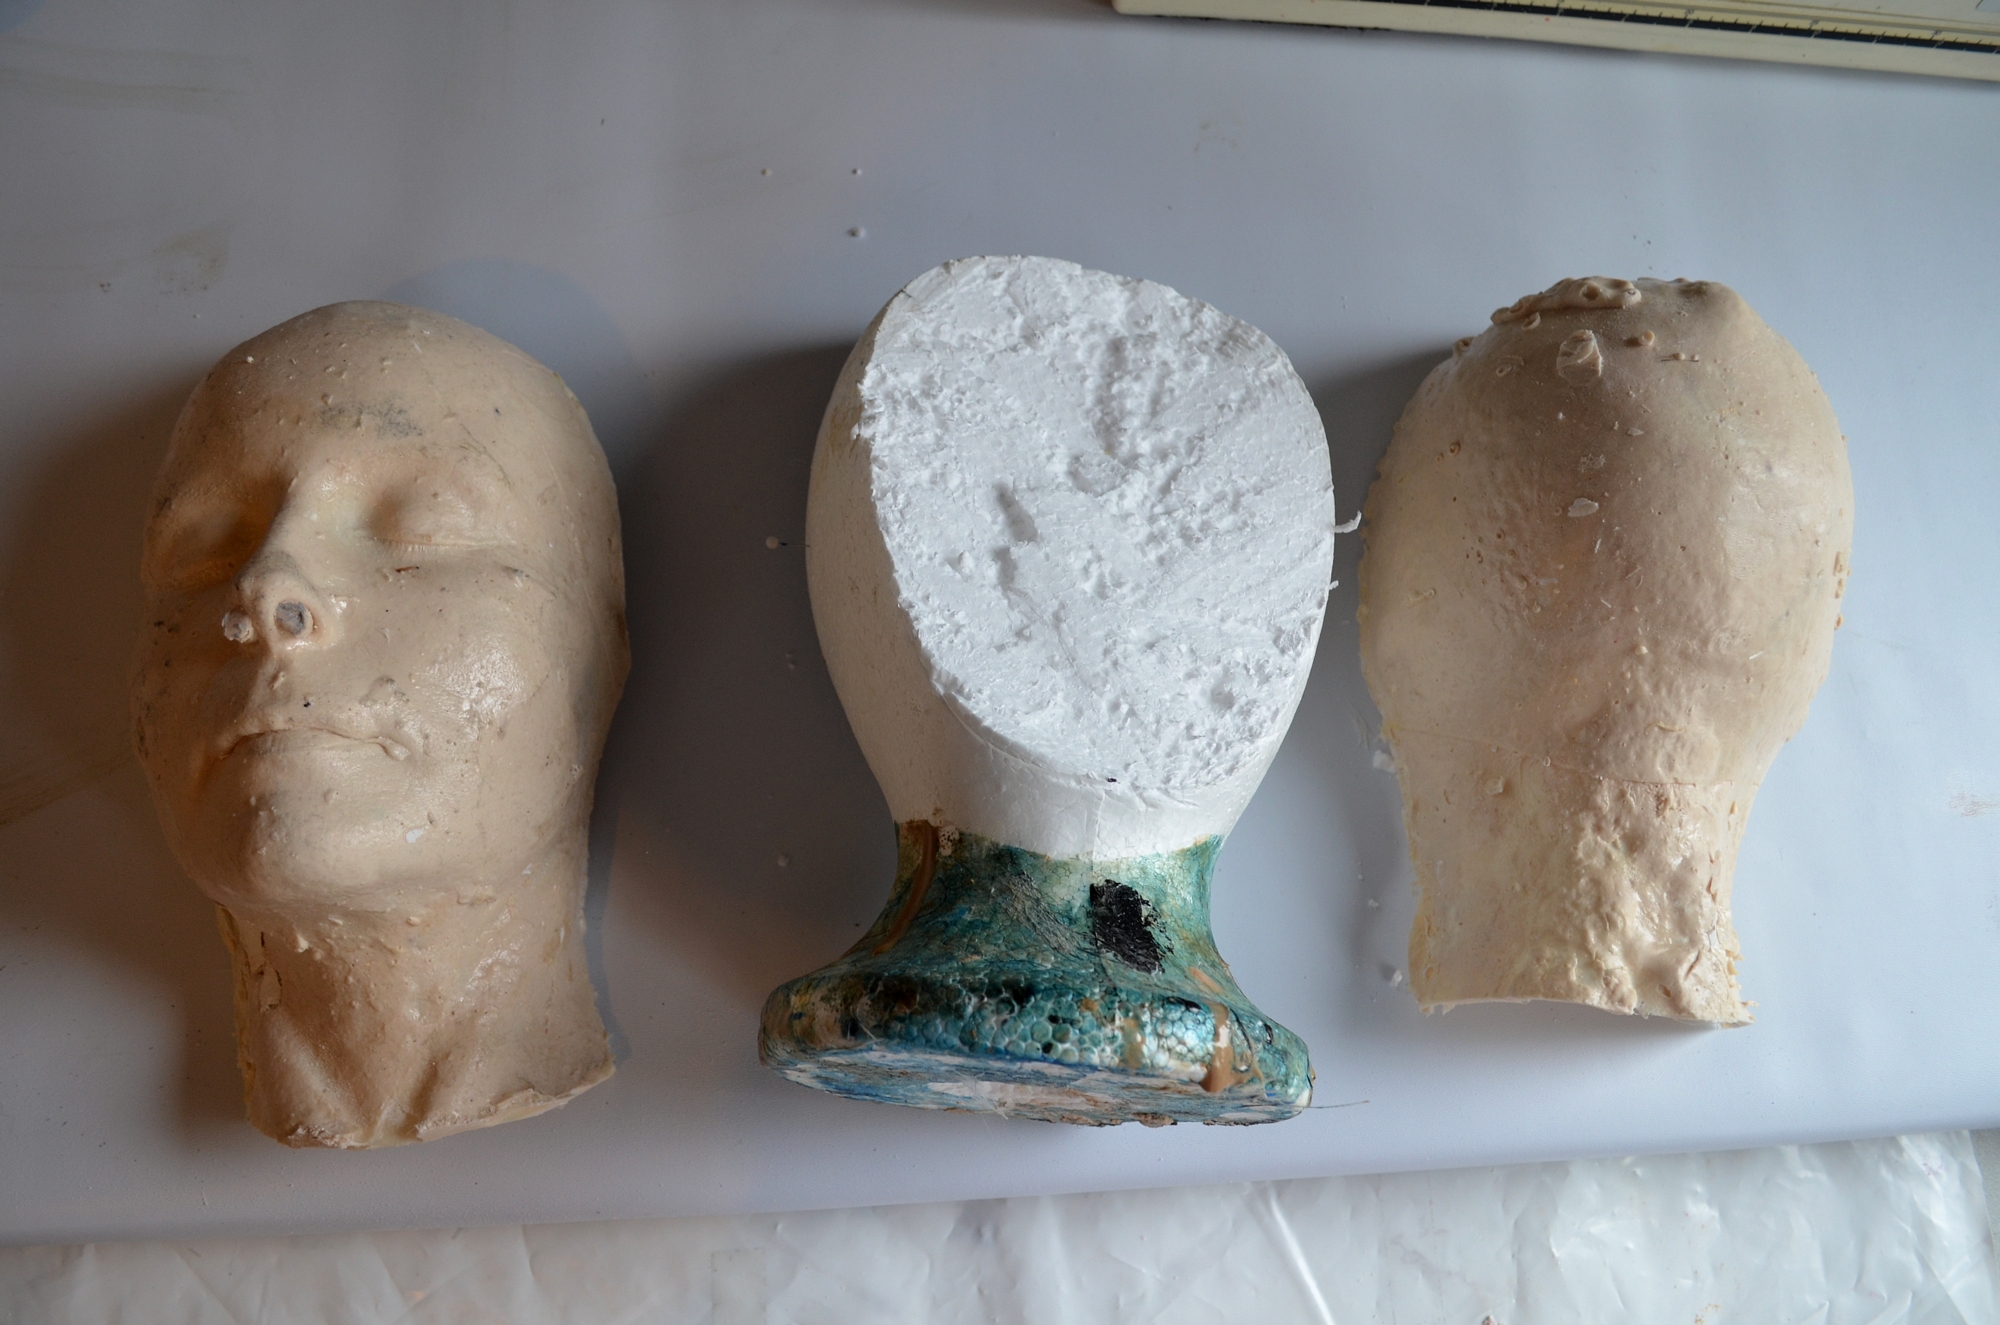
Casts trimmed and prepped for putting together:
Cunning use of a foam wig head to make the side match up:
Single layer of thick matting around the seam- yep it’s pretty open.
The neck does meet and that was where I made sure to get the two parts together.
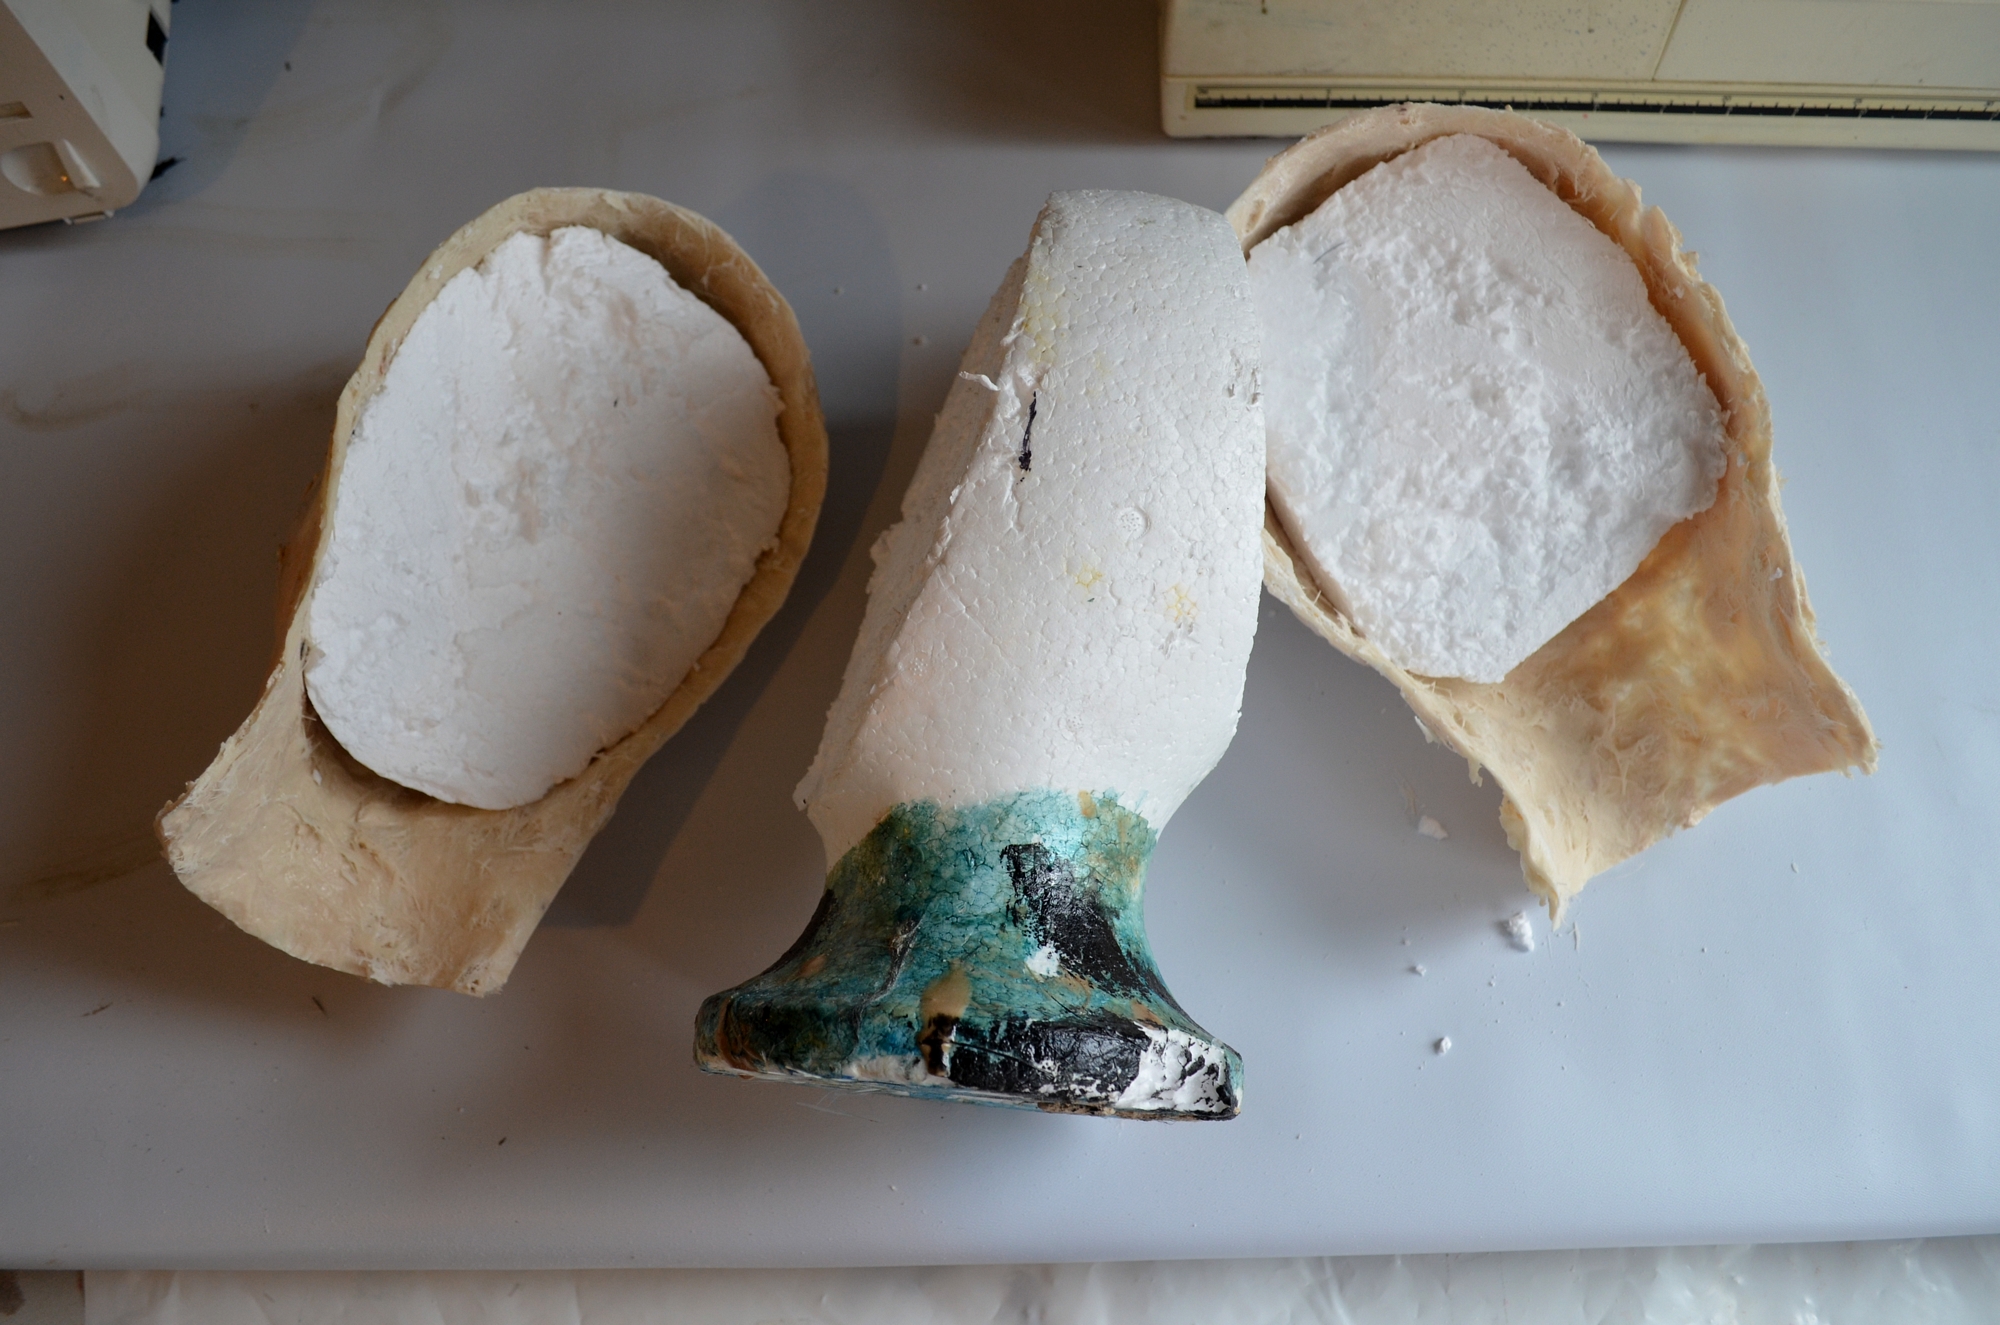
So this is basically me with my hair being a bit of a pain and filling out the sides. My separate ear pieces are still in plaster.
The ears should be able to be tackled tomorrow. The plaster is breaking down nicely.
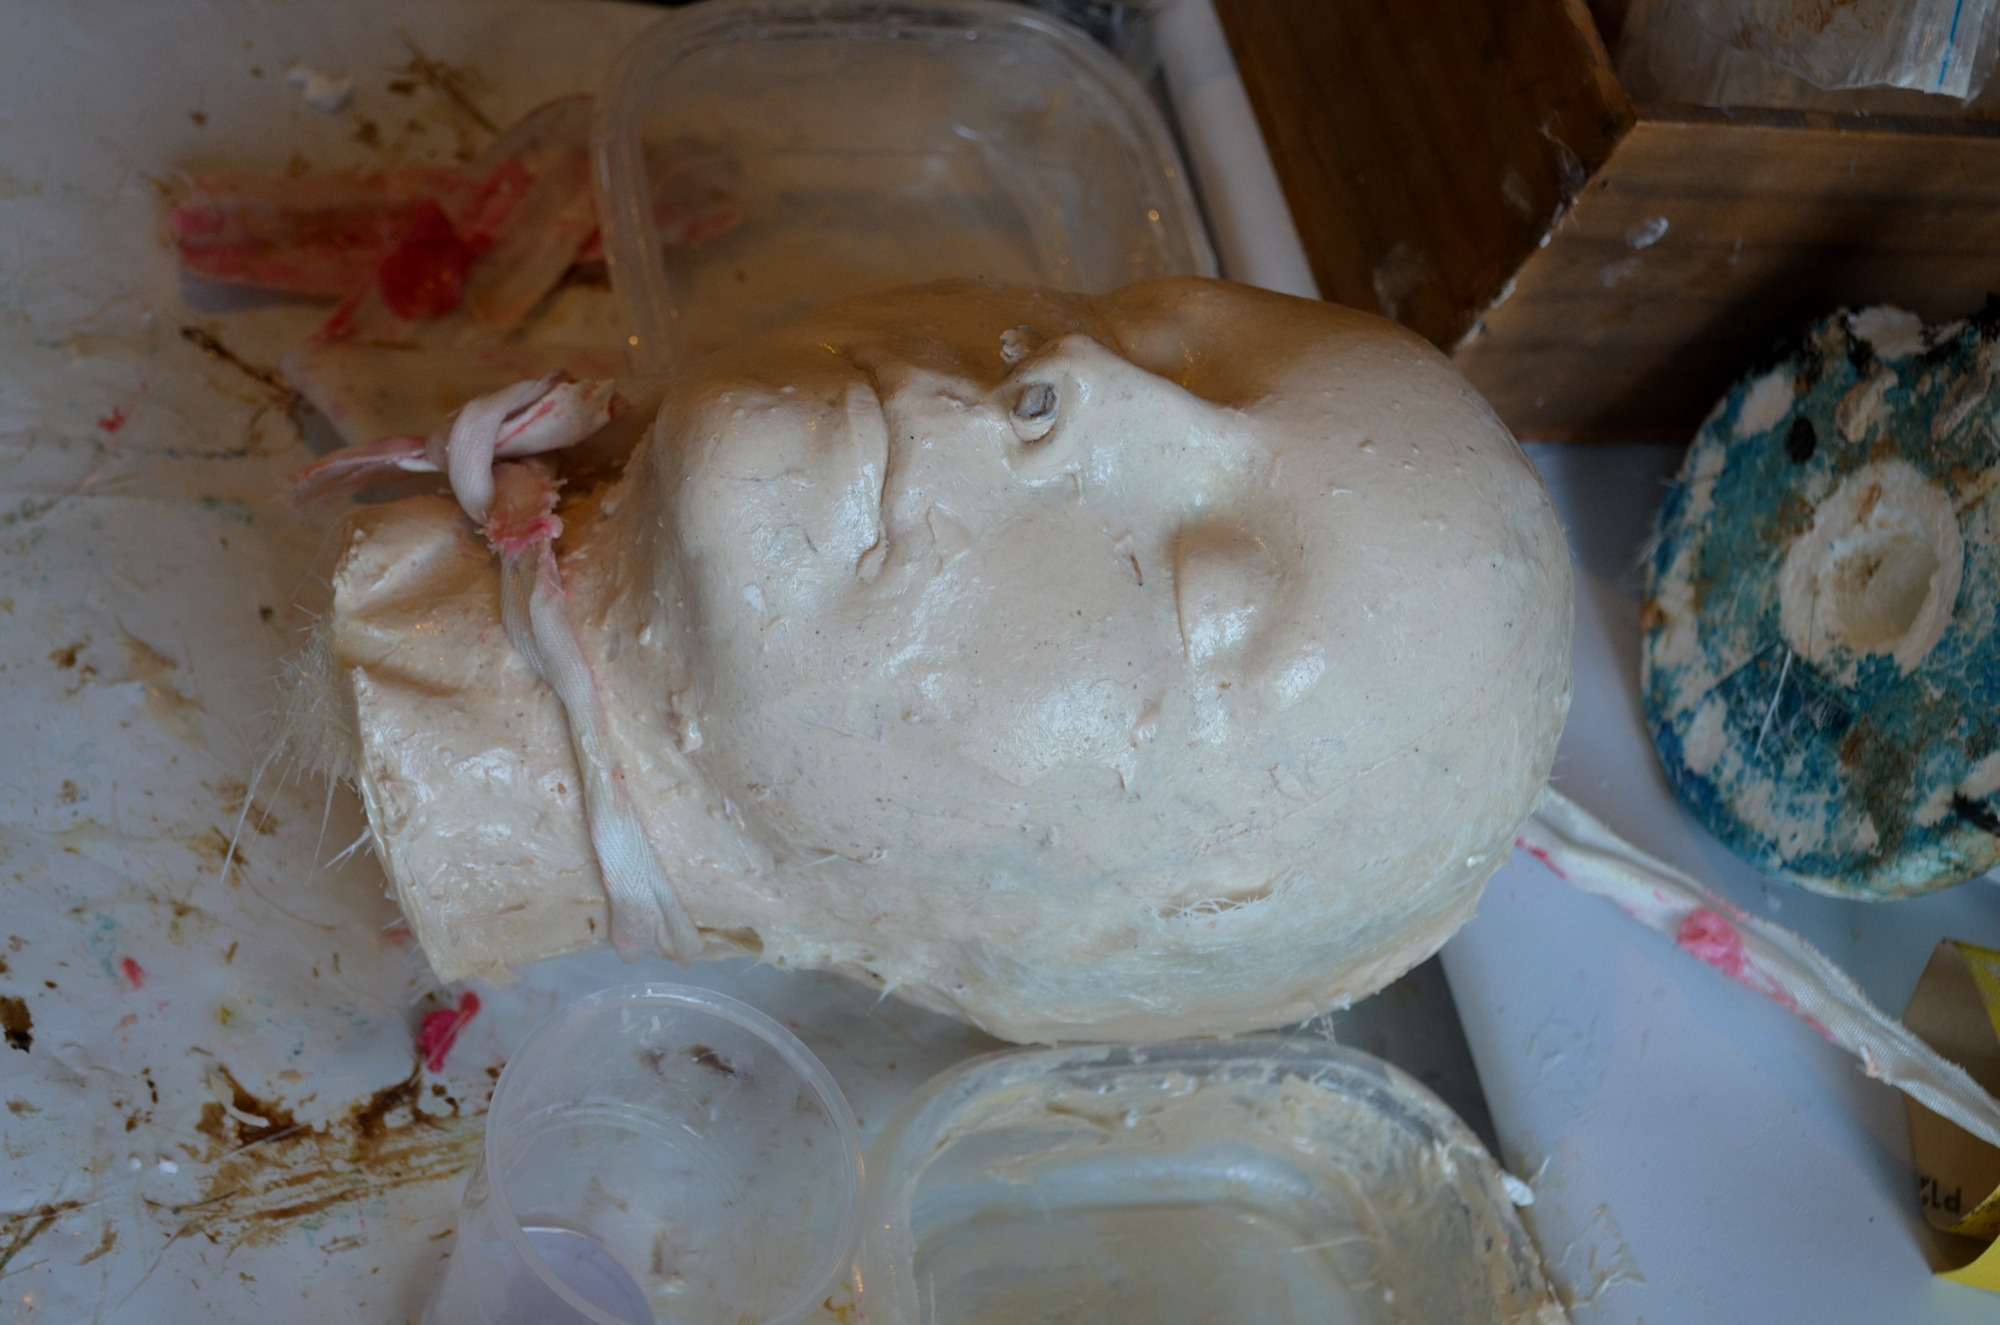
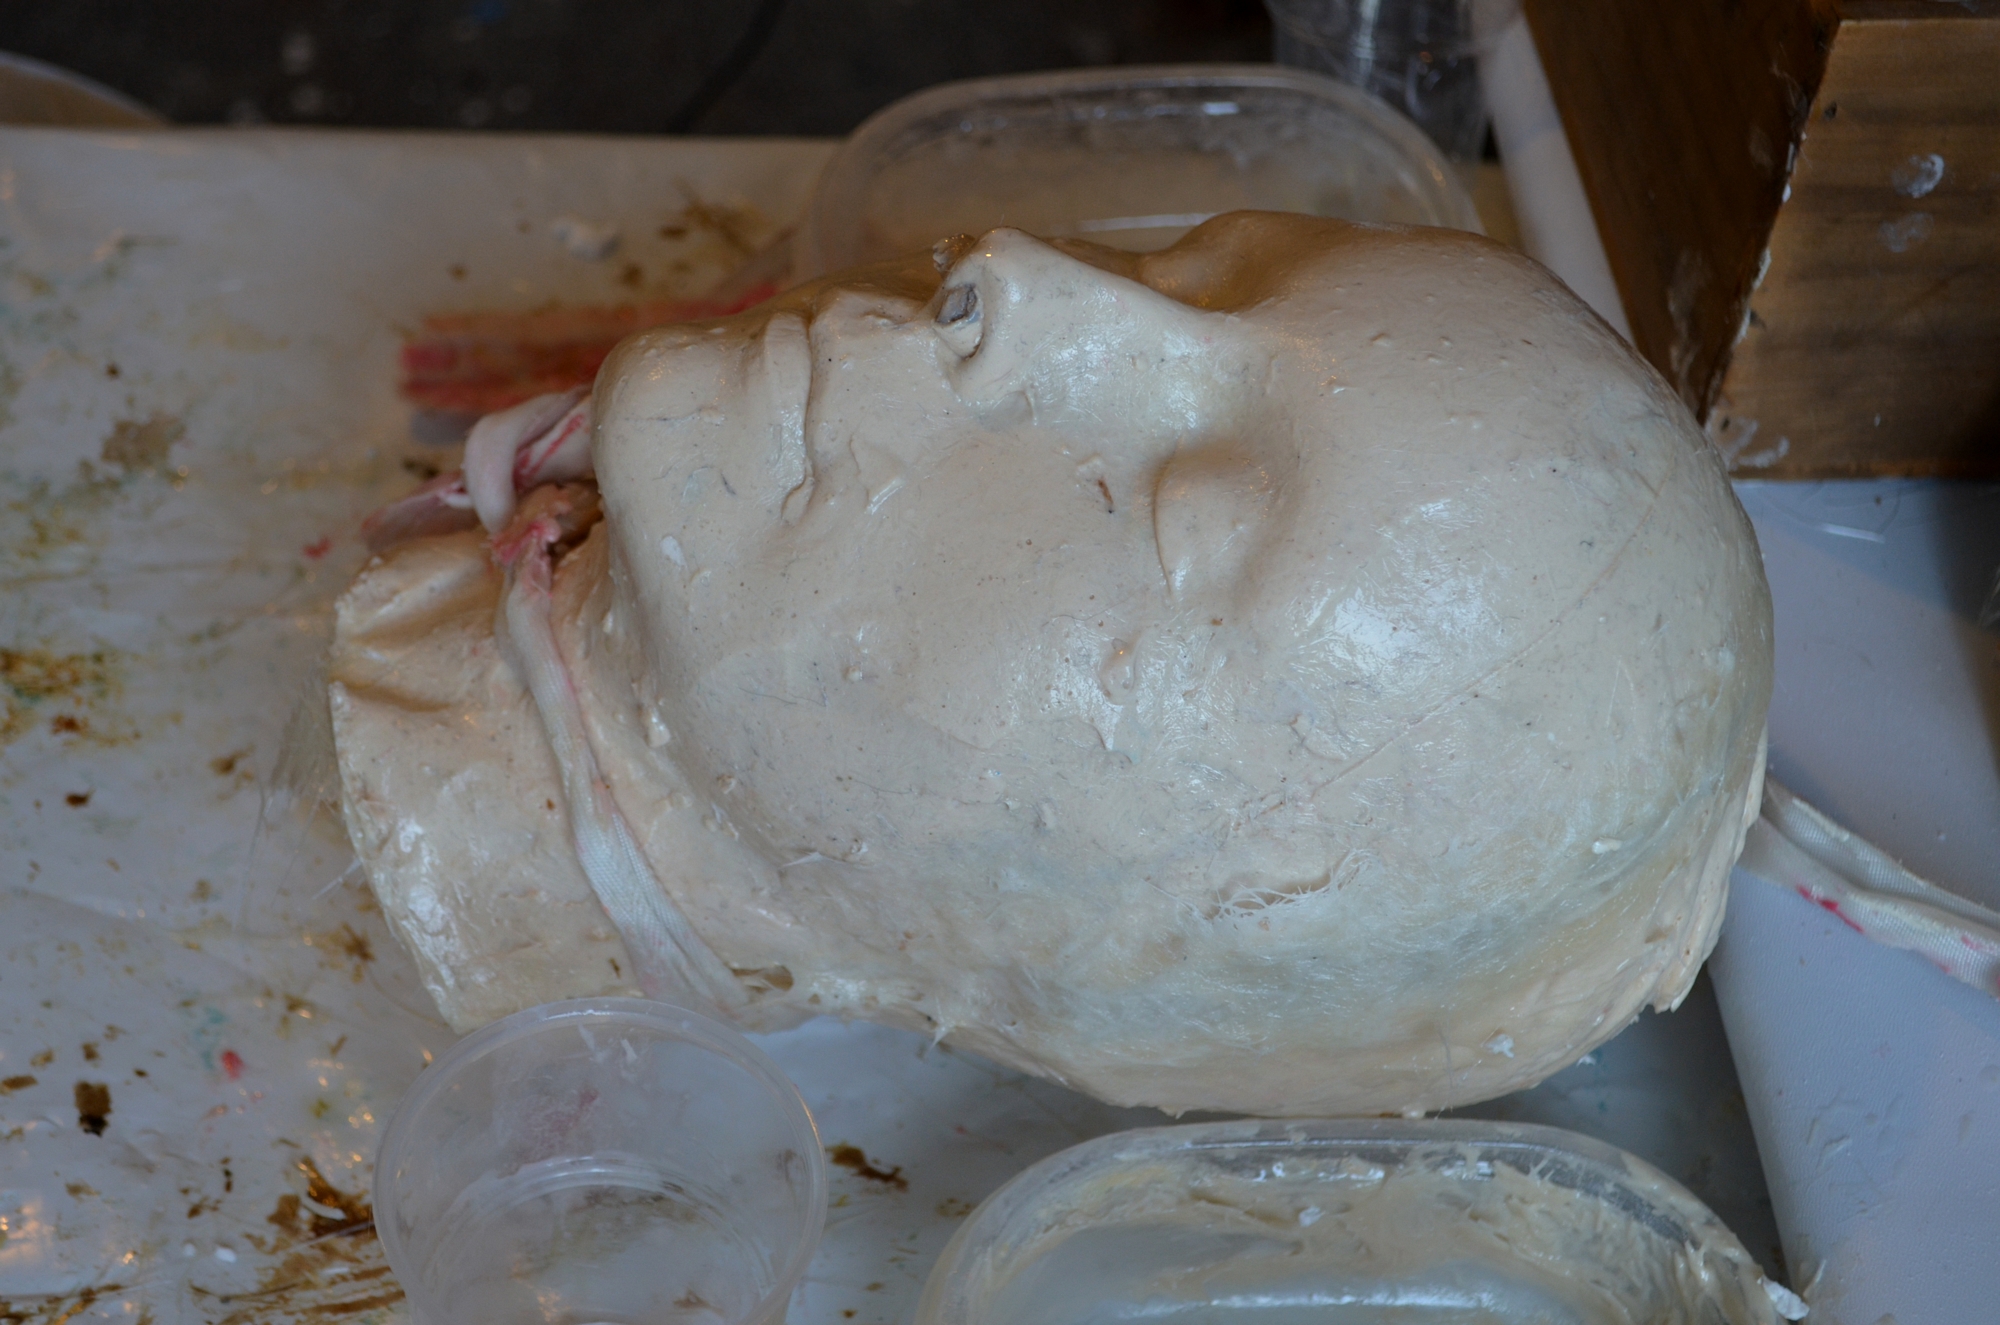
Still disconcerting seeing my stressed out smile. Sheesh. It’s actually in part due to my vampire fangs and in part due to jaw tension. If anyone ever sees me making faces while at a photoshoot, this is what I am trying to avoid.
Also it’s a bit genetic. My brother has the same turned up corners. I think we both get people assuming we are smirking.
No but seriously I thought I’d have a frown and pursed lips based on this thing, not looking like some renaissance painting of a saint.
See, buns for supporting horns/lekku etc. It’s not a made up thing 🙂 I think the slots on the top of the support also pass her hair through and you can then pin/tie behind an use front hair and extensions to hide everything.
https://www.youtube.com/watch?v=-KmK0XdntGk
Evil Fairy clip, the darn tabbard is closed all around so I am now a bit lost as to how to make this work. Her robes turn in to an open cape as she races across the moors. That may be the CG model but surely they didn’t just cut out her robes for this? Mind you the original robes make zero sense in terms of layers and cronstruction…
Kristen / 6 Jul 2014 11:38pm #WOuld love to know what paints are used to hand paint lenses, must be something that sinks into the lense itself rather than sit on top, more like an ink than a paint.
Makes sense with the buns for the horns to sit on, Angie has such lovely thick long hair, it has to go somewhere. Though she also says little little buns, which makes me think of the time i had my long hair put up under a wig by Fiona Cush, who worked for Optic Nerve. She twisted my hair into many many teeny little buns that could then be flattened onto my head with pins and then the wig was laid on top. Might be a combo of both techniques to smooth out her hair that flat.
Firstly going back to the preshow last minute stuff!
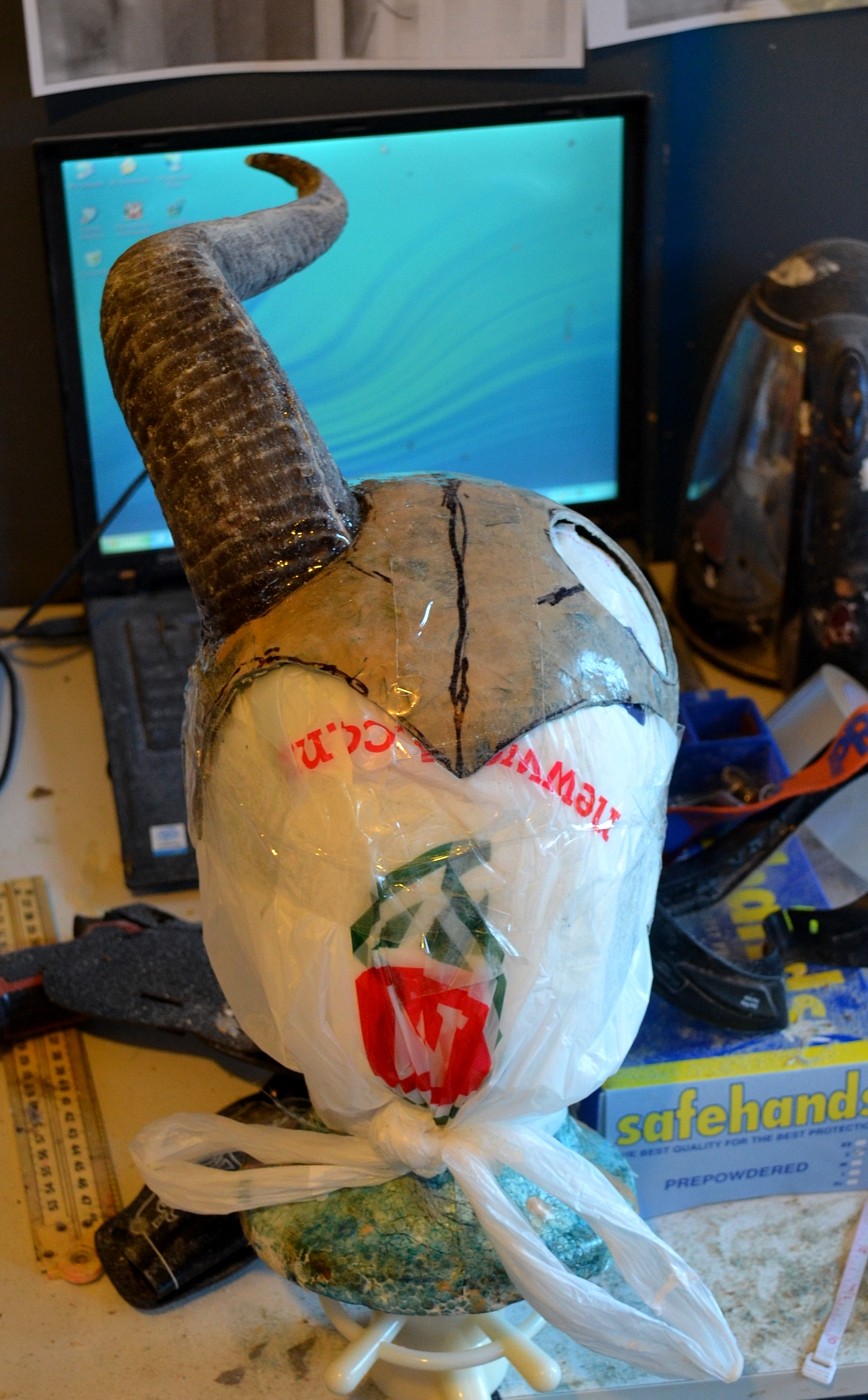
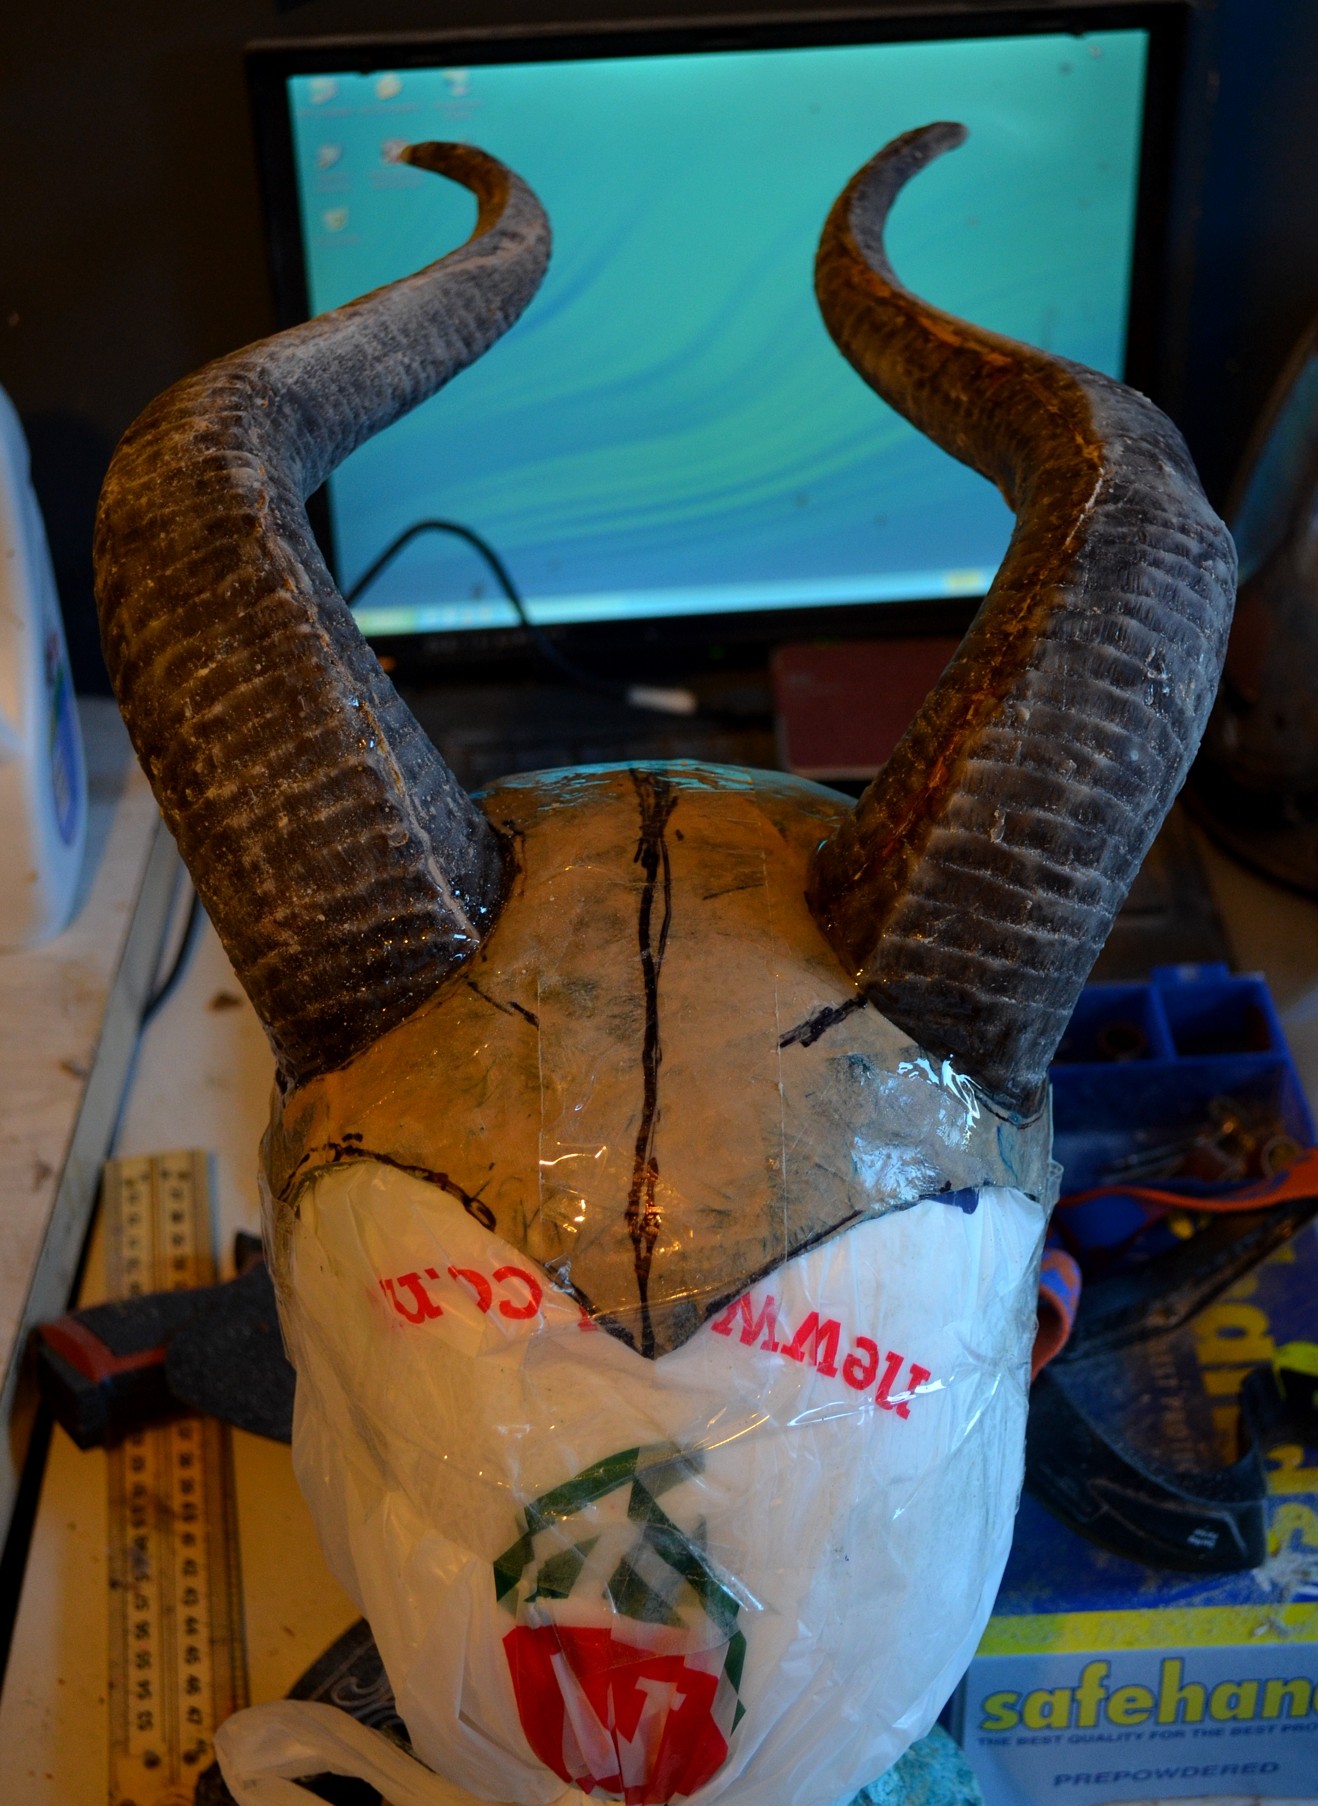
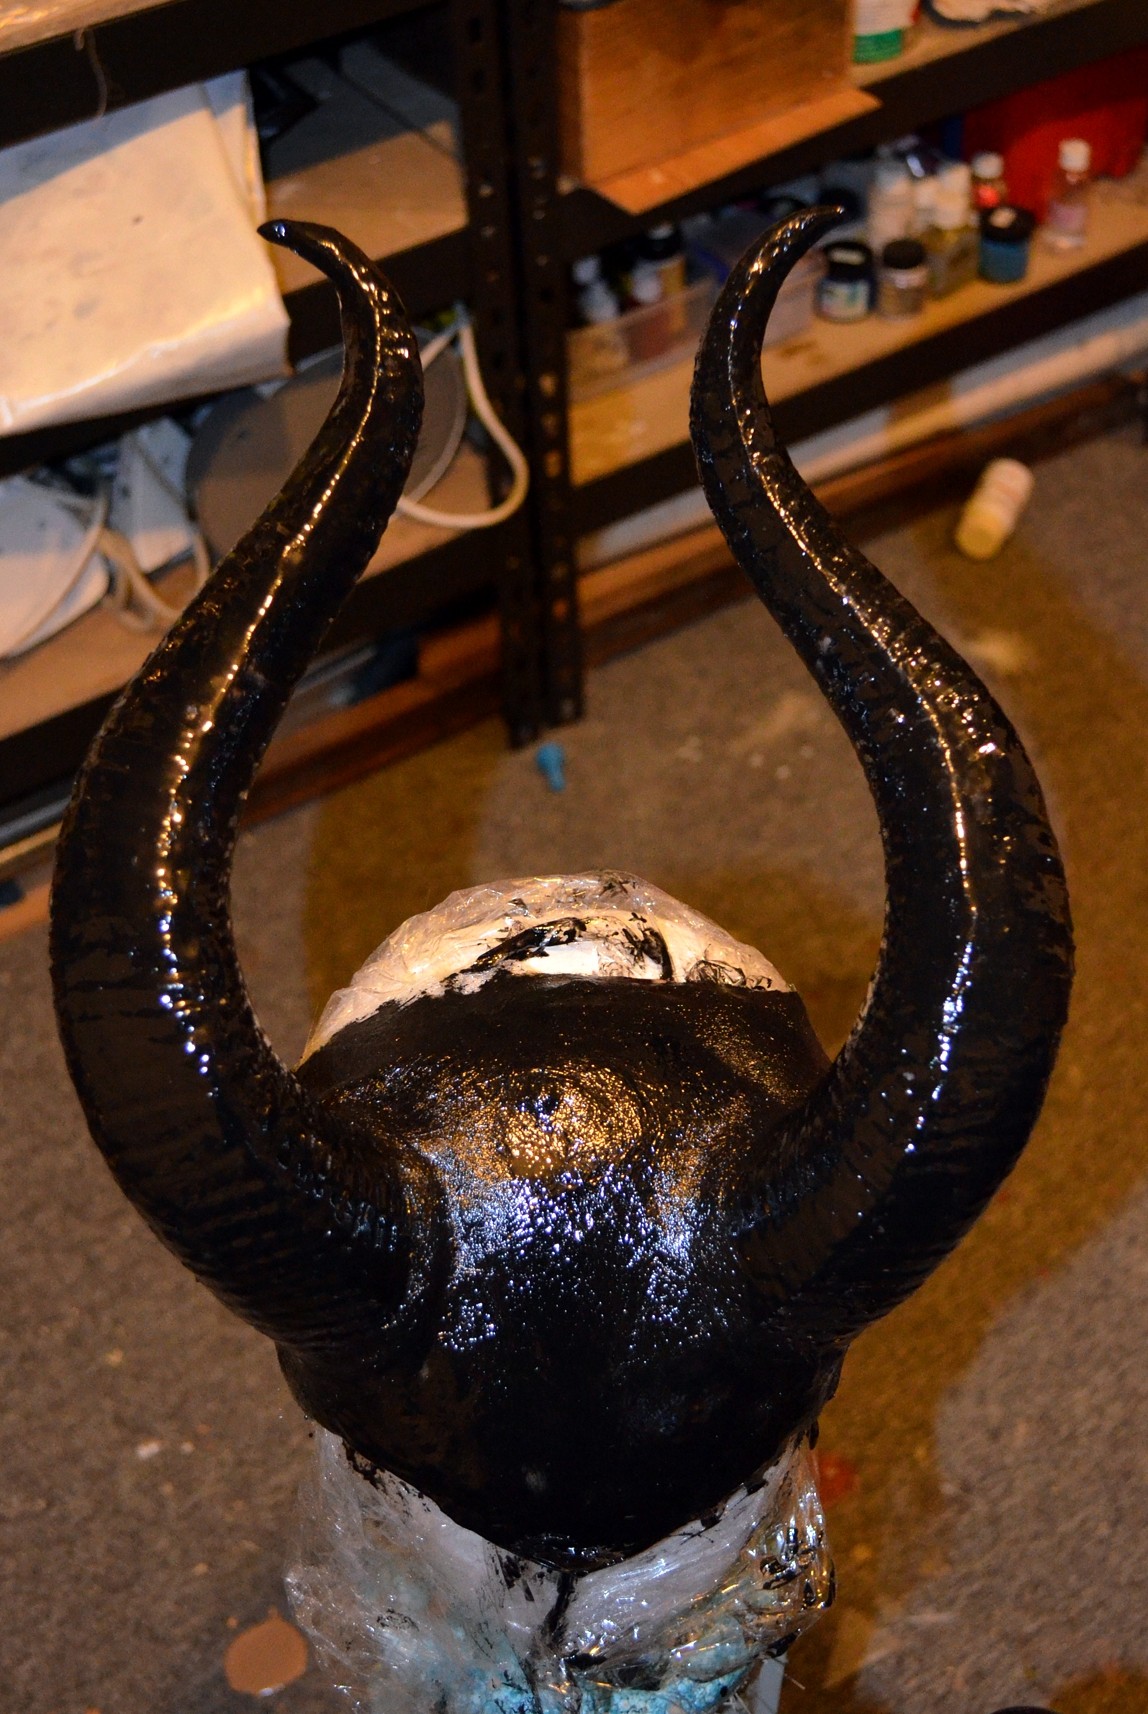
Horns: cut to shape then glued in place. You can see the dip on the horn on the right hand side. I do still like this effect but having seen the movie now I don’t need to go mad trying to do this again! they are much more opaque and with a less defined series of growth rings, so yay 🙂
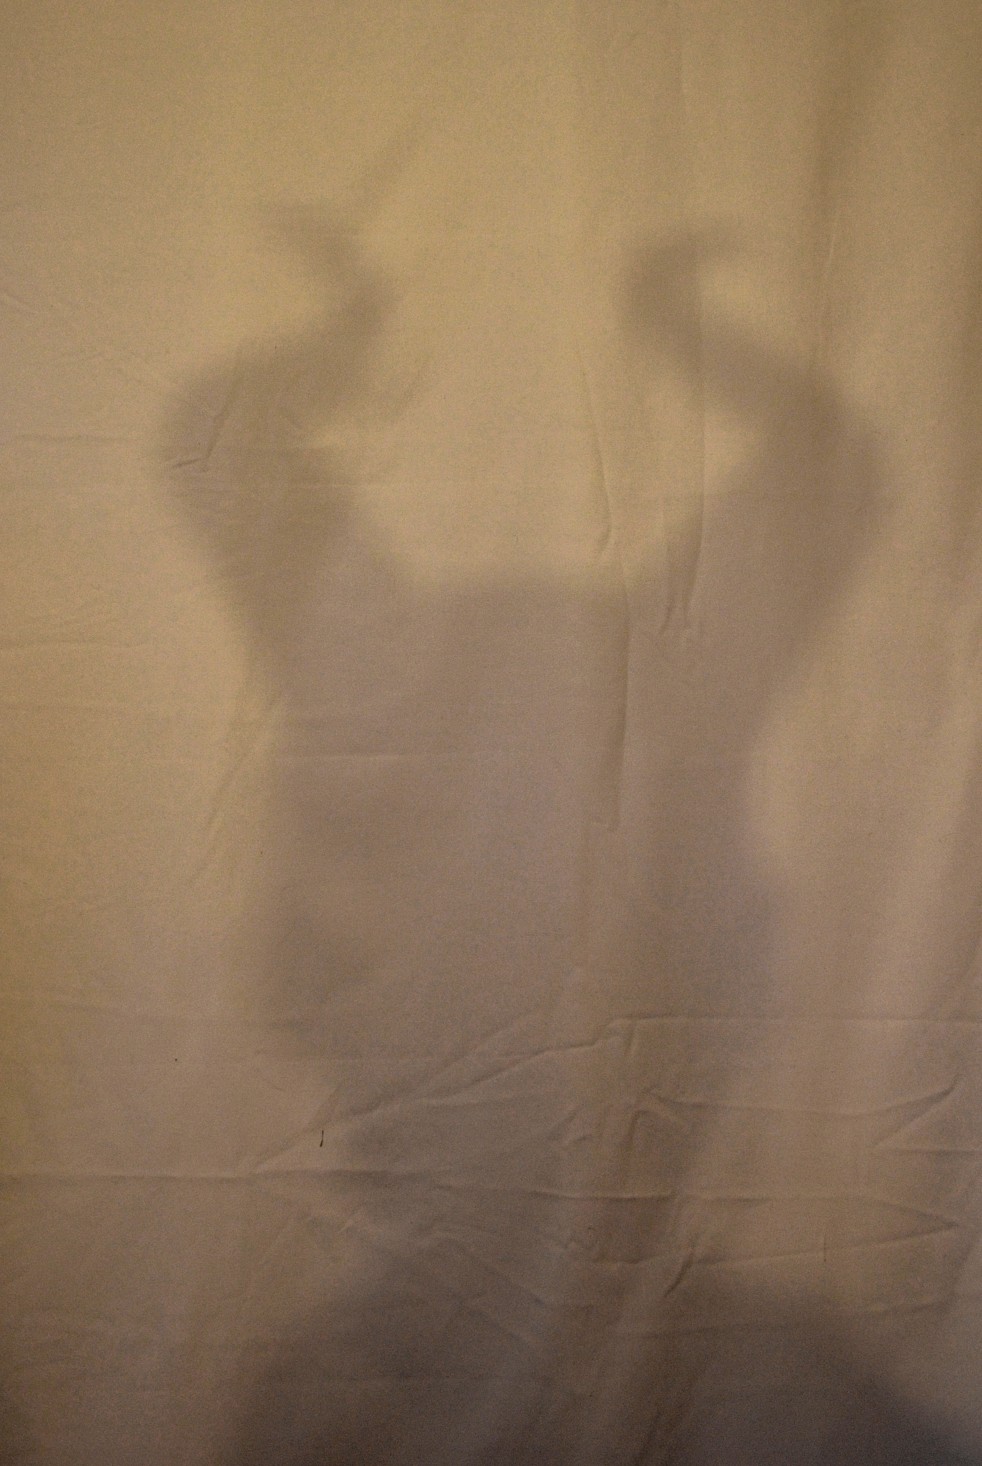
Yes, I like my shadow in these things!
With the layer of black resin straight over! Also more fibreglass on the crown. This made it more rigid and actually in hind sight it wasn’t needed.
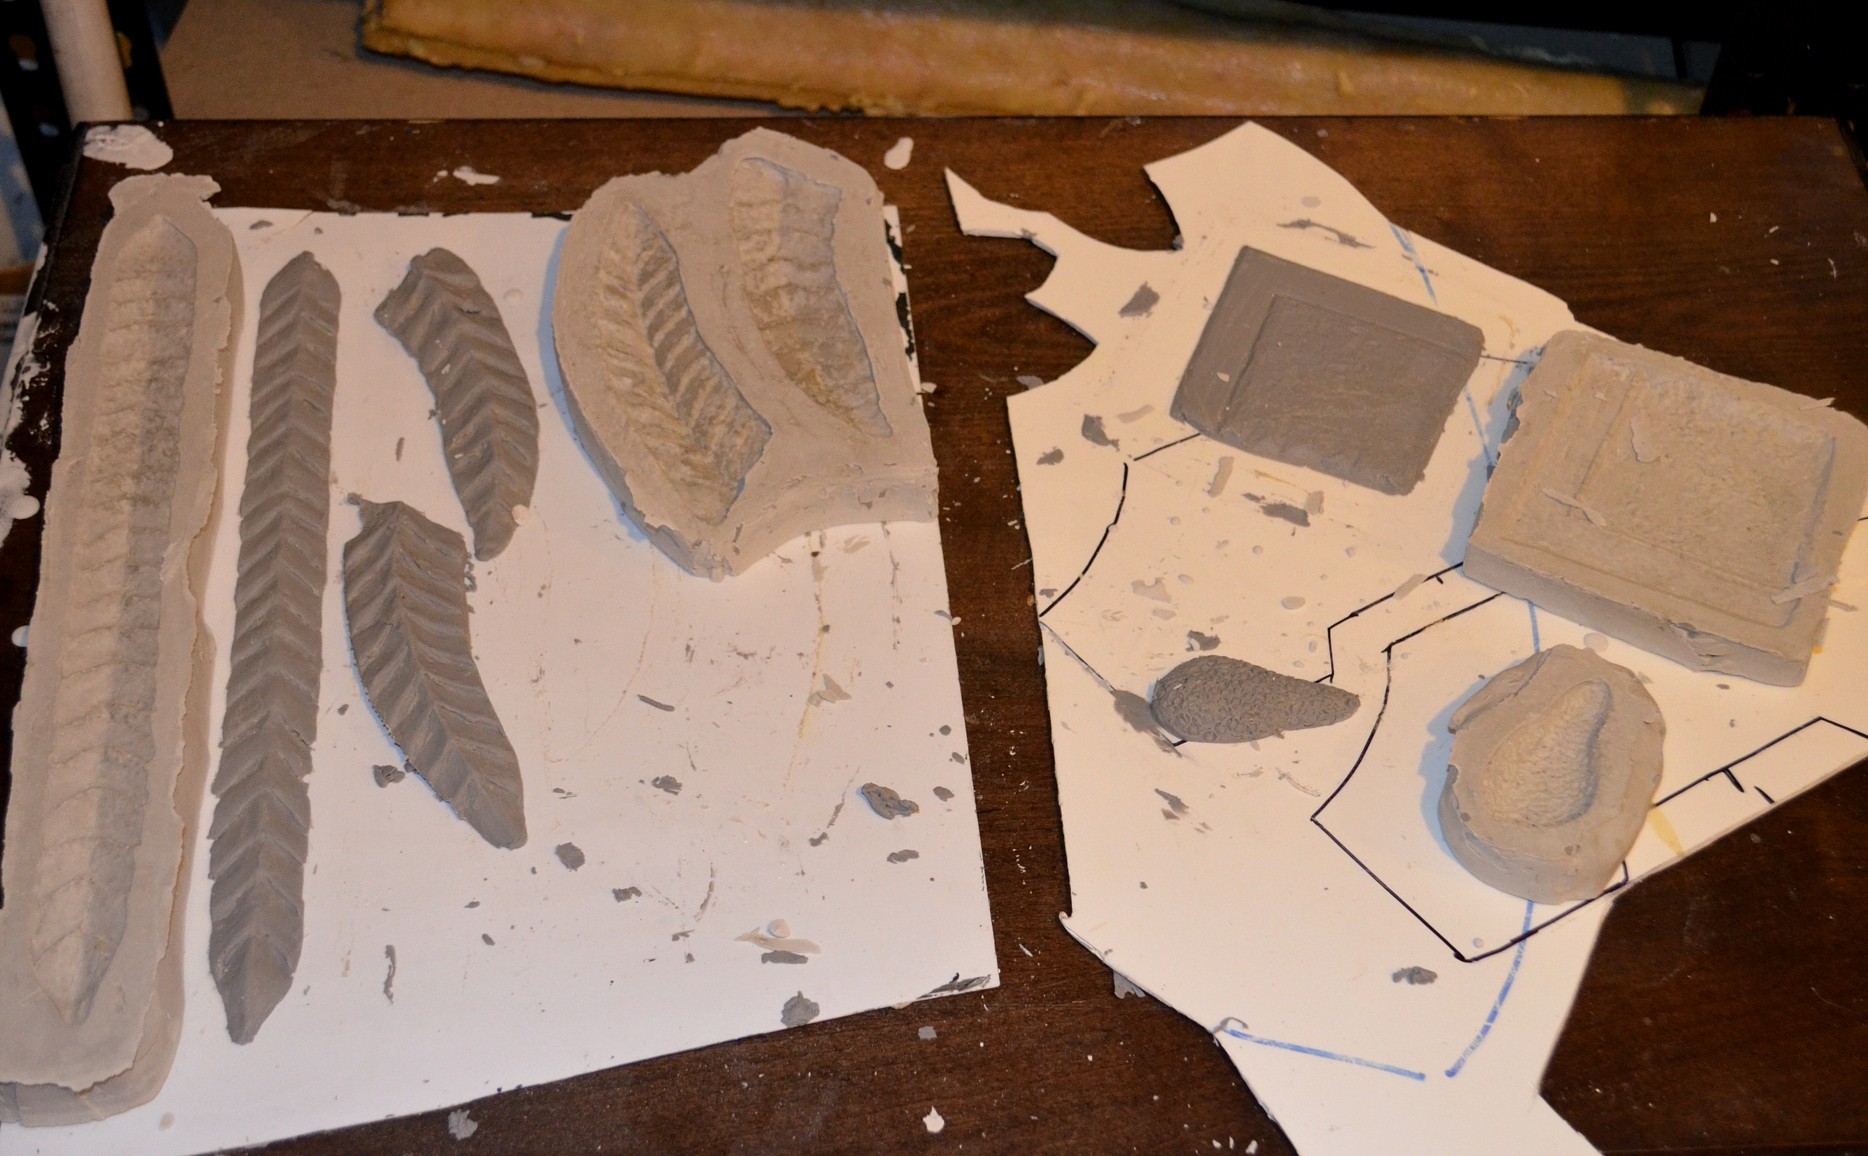
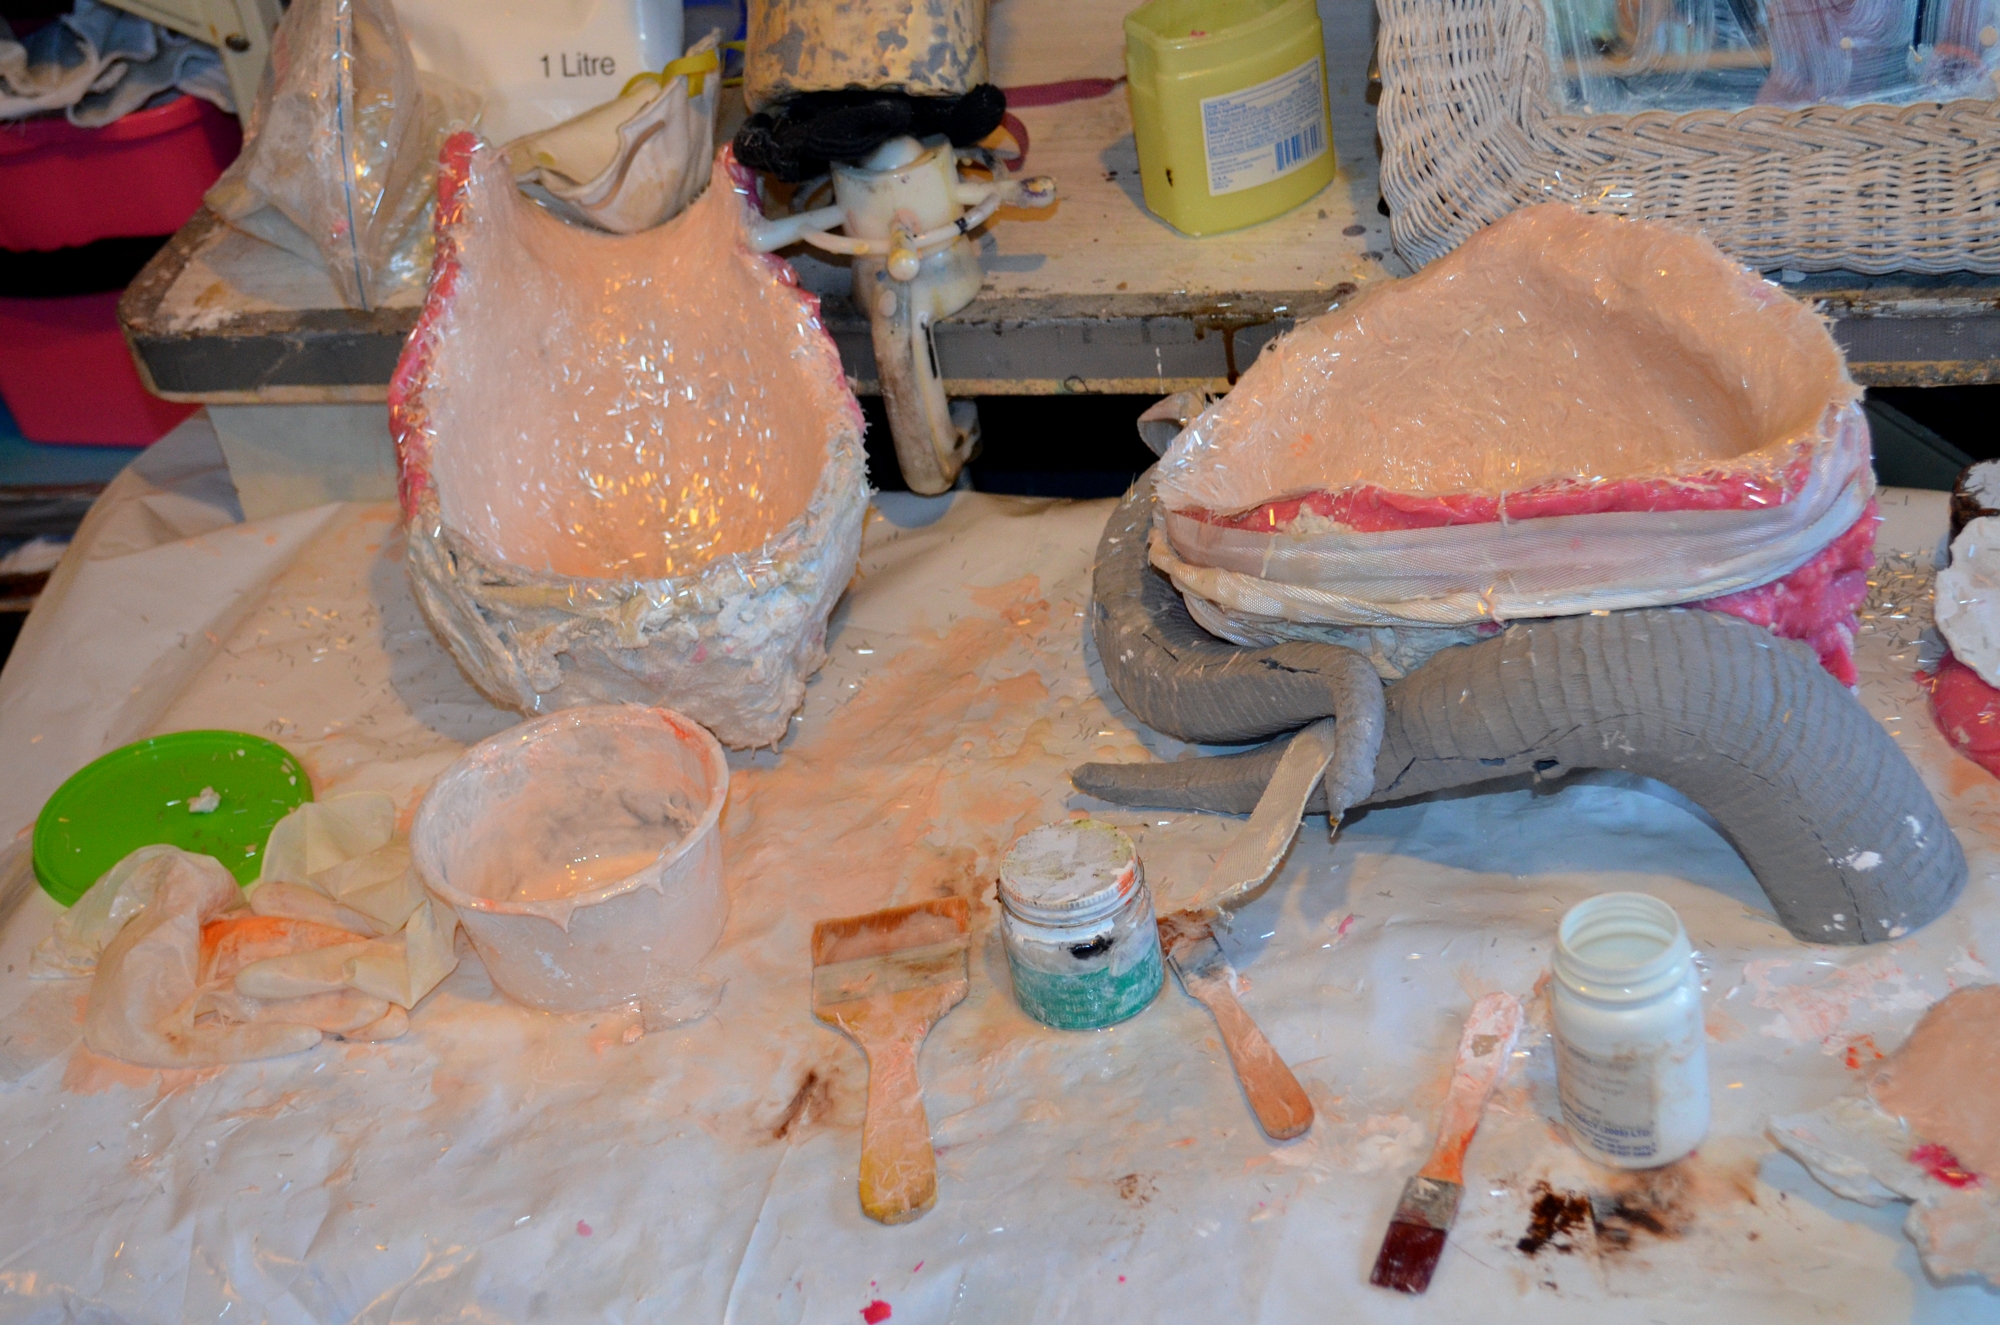
Sculptures and casts for the soft parts on the costume. I can’t believe I did that all in one evening!
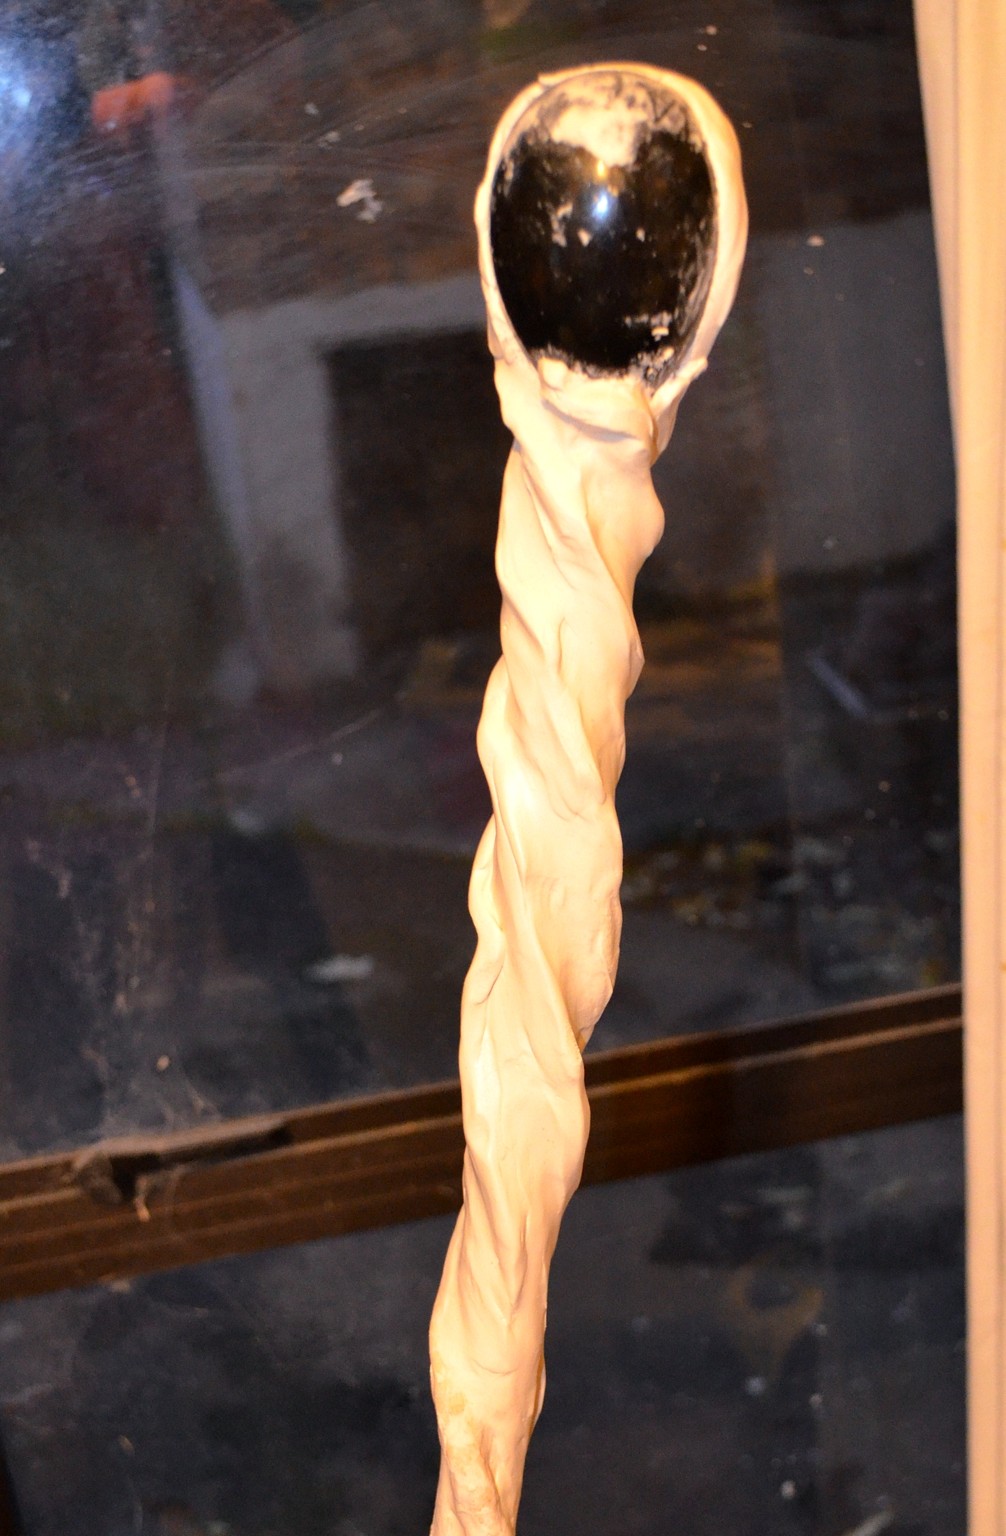
And the staff. This may be why my ring finger was so bad…. that’s hand modeled epoxy 🙂 With microballons it’s a beautiful putty but epoxy is not my friend!
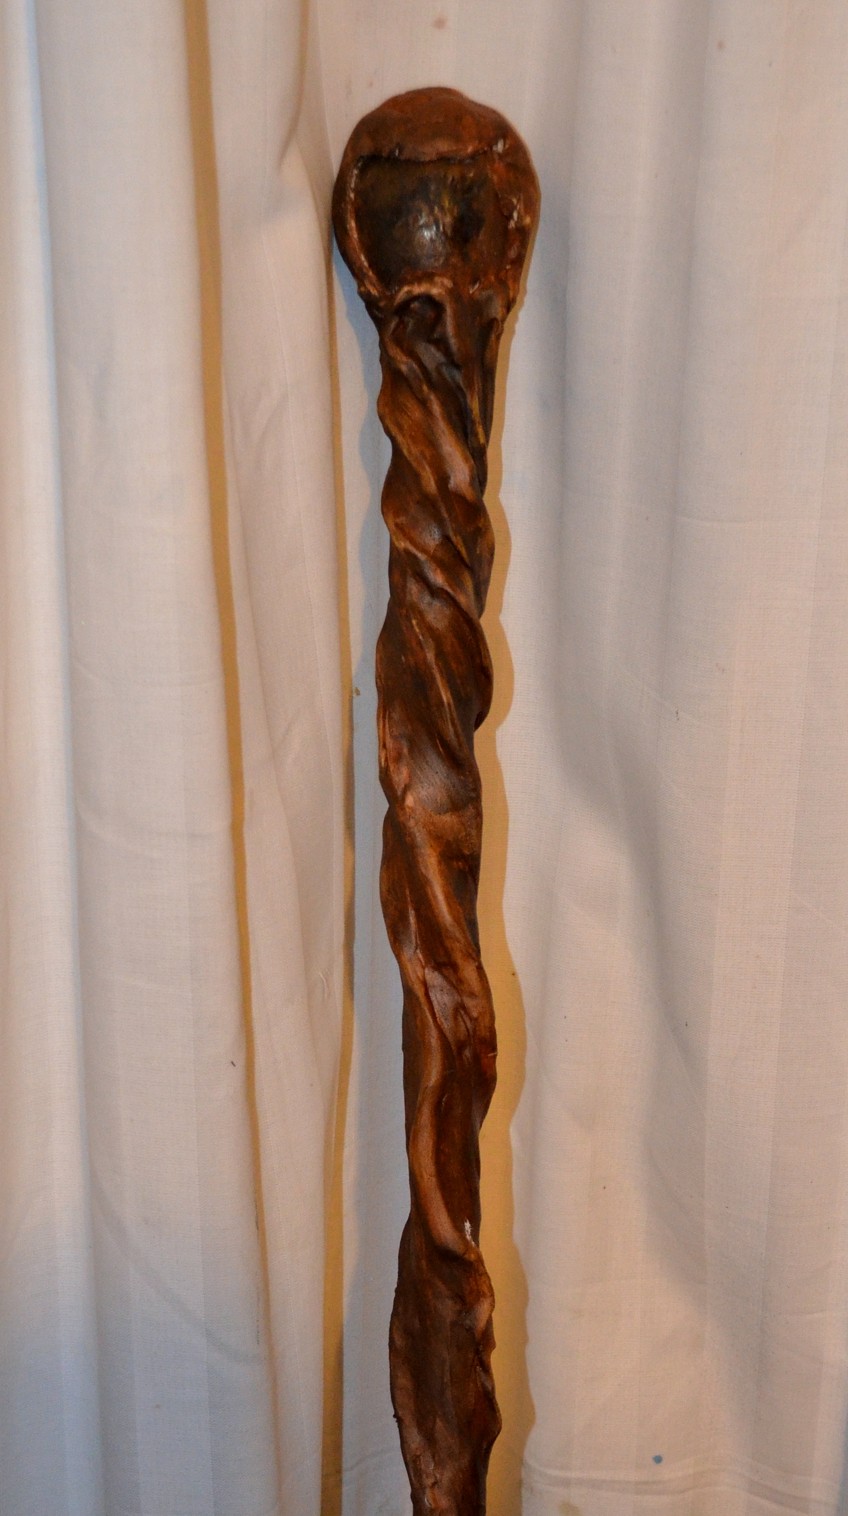
oh hey and that paint was just acrylic ink and paint mixed with IA and brushed on with a chipping brush. It was not fully cured. But handy hint: ochre and yellow ink, with a smidge of black paint and then a small dab of gold paint mixed with IA makes for a slightly curdled paint mix that creates a great wood grain effect.
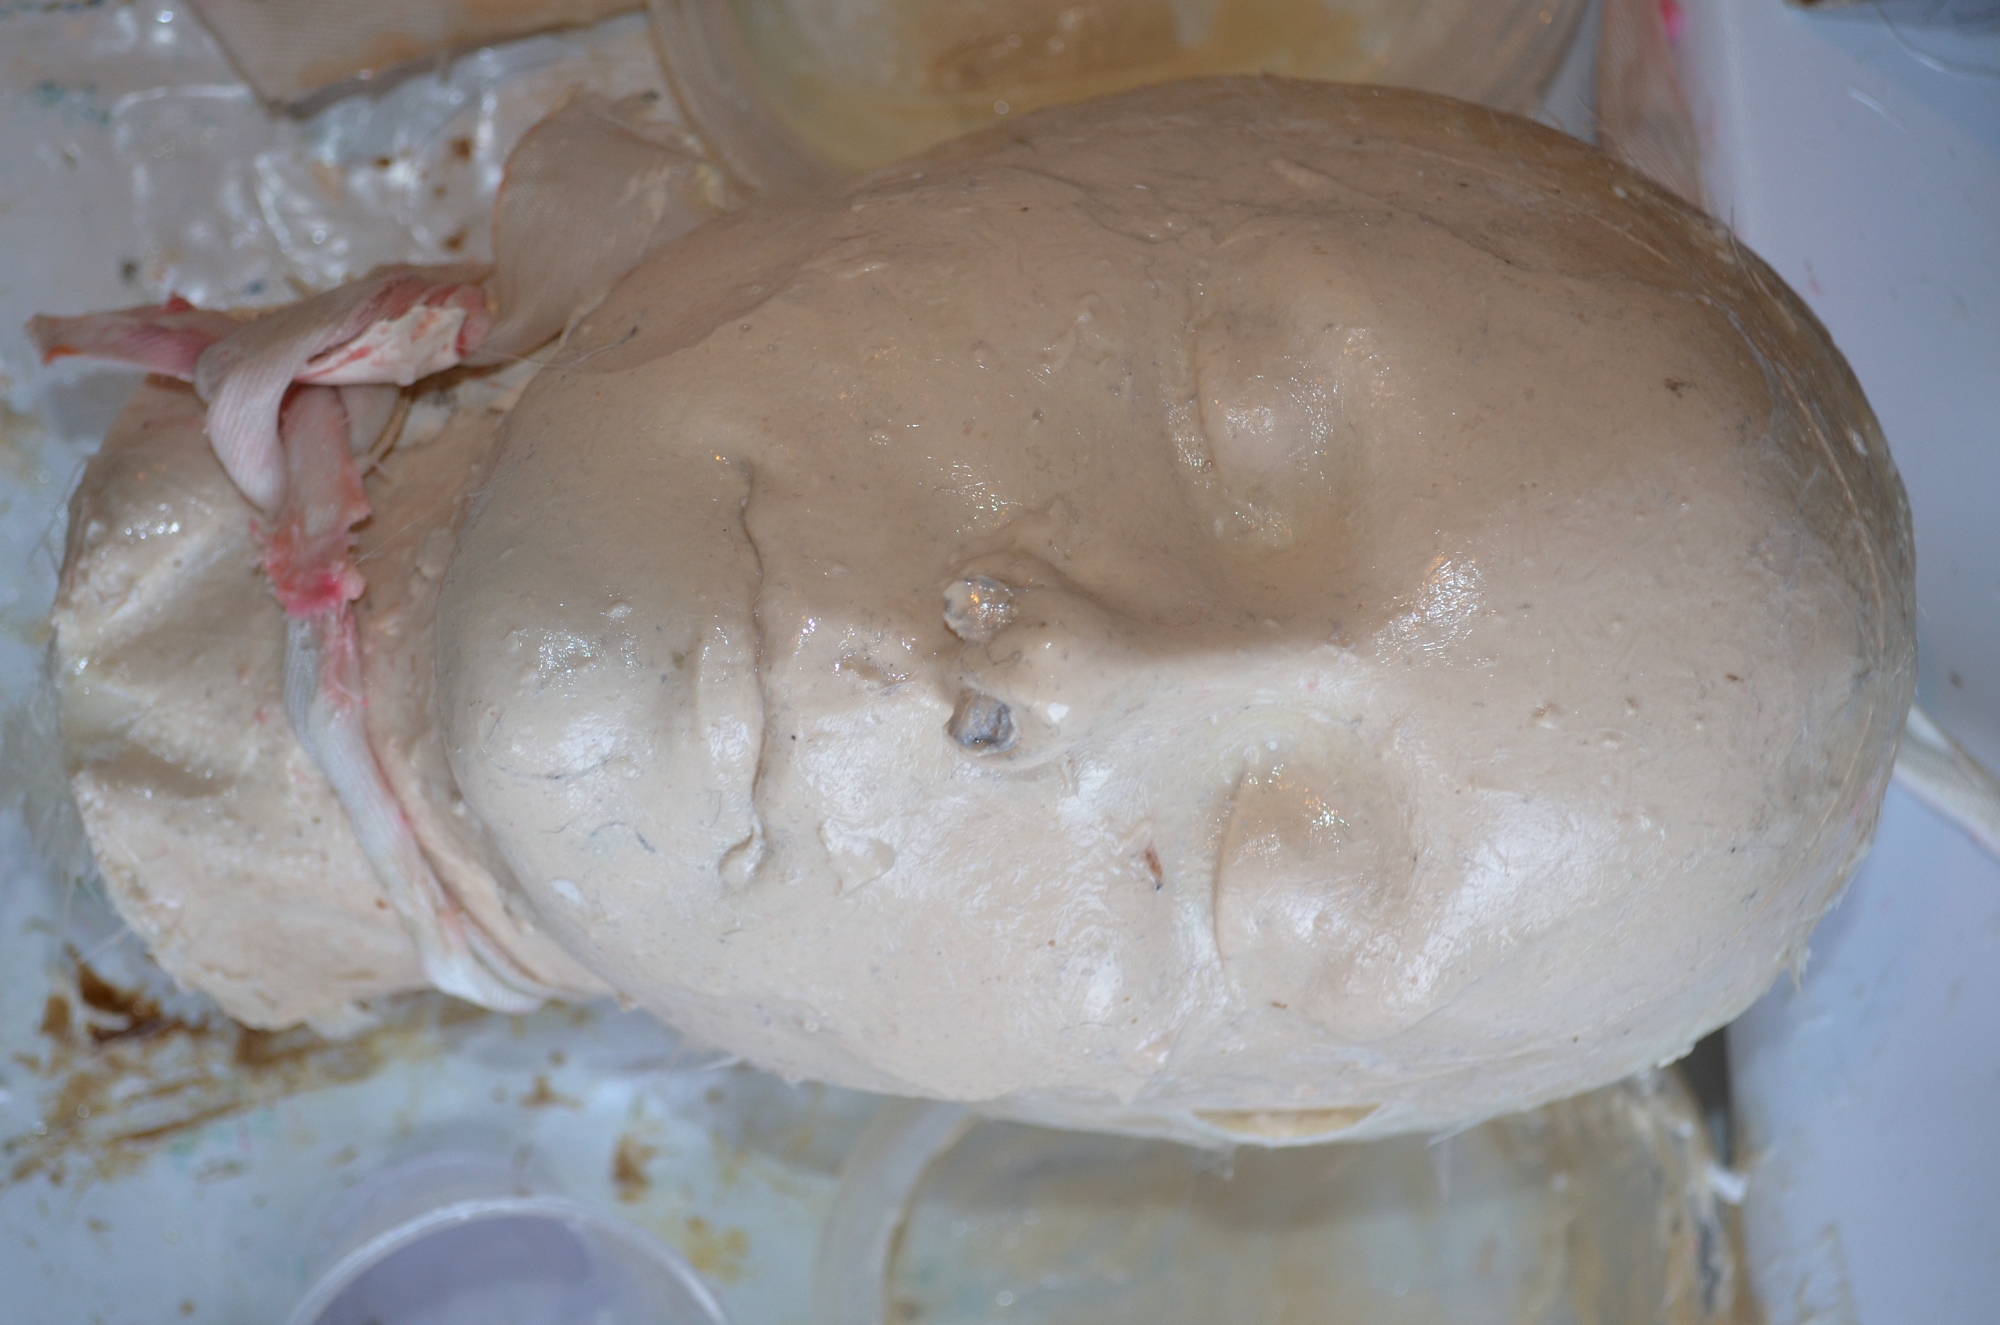
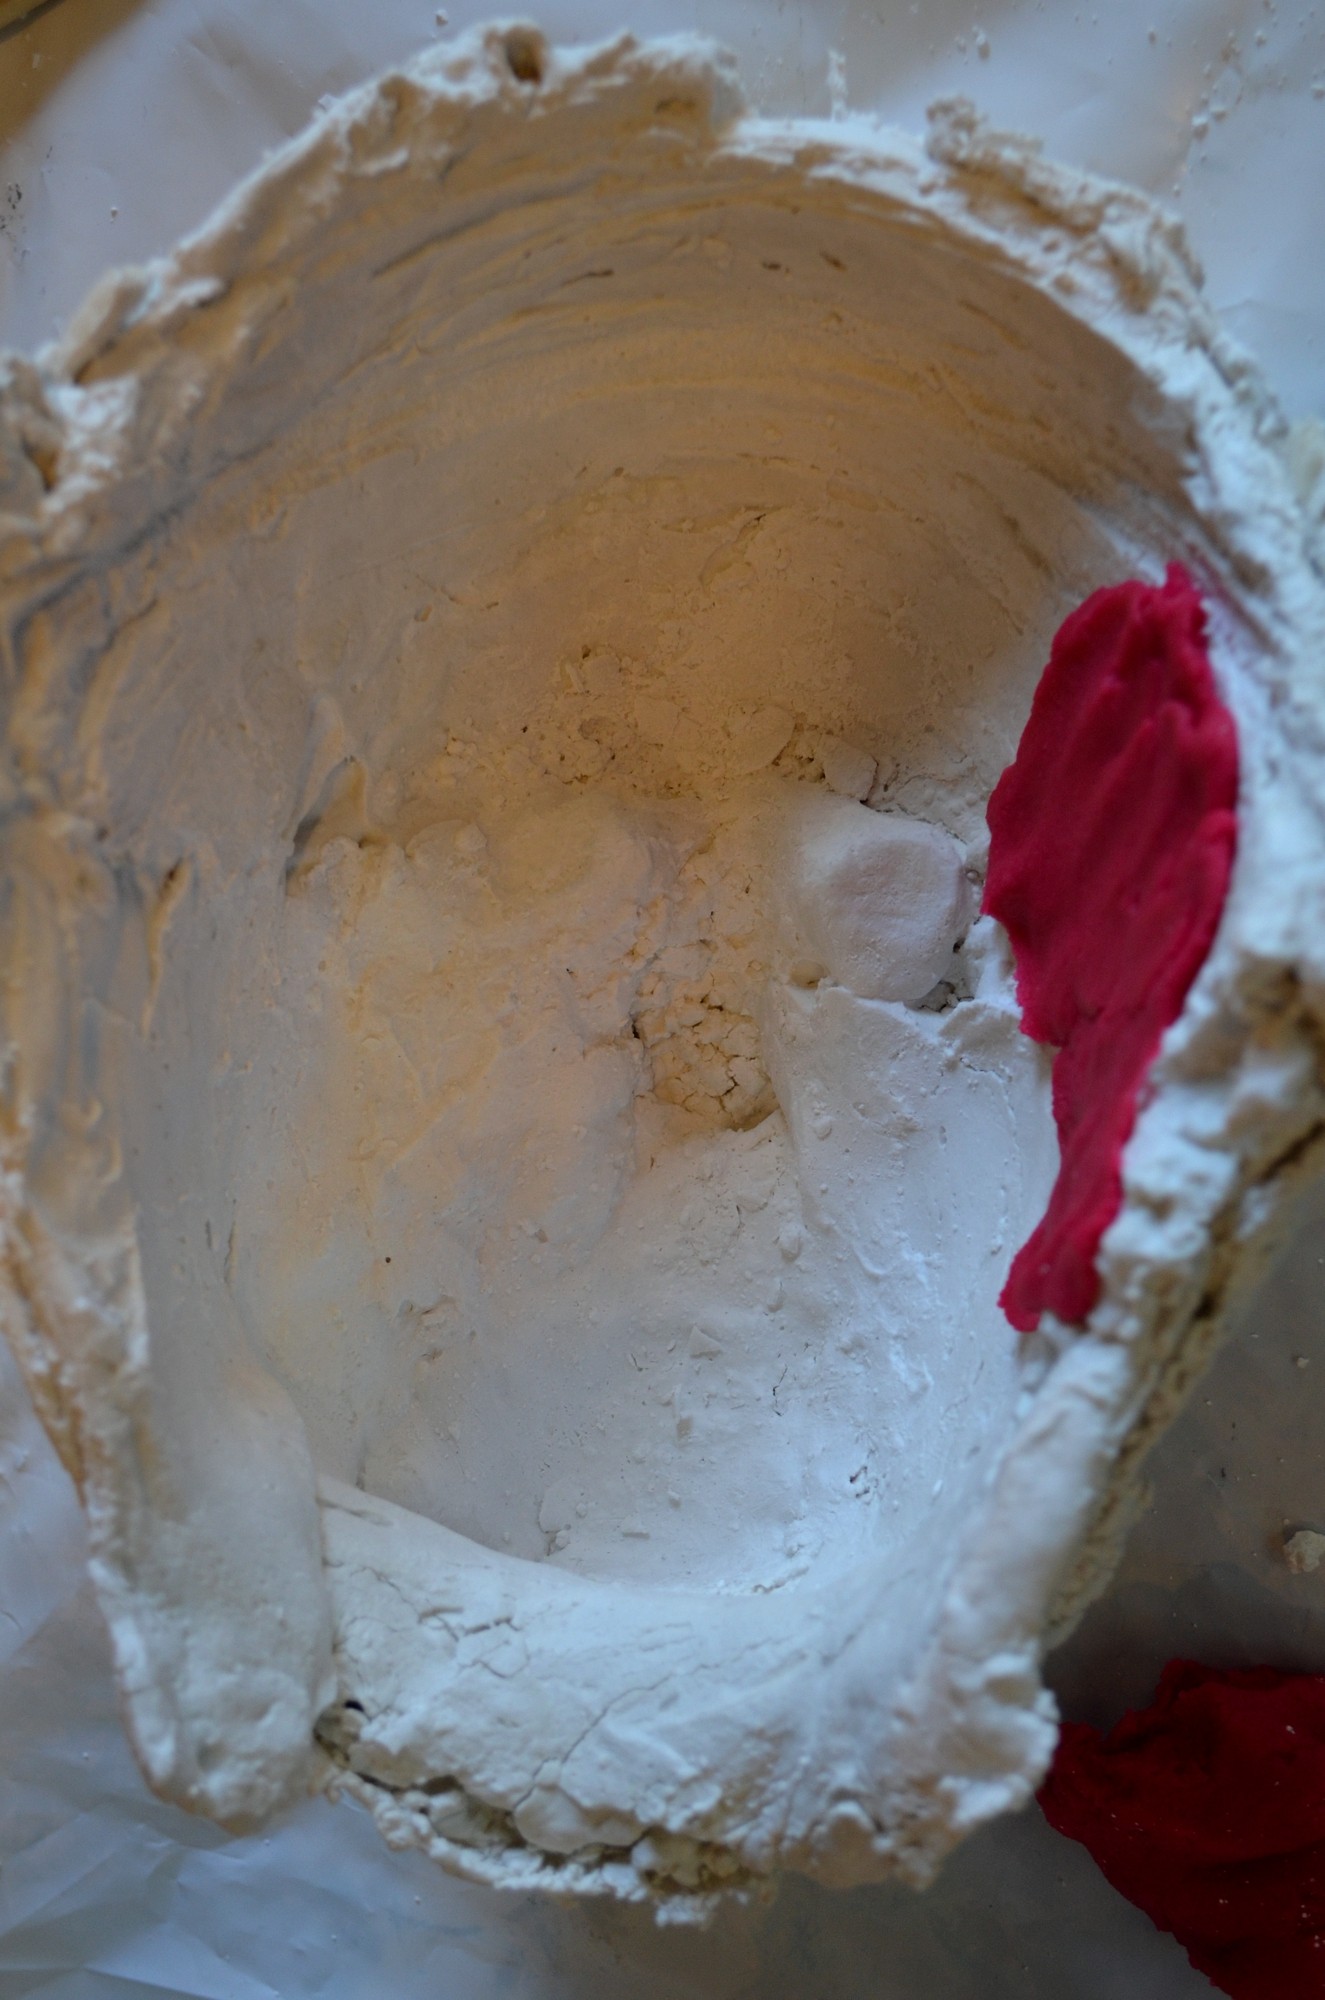
And now… my head cast:
Plaster mother with some of my home made playdough smooshed in. I pressed a thin layer then pressed my face in then added more on my face then pressed in. It’s not perfect but it has my proportions and may be a bit more true than my previous cast.
Resined! OMG!!! Chopped strand filler is a game changer! I mix a slurry of resin with pigments and a little cabosil, then while it is starting to slump use glass tissue to hold it up. Paint a more liquid slurry on the back then throw (literally, like dusting a bread board) the chopped strand in side and press and move any excess further up. Then paint another layer and do the same. There is a lot of excess strand in the mold that can be brushed out when cured.
Also I found my pink suede boots and realised the heel is a bit chunky but super sturdy so will be a good base for the boots at the end of the film 🙂
So yes, tabbard to action suit to winged form is happening. Funnily enough it may take up less room than the current gown…
Meilin / 26 Jun 2014 7:18pm #For the epoxy + microballoons, did you mix that up so that it’s putty consistency or is there some store-bought mix that you use? Also, do you use gloves and get a reaction anyway or do you forgo the gloves to get better artistic control? I don’t have an allergy to epoxy (knock on wood) but I hear you can get sensitized to it…
In any case, the staff and horns look great!
Reply
admin / 2 Jul 2014 6:51am #Thank you 🙂
I do wear gloves and the more dense kind of coveralls as well as a mask. I should get a full reperator but I need dust and chemical filters and I think you can only get one or the other. Pretty sure a solvent filter will also filter these larger particles though…
I mix the resin then stand added filler by equal parts. I think it wind up 4:1 powder to resin. And it is then hand (in glove!) mixed to a dry dough (think scone dough) before being applied. I thin dip my (gloved!) hand in water and use that to smooth and push the surface to shape.
I have longer fingers but small hands so I usually wind up with my hand breaking through gloves. SO I may just have to start wearing to sets at a time or hunting out the more durable sort. Once my hands break through I try to work as fast as I can.
My current ptoblem is in part beacuse I need the three main kinds of antihistamines and I only have Loratadine on hand. Also I got some resin on my forearms when I took my coveralls off. I thought I had cleaned it off but actually not. Releasing my Shae helmet cause some fibreglass rash and so I got the stuff under my skin and poof! ALong with the synacthen test I am really riding the crest of a fairly full on allergy! Luckily skin only. A bit of coughing but that could be dust.
Thank you for your questions 🙂 It’s always lovely to know people are reading and also thinking about it 🙂
Because I think I have worked it out. Flexible relatively light and I hopefully can make them fit my suitcase in pieces.
So I’ve requested some more urethane (squee!) and will test what I have already.
2 Responses to “Wings, or rather ZOMGWINGZ”
Dare / 26 Jun 2014 9:27am #I found your site when trying to get better pics of the christening gown and it’s so exciting to see your progress. Especially bc my motto is similar to yours except it’s “overcomplicating costuming for 10 months and then half assing and last minuting the other 2″. As a former lover of costumes with wings (I don’t have the time to make them anymore) I’m excited to see how you made a “light” urethane wing and am looking forward to that post! I think I’d read in another costume post that you’d been to Dragon Con. Are you doing Maleficent there this year? I’d love to see it in person.
Was the fabric you’re using already textured like that or did you wrinkle it?
Reply
admin / 2 Jul 2014 6:54am #Hello 🙂 The fabric was already wrinkled. I’m in the process of acquiring more, there are only remnants of it left!
I haven’t made the wings yet and have two options, still debating between them!
I’d love to go to D*C this year, my one and only trip was 2012 and I don’t think the luck that played in to that will happen again. So much help from friends and family 🙂 ANd Celebration 6 was the weekend before that made it oh so tempting 🙂
Last costume was the most anticipated for the designer 🙂 And yeah I spotted so much gorgeous metal work and sigh I can’t wait to see the full thing properly.
Baker created cheeks, a nose and ear appliances for Jolie that were silicone and gel-filled. Maleficent’s cheeks look sharply prominent in the film, but the appliances are actually very small. Baker explains, “It’s amazing because the appliances are less than a quarter of an inch at their thickest points and only about a half inch wide. They sit right at the crest of her cheekbones.”
Special makeup effects artist Arjen Tuiten was on set daily to transfer Baker’s designs to Angelina Jolie. “It was important to Rick [Baker] that all Angelina’s prosthetics conform to the angles of her face,” says Tuiten. “From the life cast of her head, we formed the rubber cheekbones and ears, following those contours. The whole application process, including hair weaves, which took about a half-hour, was about four hours every morning. Angelina was very patient with the process.”
Turning his attention to the horns, Baker faced several challenges. “The horns were one of the big issues because no one would want to walk around all day with big horns on his or her head,” relates Baker. “So, I wanted to make them as lightweight as possible and removable because when you have something that sticks out a foot beyond your head and you’re not used to it, you’re apt to run into things.”
Baker and his team sculpted at least four different designs of horns. “I did some drawings and modeled some of the designs for the horns on the computer,” says Baker. “Then we actually ended up sculpting them. We chose the one that we liked the best and did all the work using that one design.”
For comfort, the horns are very lightweight and thin, and made of urethane casting resin. “After much experimentation, we ended up basically with a maxi-form skullcap that had on it the base of the horns and the first inch or so of the horns,” explains Baker. ‘The rest of the horns stuck on with a magnet. They were very strong magnets that held them in place but we could then pop them off in between shots.”
Goodwin’s most challenging designs for the film involved the battles scene. “From early on, I had an idea for a helmet and footwear for her battle scene, which had to be hard, formidable yet elegant. The helmet’s sculpted shape is covered in leather that looks reptilian and this detail was continued onto the boots, which had customized bone-like heels. Together, these pieces were my most challenging as well as being my favorites.”
So with that link dump (if you are seeing this via social media go look at the pages proper, so many links!) I now know that I can get a look like the real life wings used at the exhibition (At Kensington Palace!!!!!). So I just need to reverse engineer.
Just.
Just she says. But there is a great still where the feathers don’t trail and the wings aren’t too out stretched 🙂
To the corset/harness and wing frame build. Lets see if we can get some articulation happening as well…
I’m vertical for a little bit. Also managed to trick youtube into letting my upload a 46min video! Woohoo!
Also my point in this video is don’t let anyone tell you what characters you should do because of what you look like. Most people can’t seem to see beyond basics and that’s just limiting. Have fun whether you try to look like the character or not. This make up is the opposite of what I do for Regina which is another character people wouldn’t immediately think of for me but which works very well indeed.
https://www.youtube.com/watch?v=VVHNArp_jcw
So this is me starting from the more interesting part- the highlights and contours.
To get to this point my eyebrows were plucked and eyebrows and lashes coloured (go pastypastry!) and then the lenses put in and my eyelashes glued down.
The eyelashes are simple dollar store goodies and I may just grab a collection of them having now worked out how to make them work. Clip to size and glue the lid then the lash as if using contact cement!
I have a quiet voice so hopefully the video while long is not too droning but I did it to show how you really do want a nice calm time to zone in and chill while making a face that is not your own. I can do some editing to do a before and after comparison.
But also, man I wish other people could get photos like this of me. You can see I have cheekbones and my mouth is not all pinched. It’s even at the world’s worst selfie angle (under the nose) and lookit! Anyway. It’s just making me really determined to see what my lens can do….
2 Responses to “Even more maelficent references”
Kristen / 6 Jul 2014 11:38pm #WOuld love to know what paints are used to hand paint lenses, must be something that sinks into the lense itself rather than sit on top, more like an ink than a paint.
Makes sense with the buns for the horns to sit on, Angie has such lovely thick long hair, it has to go somewhere. Though she also says little little buns, which makes me think of the time i had my long hair put up under a wig by Fiona Cush, who worked for Optic Nerve. She twisted my hair into many many teeny little buns that could then be flattened onto my head with pins and then the wig was laid on top. Might be a combo of both techniques to smooth out her hair that flat.
Reply
Kristen / 6 Jul 2014 11:42pm #the contact lense company site – http://www.eyeinkfx.com/
Reply