
I AM GLAM 70S ROCKER
PVC and feathers!
So I need a pair of coveralls desperately. I finally tossed the pair that were basically held together with old resin.
PVC and feathers!
So I need a pair of coveralls desperately. I finally tossed the pair that were basically held together with old resin.
Filed under projects: media recreations, Uncategorized
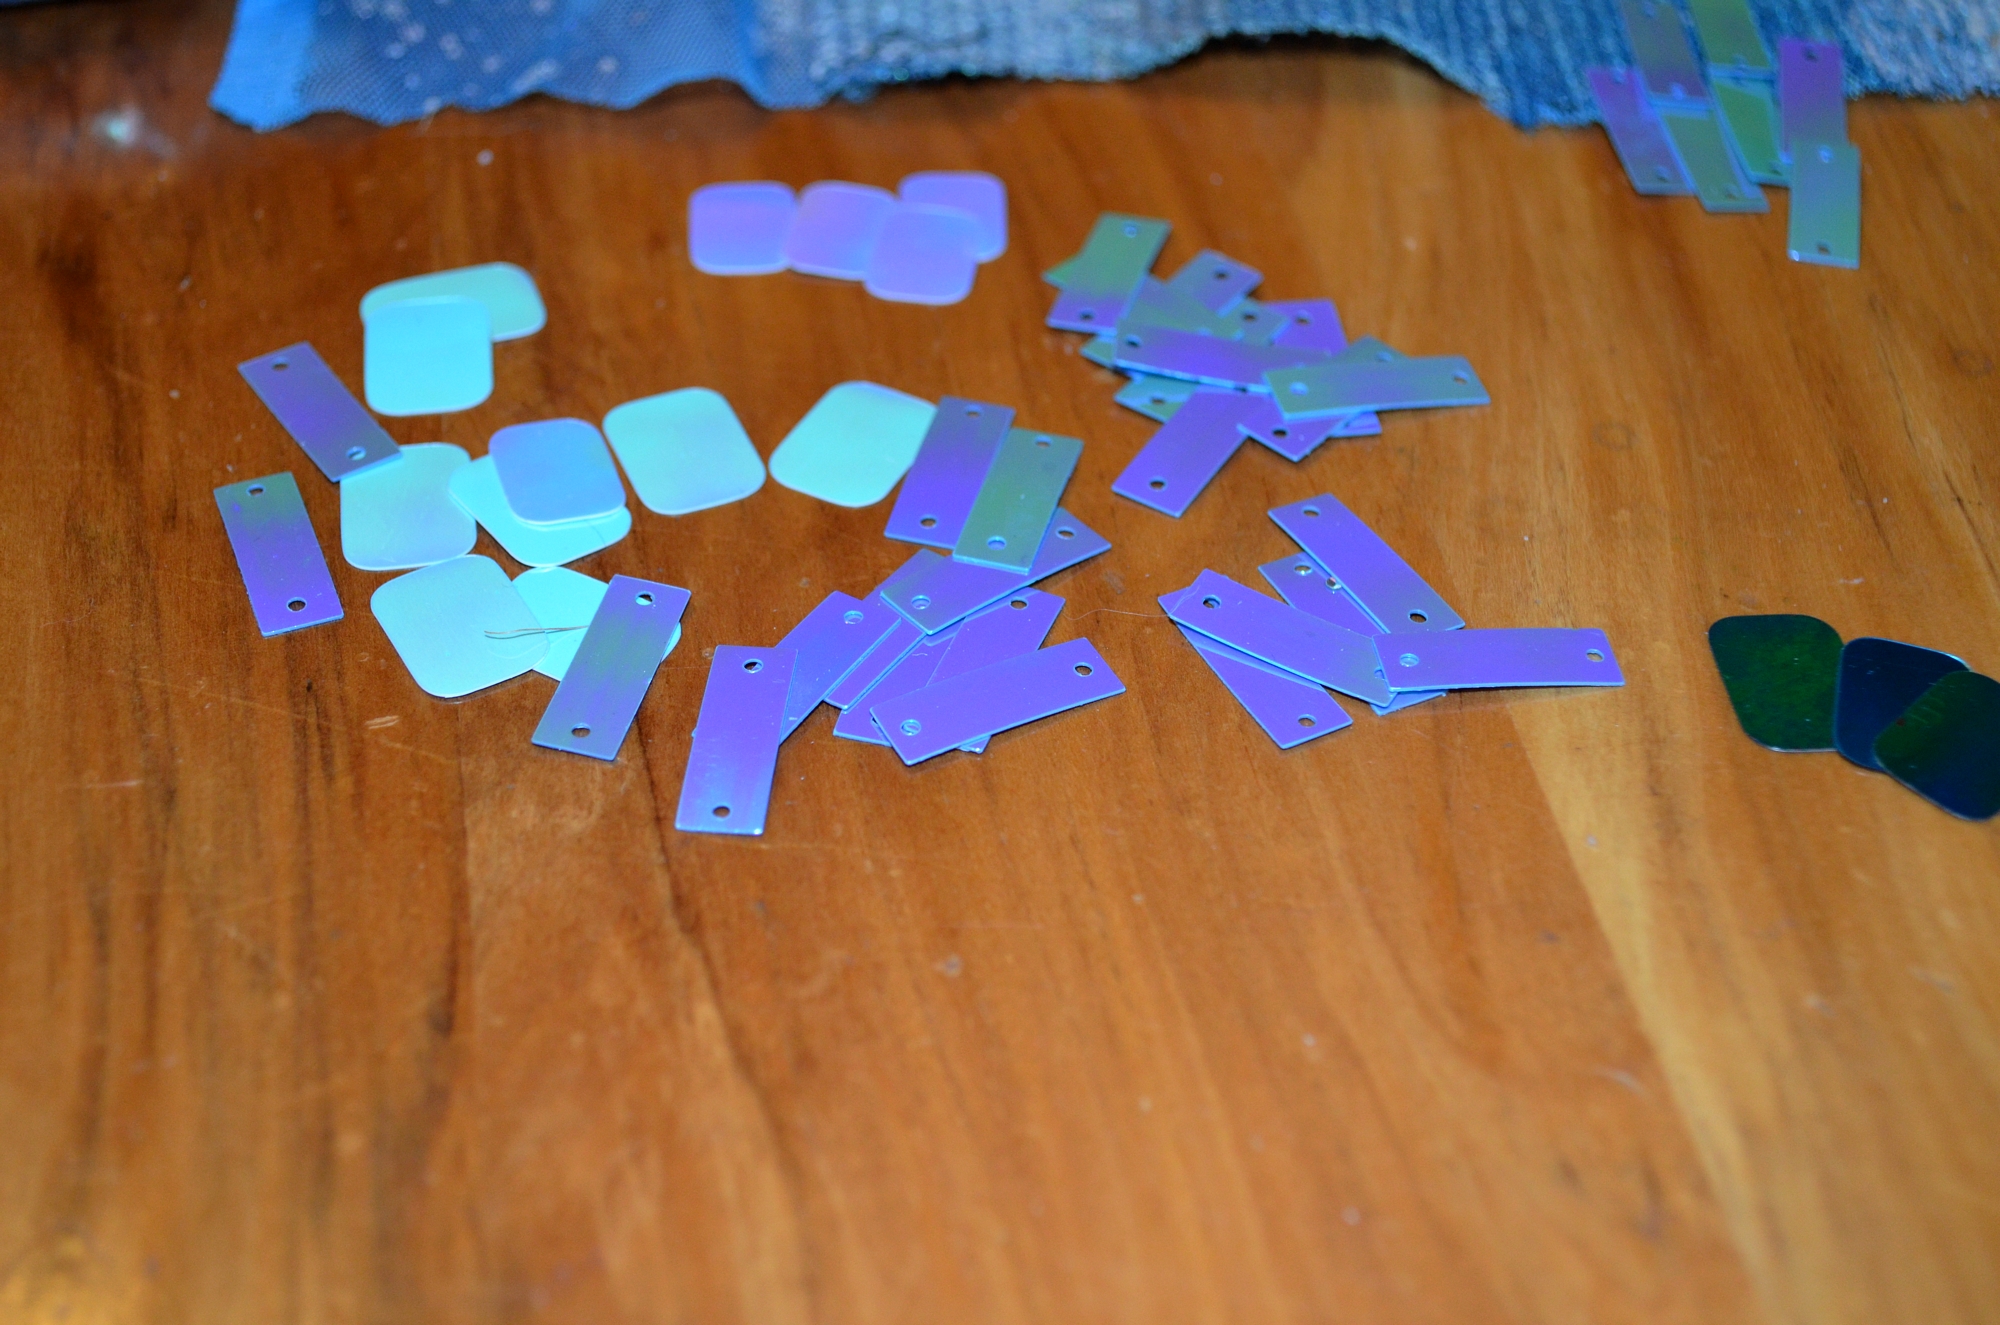
Small problem with trying to get photos, the sequins flash green mostly when vertical, when flat they look really purple. But in scale they are a nice match to the sequined fabric and do indeed blend in between the other sequins.
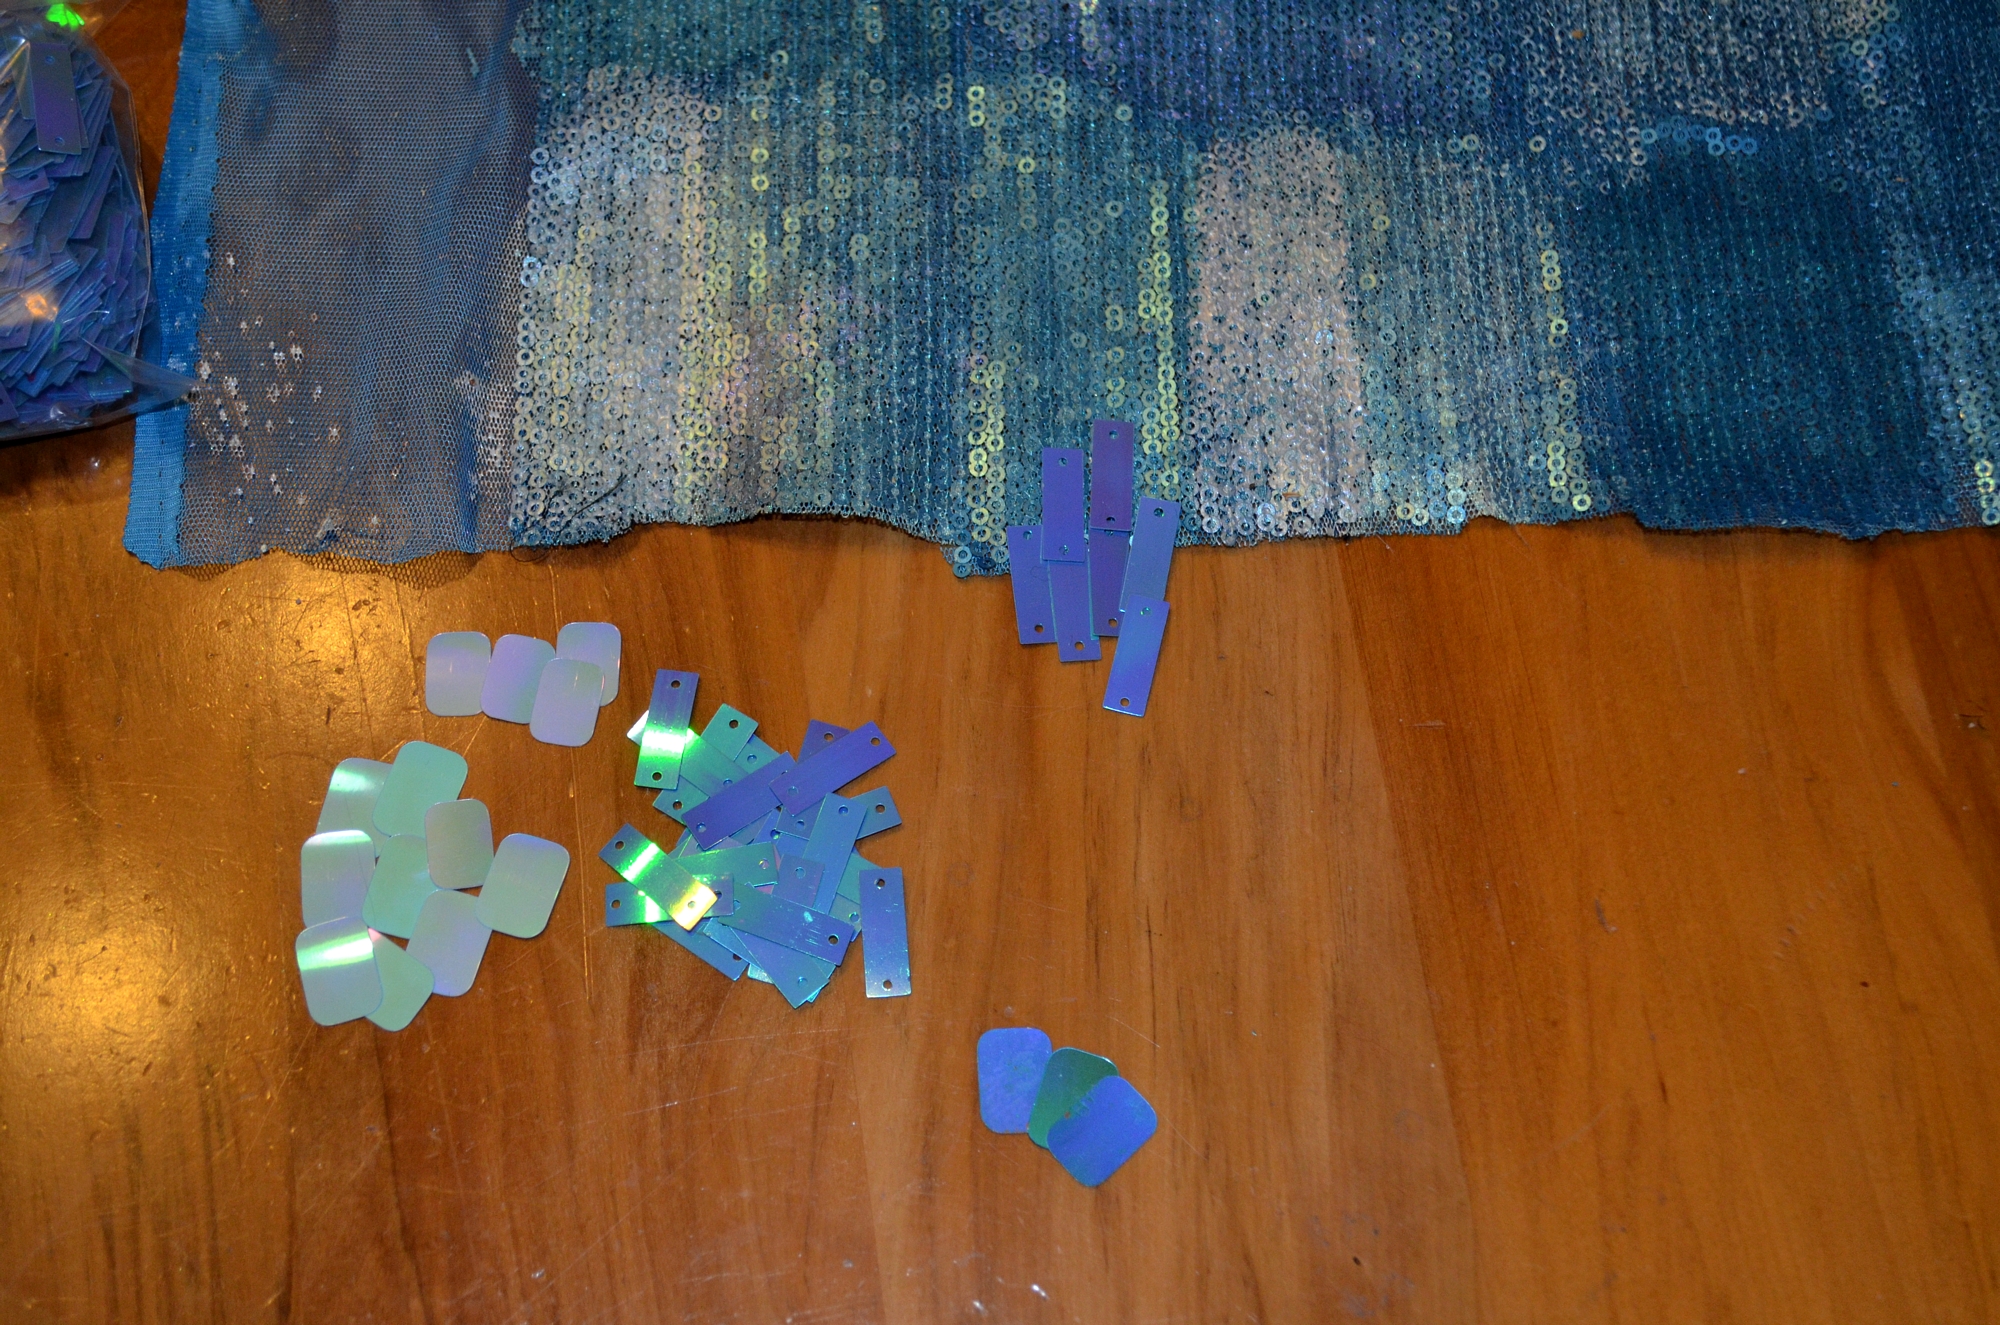
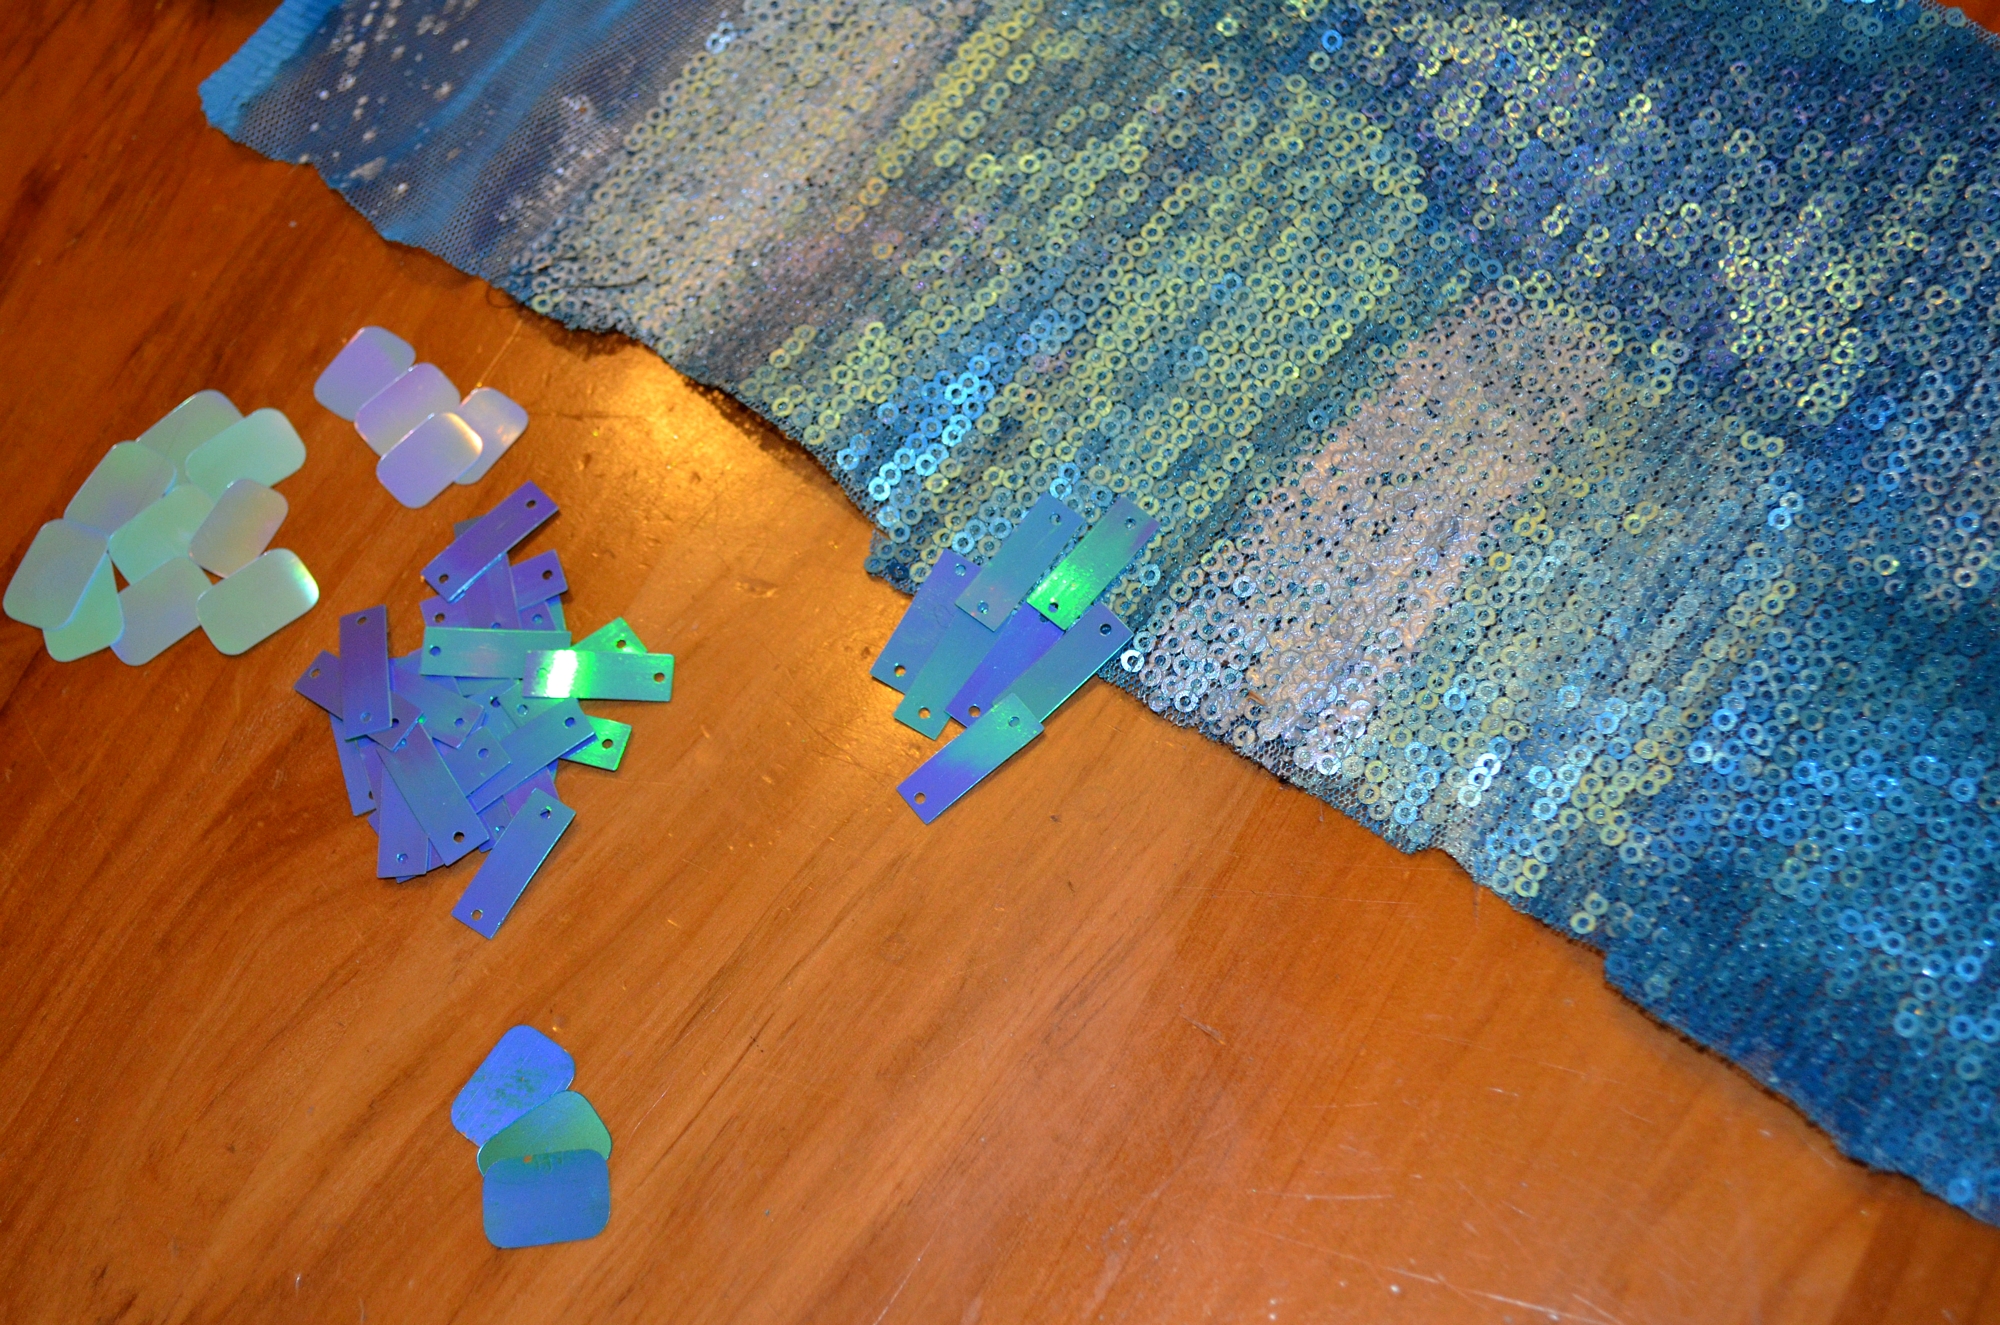
So these are the Athena “green aqua” cornflower blue which I think are slightly deeper tone than the cornflower blue– the base plastic is pale blue but the colours that flash are green and lilac. Really recommended for lower torso then blend up over the bust with paler sequins.

Filed under projects: media recreations, Uncategorized
So I will do a proper tutorial including these images as soon as I am able to pull out the alginate- which due to the process I used will not be for a while. If at all.
So.
Materials:

Alginate, mixing containers, plaster bandages, measuring cups. Also a swimming cap (leaves a clear line in the the impression to help match up sides, also no need to glue it) and a wide straw, split, taped into an oval in cross section to fit my nostrils, cut into small sections.
Mental Prep:
I am claustrophobic and was alone so I made sure my work room was safe. This meant having my computer/entertainment area away from the work area in case of splashing.
I also played a movie I know very well, has no loud noises and I could use to time. This is to reduce panic related issues while totally enveloped in the alginate. “Okay I will wait to the end of this scene before seeing if it is cured”.
I also put on coveralls but kept a warm layer on underneath. I couldn’t have the heater on due to risk of anything going wrong with it while I had water and had to move while unable to see.
So the main risk factors in doing this are panic related or lack of prep work. So make sure everything is in place and you have a plan for just in case. I didn’t want to waste the product but knew I would if I wound up with the stuff up my nose or in my eyes.
Step 1:
Plaster support/mother, back of head
I started by making a plaster shell for the back of my head and for my face. I knew I could just use the bandages straight on my swim cap and skin if I made sure to use a petroleum jelly. This is the same process I I did for my playdough and plaster mold, but this is far more successful as the plaster bandages cure fast and very light. This shell would then be close enough to use alone if there was no alginate left over.
So I cut long and short strips. I used two long strips to define the line from top of head down sides over my covered ears and to the side of my neck. Then filled in the back, with shorter section across and longer strips vertically.
Plaster support/mother, front of head
The face was going to be another issue. From previous experience I knew I would need the mother to be bigger in all directions but not too big. The volume would be filled with alginate and I didn’t want to waste it. So I looked at my other headcast and realised it was perfect due to the amount of clay on there for the silurian. So I laid up the plaster bandages, making sure to not press it right on the clay. I also made sure to leave breathing holes for my nostrils:
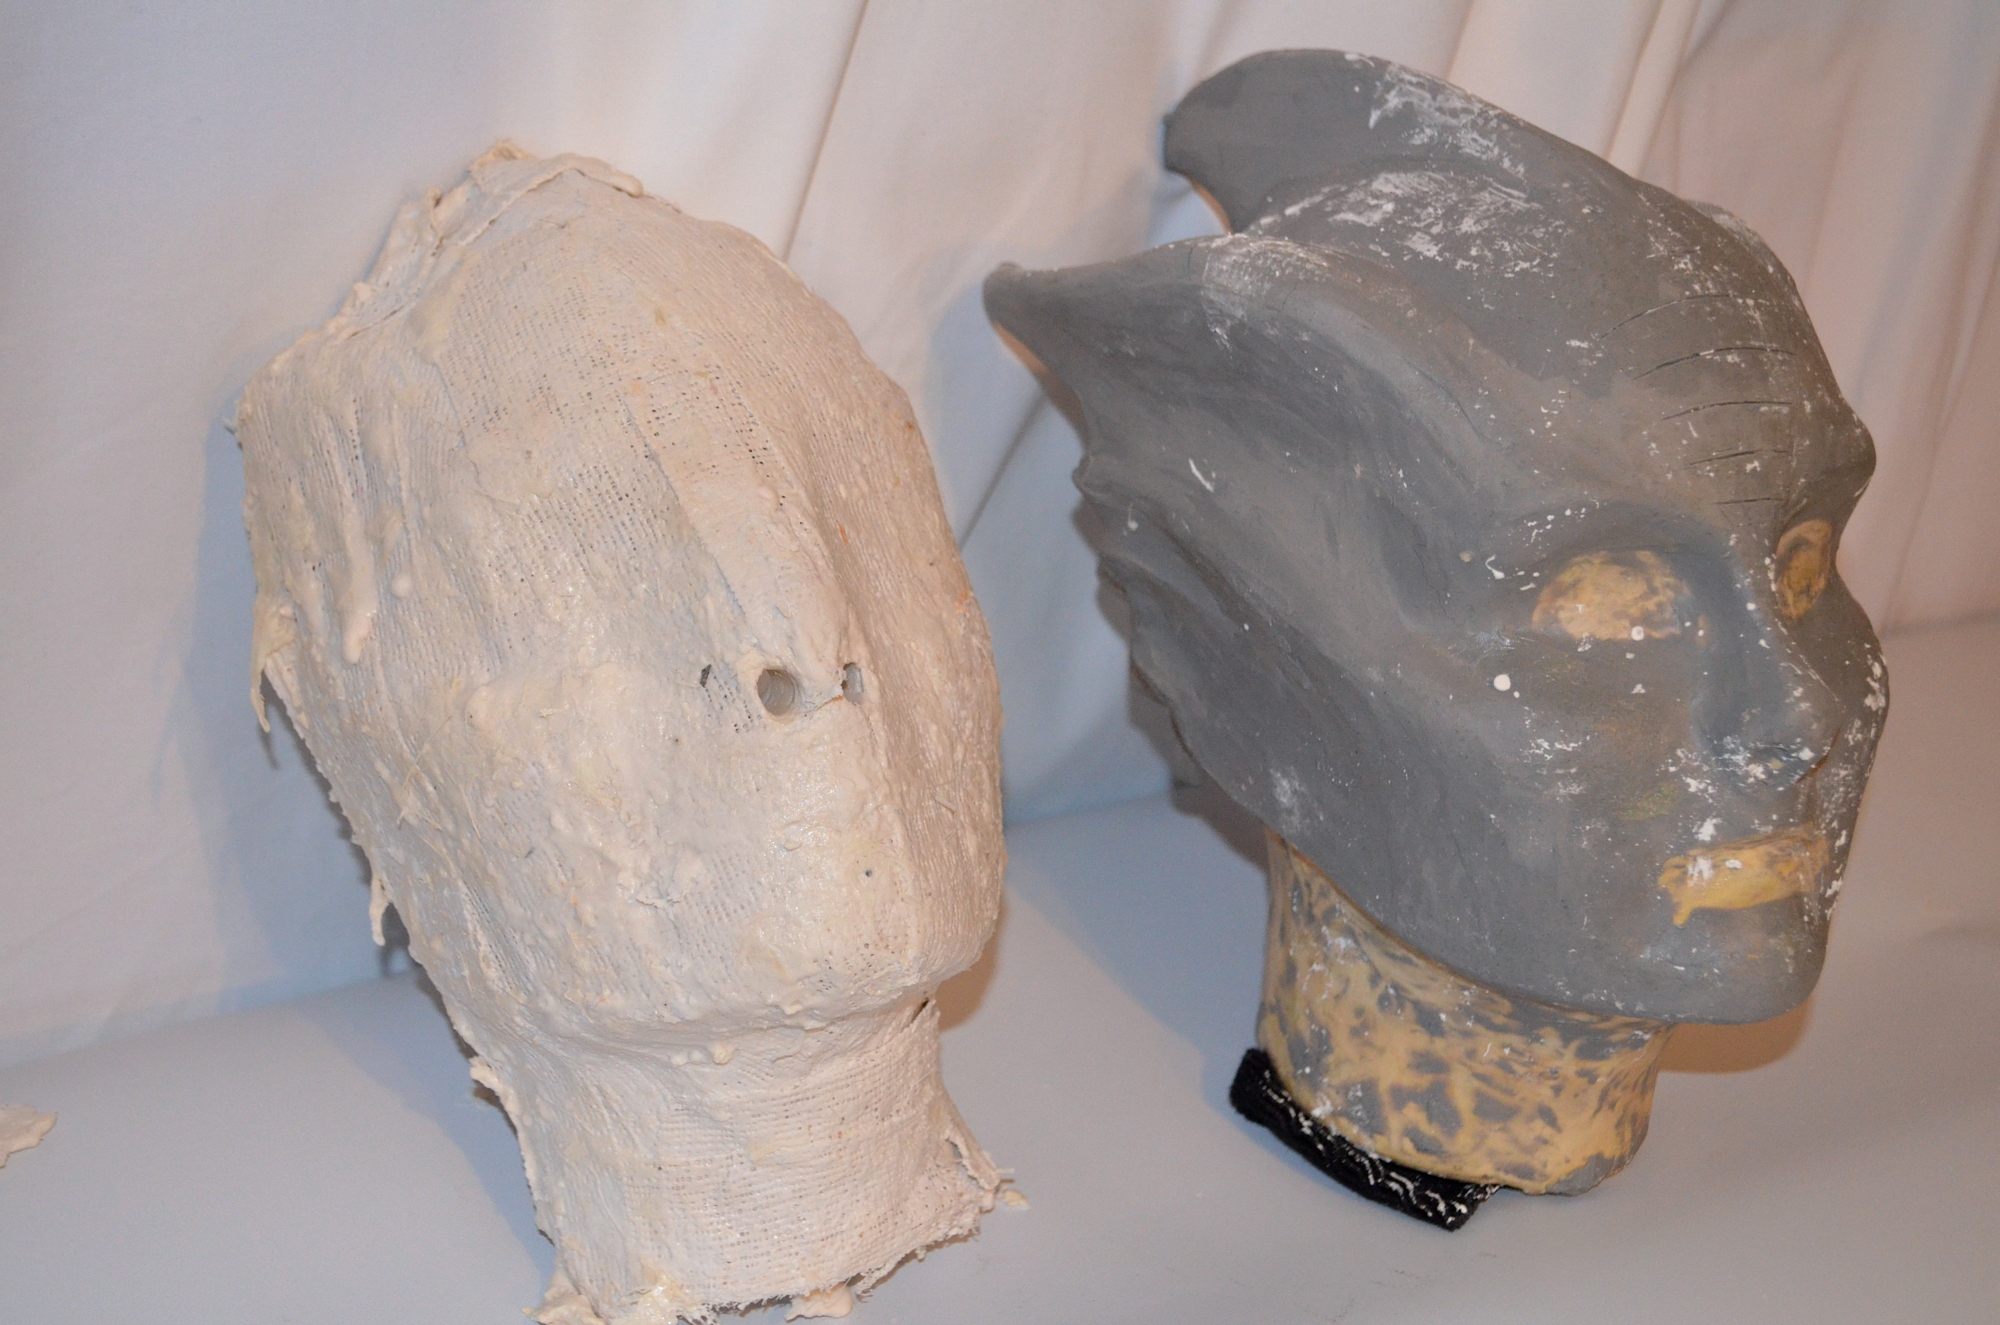
I also knew where my jaw line and ears were so was able to align the edges to match the edges of the back of the mold.
Leave the two parts to dry. While best advice is to leave until bone dry I used mine while still damp as it is Auckland and winter so everything is cold and damp anyway. Also the wetness allowed the alginate to really grip and stay put on the inside.
If you don’t happen to have such a head cast already prepared then it is possible to build up clay on a foam wig head, just measure as you go to make sure you have enough room.
Step 2:
Alginate mixing:
Alginate is a bit like plaster in that it can have a long mix time then suddenly fast gel time. I tested a small amount the day before and decided it was easiest to mix by hand as if I was working with a firm tempora and trying to work out lumps. And you will get lumps. General advice is to get rid of them with a mixing bit on a drill but I found even if it was lumpy like porridge it still worked.
Test straws for nasal comfort. Do this a few times to get used to them. I had to use the largest straw I could find.
Head prep:
I put my tiny pony tail right at the crown as it is easy to see even under a bald cap. This means I can knock it out when I tidy and trim the cast. Then a fishnet hair cap to hold stray hair and also make the swim cap easier to move without pulling on your hair. Finally the swim cap. I trimmed a shallow D out of the front so as to leave my forehead free of tension and reveal a tiny portion of my hair line- I have a widows peak that does make wigs and prosthetics sit lower than they should.
Then petroleum jelly over your face and neck!
Alginate layup:
You need to work fast! As soon as it gets to the tacky stage start filling in the front of the face and spread from the centre up and to the edges. Work very fast. Trying to get the straws through the holes took me a long time due to a single strand of the strip that caught several times. Blow alginate out of the straw from the plaster side (ie in to the inside) as that is the shortest route out.
Then lean forward while bringing the face mold up to you, with one hand support the mold, with the other wiggle the straws until you find each nostil and then if they are on place carefully press your face in. I also distorted the plaster mold a bit so that it would draw out air trapped inside.
As I had straw problems I wound up with the alginate curing within 30 seconds. Which was great as I did panic a bit and the alginate separated easily from my skin.

As this was my first try and the alginate was already gelling I had to mix an extra cup to fill in the gaps at the side. But it was easy to do and the alginate did self adhere as I did not wait too long between each step. Alginate will not self adhere when cured.
Then I repeated the process for the back. And while it was still very damp I put the front half on (straws pulled out as there were now nice big holes to breathe through) and aligned the two parts. Then I left the front half rest while the back half cured on my back. it was a wetter mix so took longer to cure. It also stuck to me a bit more than the front.
Step 3:
Casting:
I used epoxy fibreglass resin. With a mix of West Systems microballoons and colloidal silica to make it to a slurry. I tinted it to a pale pale flesh colour, which has since been taken over by the colour of the microballoons.
I used 600ml of resin and about a cup of filler (1/2 and 1/2) then as it was sluming I used chopped strand filler to press and move the resin up the sides.
I tested drying the back mold and forgot to do this for the front. In fact it was fine. Epoxy is not inhibited by water but it won’t cure through water. So you just need to make sure you don’t move the resin too much on the inside.
Today I separated the parts and there is still some curing to go- I did not speed up the cure with heat as I did not want to lose the alginate cast due to it drying out. In the shade on a cold damp day epoxy is very resistant to curing!
Above mold and cast. with straw stoppers.
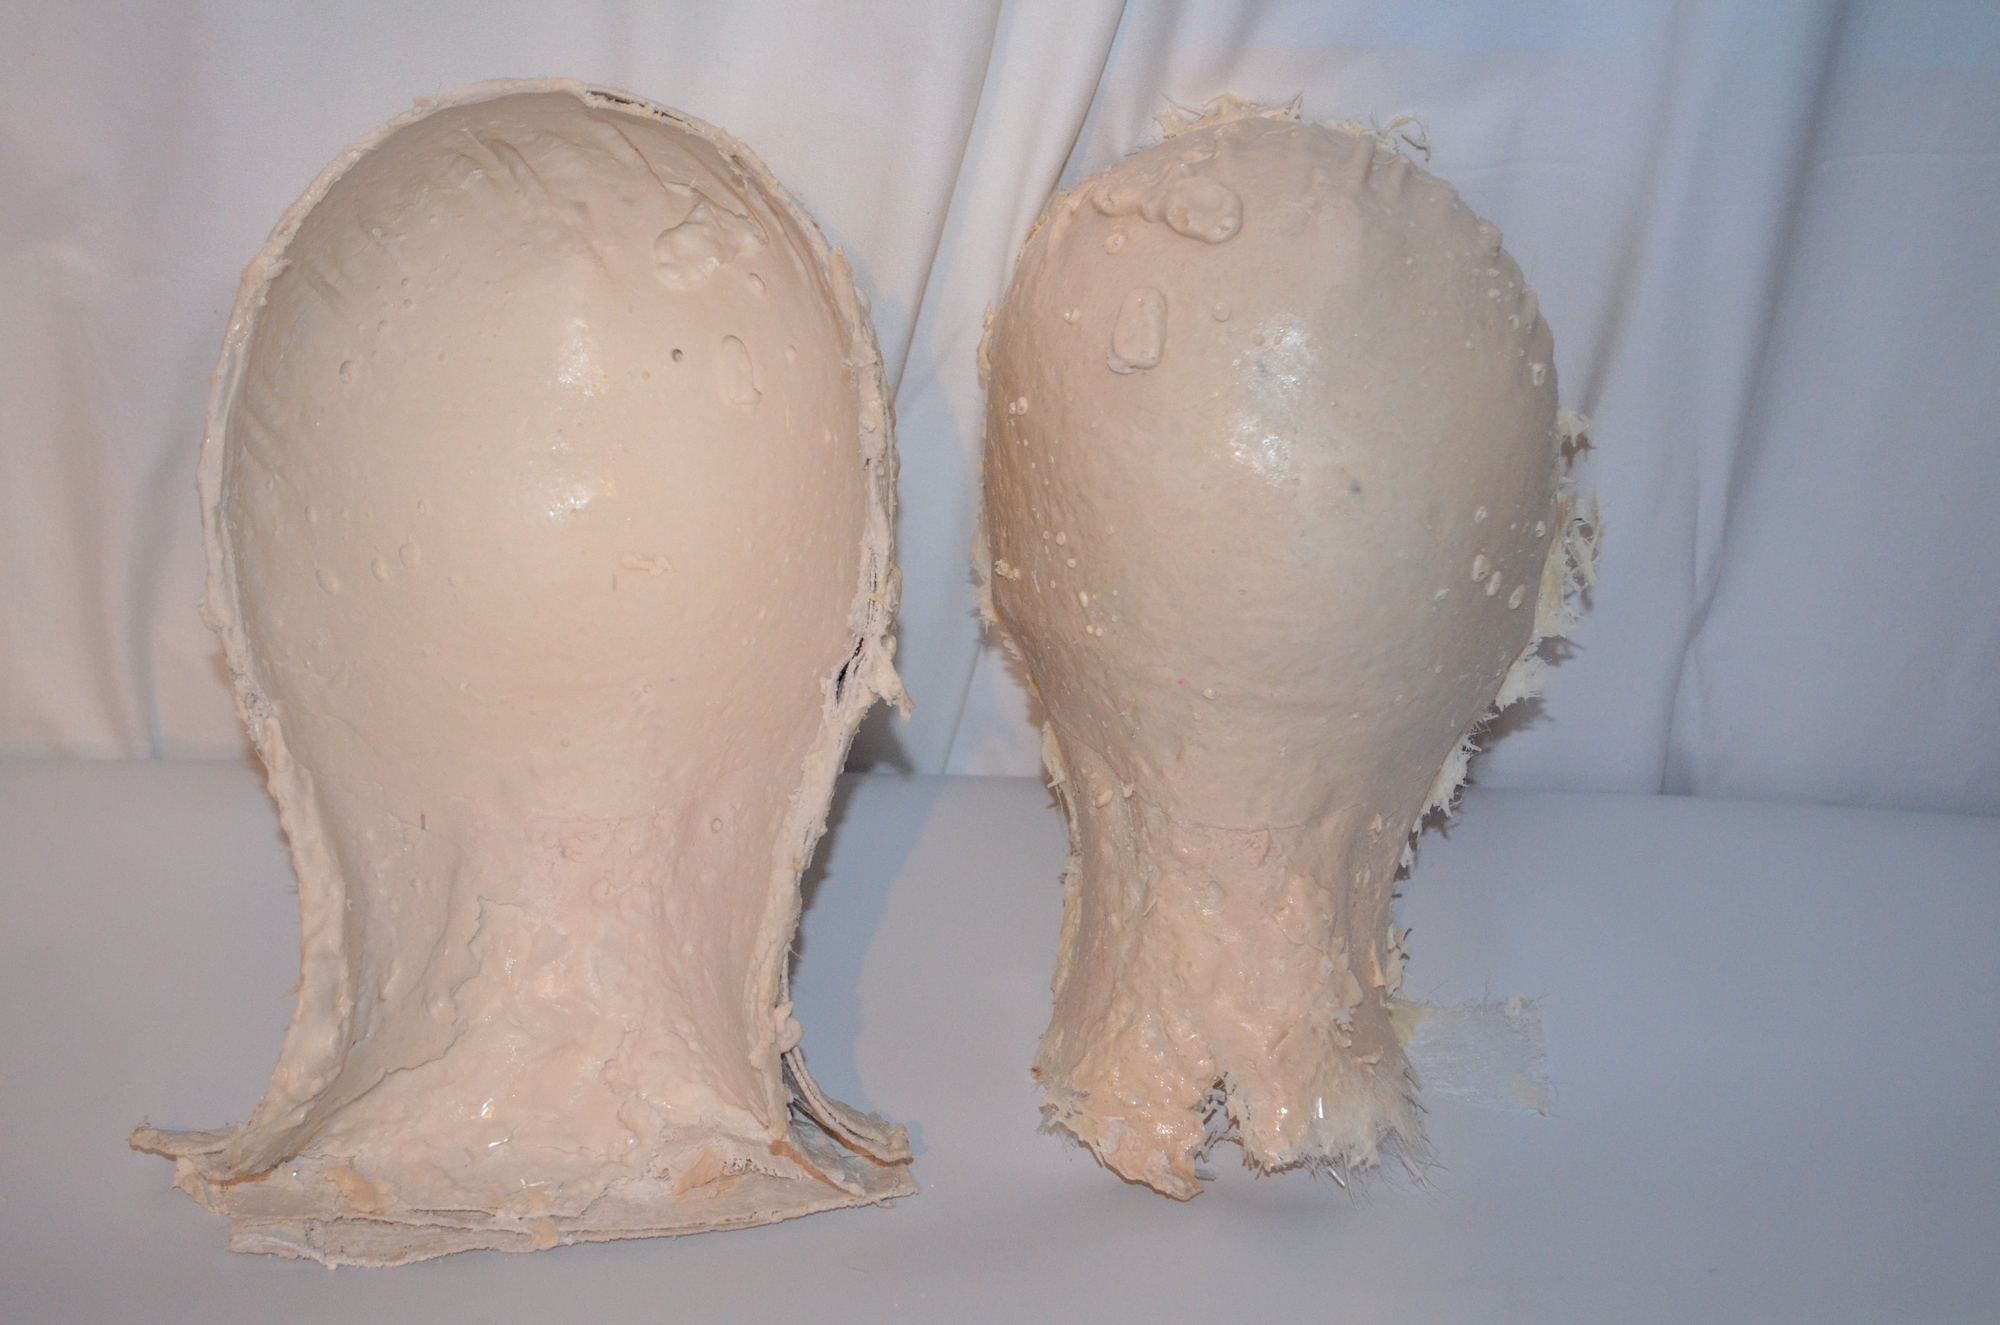
Back, wrinkles of swim cap and hail tail and air bubble can be sanded out.

Once the fibres are trimmed these edges will lie closer together. I can see the line of the bald cap so can align where that appears on each half. This also gives me the location for my ears.
My ear casts are still locked in plaster. They are soaking in water and baking soda to break down the plaster.
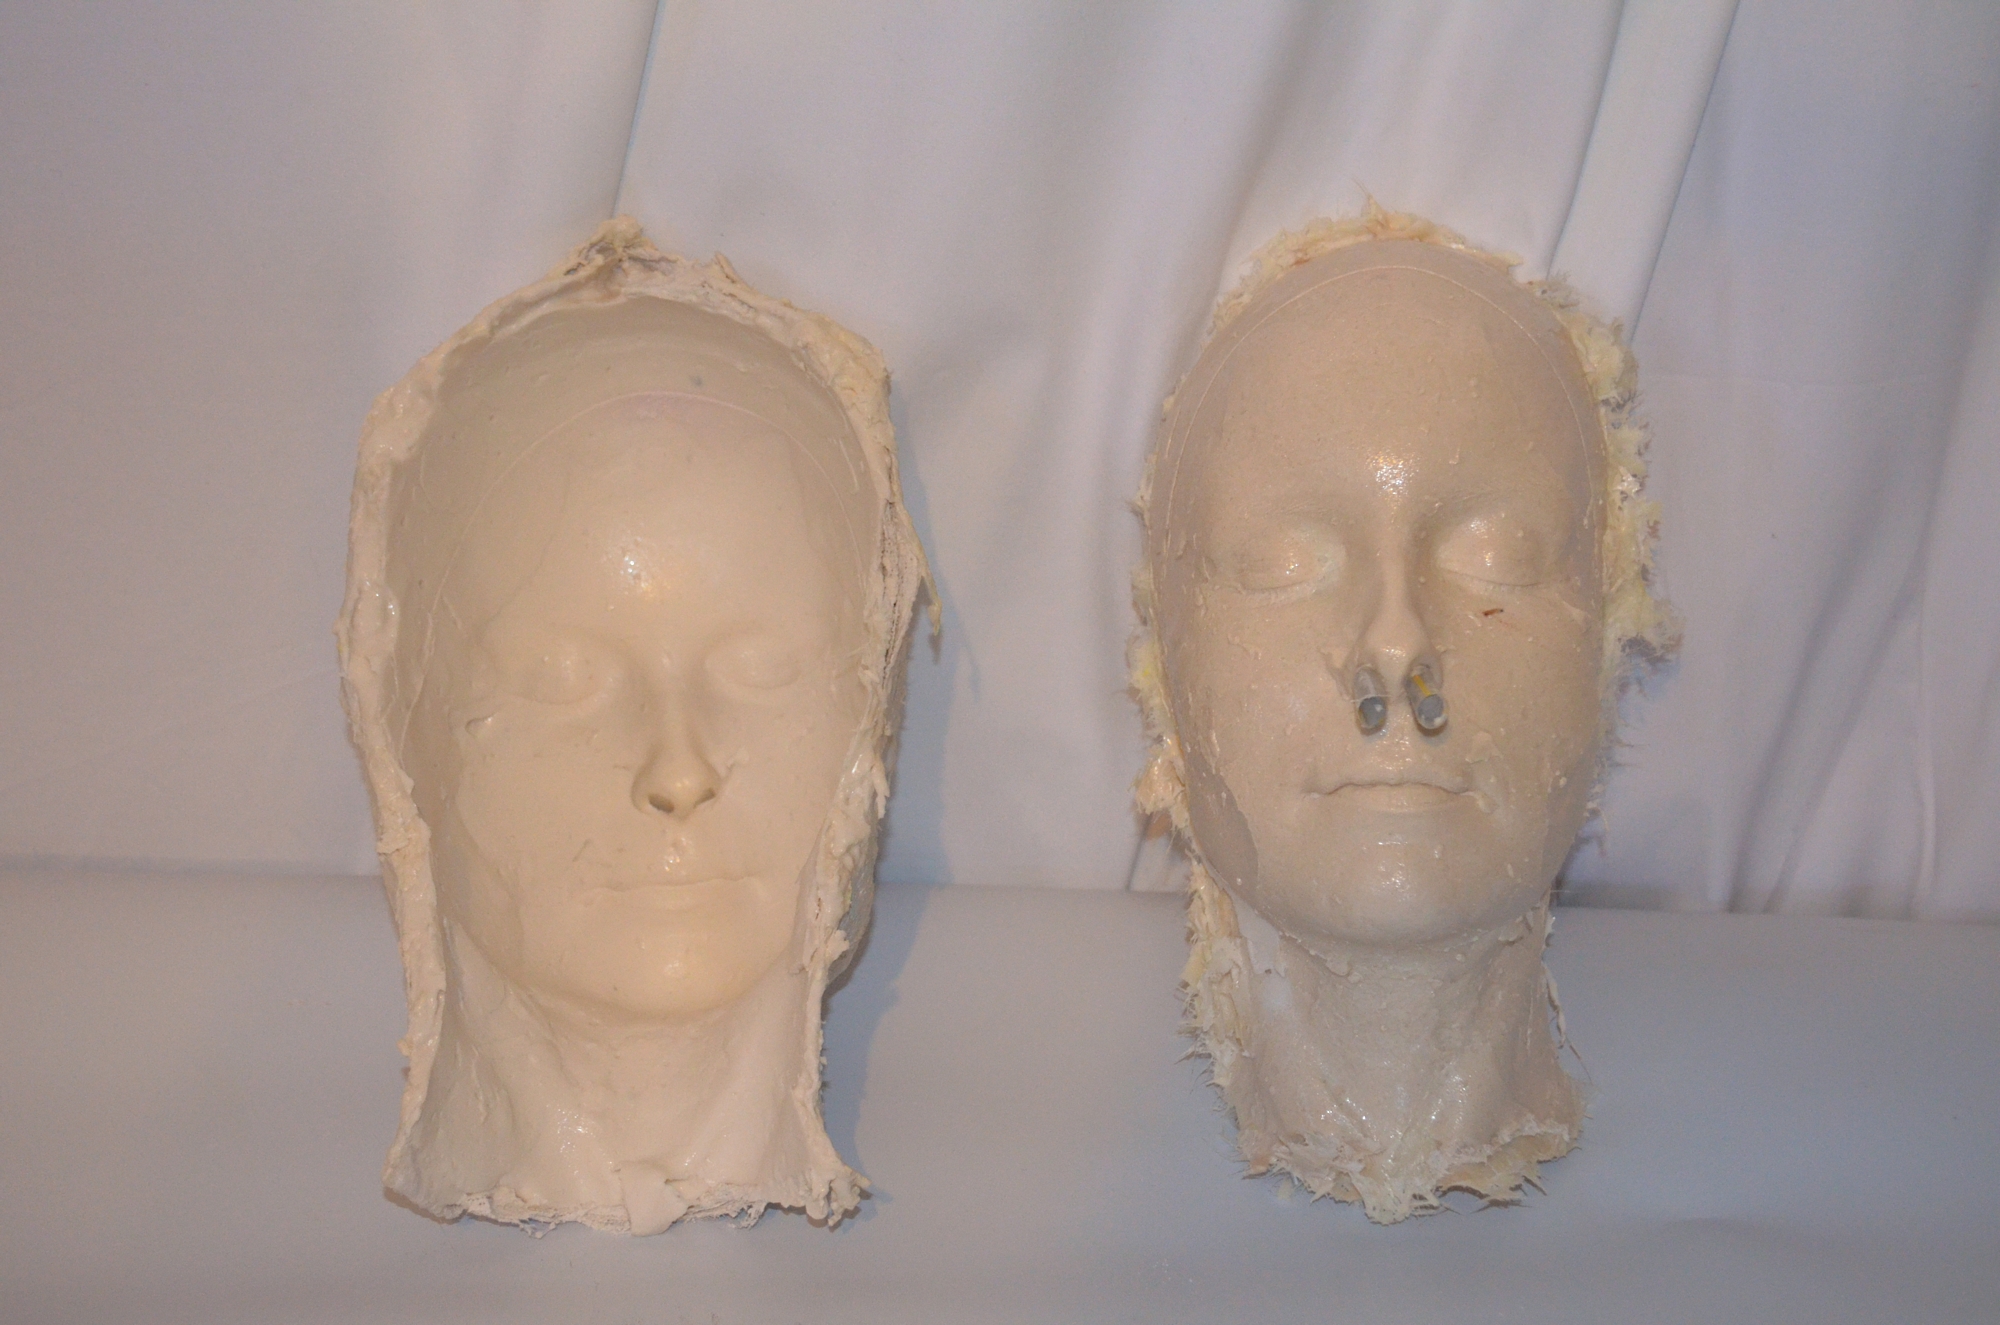
And don’t freak out when you see your face from the outside! I was surpised how narrow my face is but yeah, those are my eyes, nose and mouth.
So Synacthen is an alternative to corticosteroids but that is not what I had the test for. The test is to make sure my own body is producing cortisol after more than a decade on steroids. There are no genuine long terms studies that I know of. Long term studies usually only cover months of use not years (osteopaenia shot out!) But I haven’t really delved PubMed for a while so some studies in the last few years may have popped up.
So the synacthen was painful. The nurse said right from the start it would feel like a punch in the arm. Yes. Yes it did. A punch with a thumbtack hidden in it. But it wore off so really was like a prolonged B12 injection.
It’ll take 5 days for the results as a pathologist has to look at it. I’m hoping it’s clear because this long term use has been preying on my mind for five years at least. So that was after 8 years of use… that may put in to perspective how long term this has been!
But then I got to catch a bus to Newmarket so I could get some fabric geek on. Centrepoint has moved their fabrics around and there is some glorious stuff there. Glorious. I wanted to hug everything. And at a reasonable price! They had $5/m fabrics! They have their $200/m stuff as well but wow! Also perfect pleather for my Maleficent Onsie. Her action suit. Sorry, I keep avoiding the term body suit because yes it’s very tropily me.
And I got alginate to get a cast of my face! Figure now is ideal. And I have enough resin for a really solid, solid cast proper. I don’t know if there is any reason to not cast resin in alginate- I suspect due to the porous nature- but a slick of release/sealer or whatnot will help. Just gotta determine what the whatnot is based on either chemical/physical properties or experiences. I just don’t want a cast I can’t move around myself. I have enough molds like that.
http://www.make-up-fx-forum.com/index.php?topic=535.0
My go to, love this forum. I am a lurker but read read read.
http://www.taxidermy.net/forums/FishTaxiArticles/04/l/04836EAE7D.html
And this is what I mean by don’t even rely on costume specific references! I am not in to taxidermy but hey, this covers many of the issues shared by trying to cast from a body. I have also used car modding forums and outdoor sculpture sites.
And today I have the side effects I was supposed to watch out for- itchy face and tired and a need to.. go. Go, go. So I may have a nap during this weird weather spell and see if I can at least tidy.
And I need this doll:
http://www.stitchkingdom.com/disney-toys-r-us-sdcc-exclusives-71544/
(Winged Fairy Maleficent — Relive the fierce and exciting battle scene from the hit Disney film Maleficent. Maleficent is ready to seek vengeance, dressed in a true-to-character fitted black body suit with knee-high boots, dramatic black wings and elegant horns.)
Reasons are obvious-references especially of the back. The headpiece is not the right one but wow they went the whole way with even stitching details (due to scale I didn’t expect some of them to be there.)
But it has also confirmed to me how I’ll make the wings (yay working out hinging.)
Filed under projects: media recreations, Uncategorized
I did the traditional stovetop method. Word of caution though: Start with cold water and sift the flour!
The lumpy gluey stuff is probably the softer thus better option for a fine detail face impression, I can cope with oiling up my face so it doesn’t stick yeah??? But the lumps are making it less ideal.
The brighter smoother stuff is better fo actual dough.
Oh another hint. Probably boil the salt and water first to dissolve it fully, let cool and then sift in the flour and cream of tartar.
http://www.instructables.com/id/How-to-Make-Playdough-Play-doh/
Sooo pressing face in dough before or after hair colouring…..? I think before…
Filed under projects: media recreations, Uncategorized

Filed under projects: media recreations, Uncategorized
I have horns. In fact I am wearing them right now. So light and well balanced! I may just wrap a length of fabric around to get a reasonable selfie.
There is a narrow support but that is just being held in place by a wide strap of elastic looped around my hairline. I need to decide on how I’ll make the join stronger (atm just some araldite) as the support flexes just enough to curve to my head (slightly narrower across the brow than the wig head though everything else is great.
And this is just making me really sure I want to do all the versions of her just to wear these horns.
Warped section and all. That’s about to be fixed anyway 🙂
Filed under projects: media recreations, Uncategorized
Sooo, the duo tone blue green doesn’t show up in the photo but it does in reality and I’ll just mix some and coat it tomorrow.
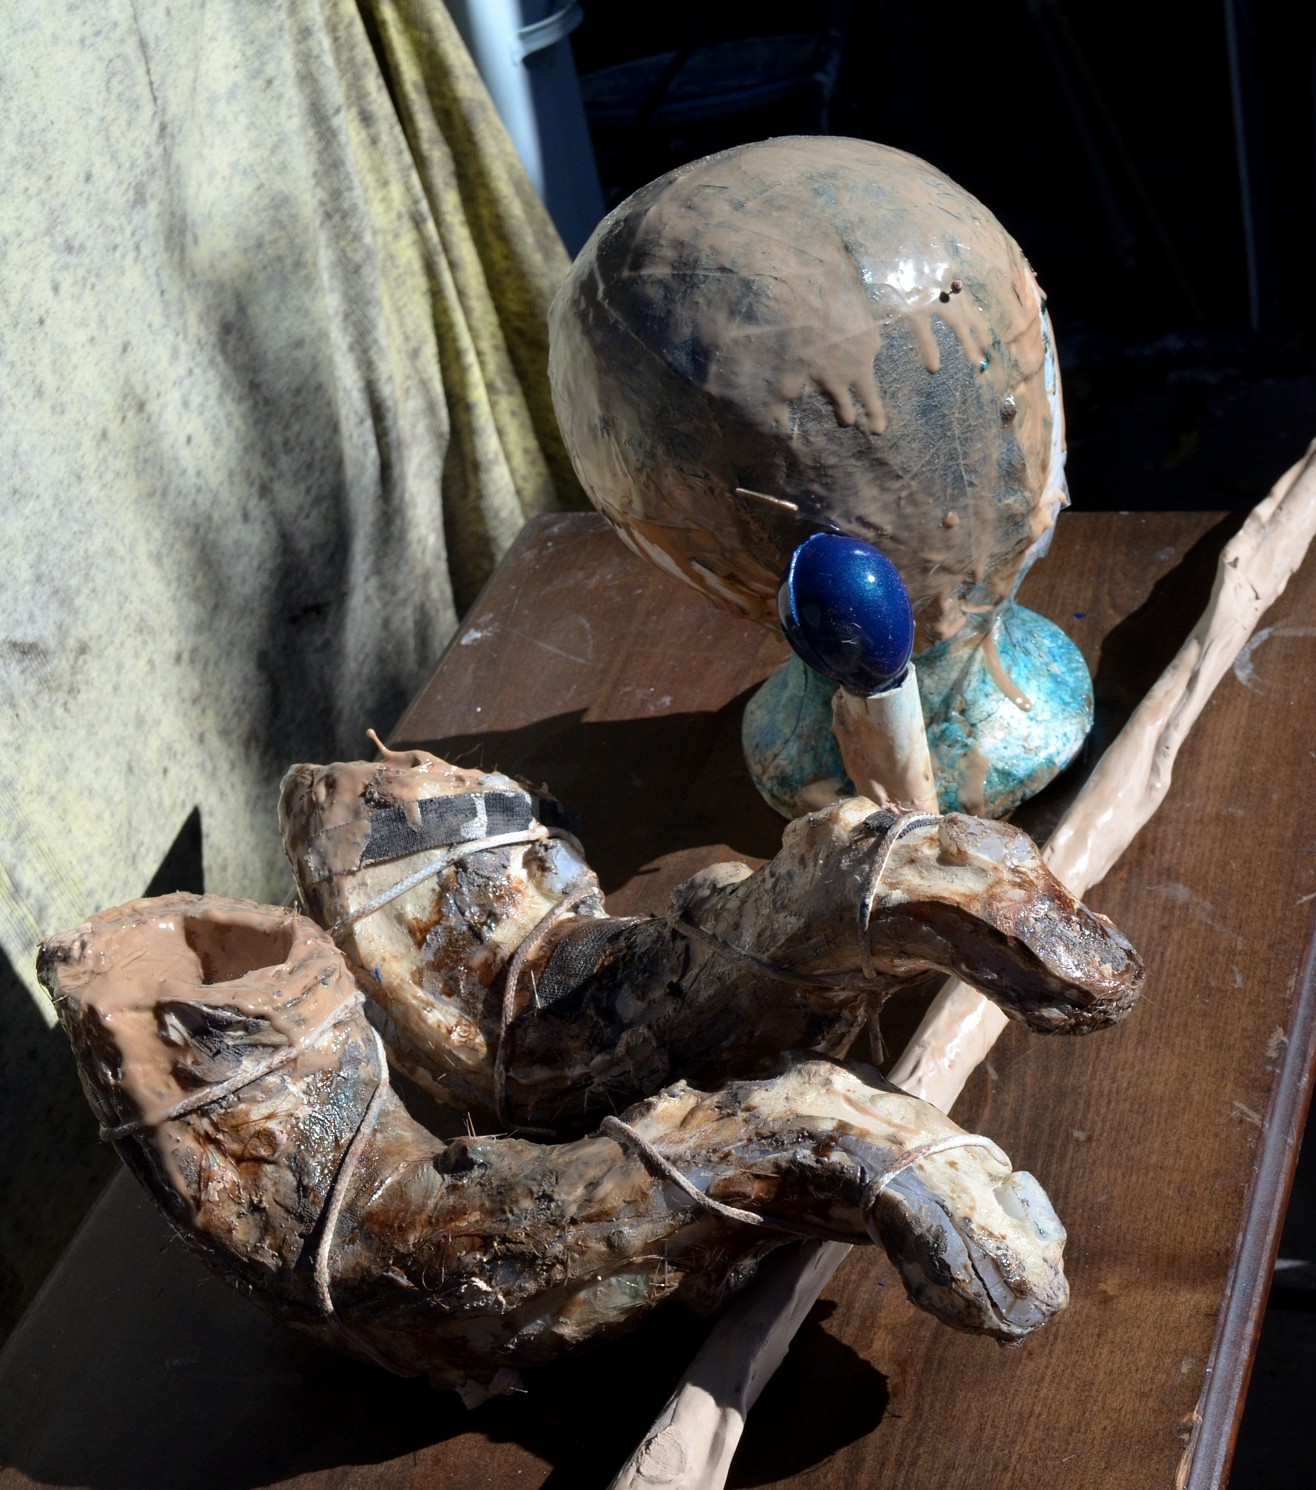
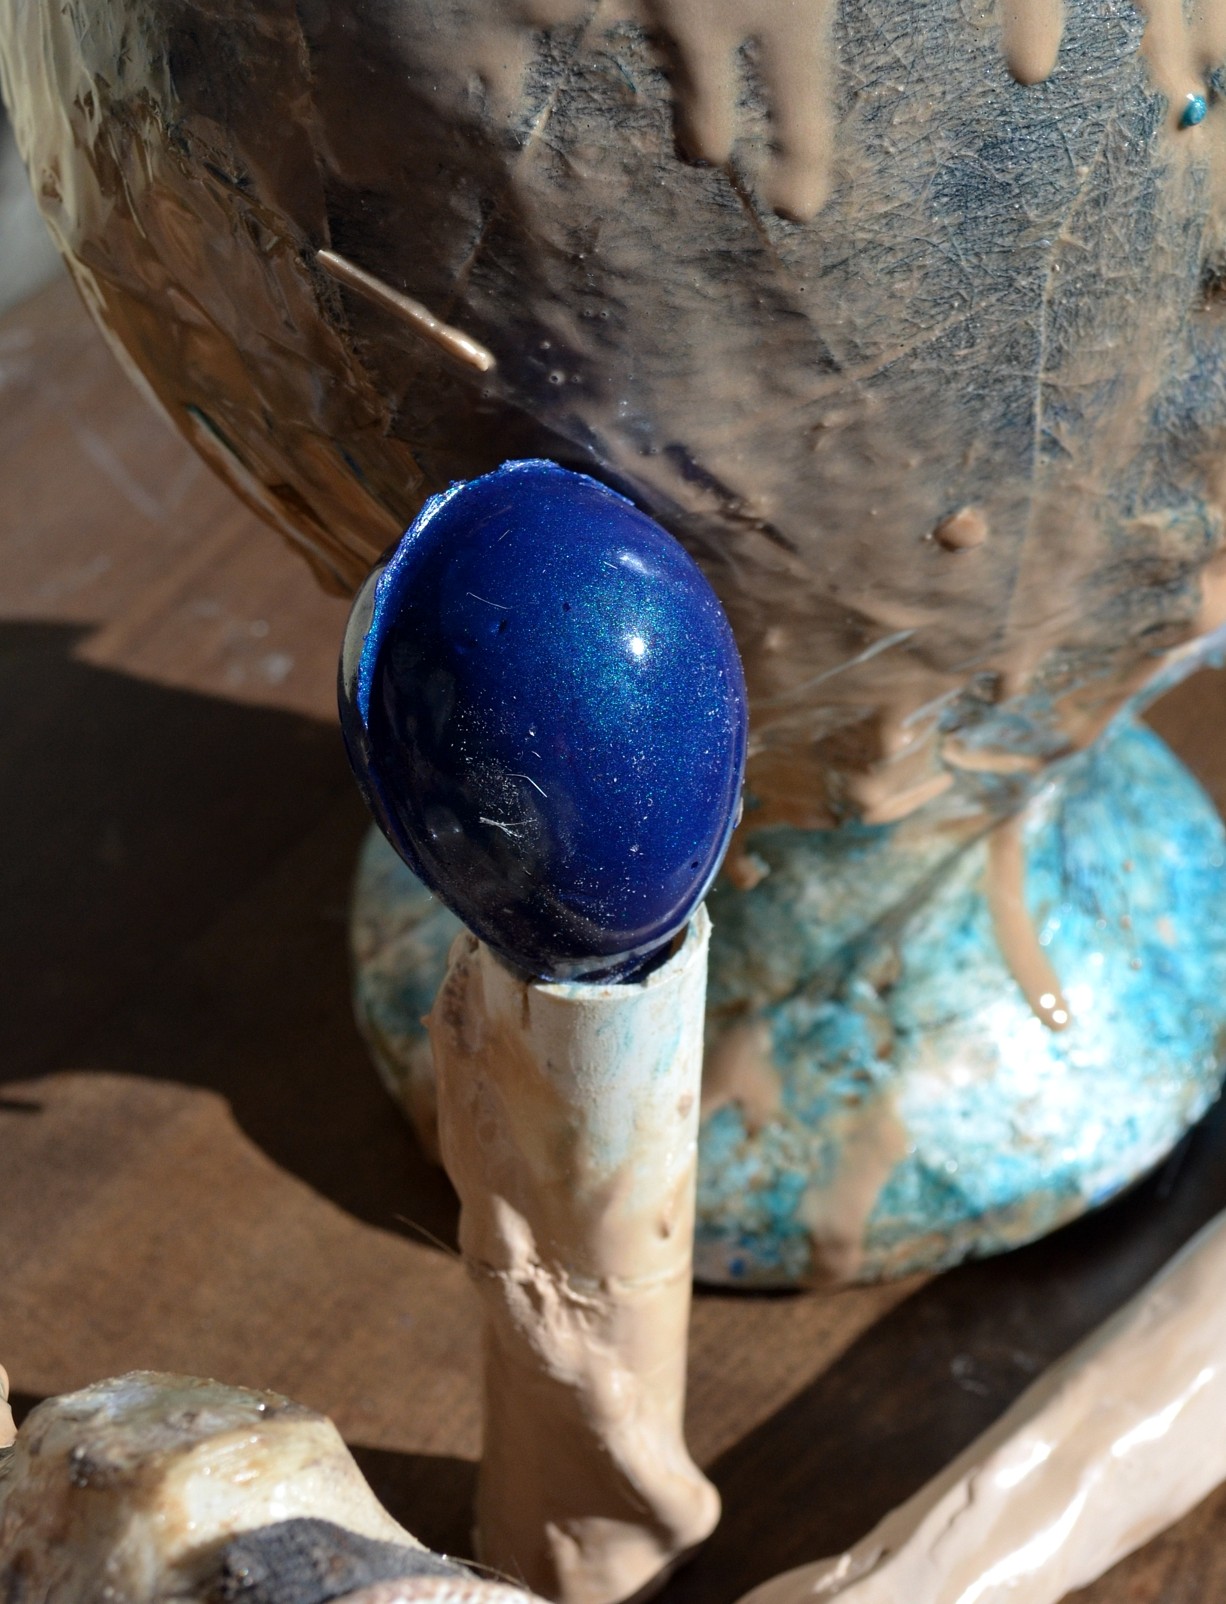
So I put the horns and head in the sink and used hot water to soften them enough to remove from forms.

E voila! Head support, untrimmed horns and staff all ready for the next stage of sticking together and sanding.
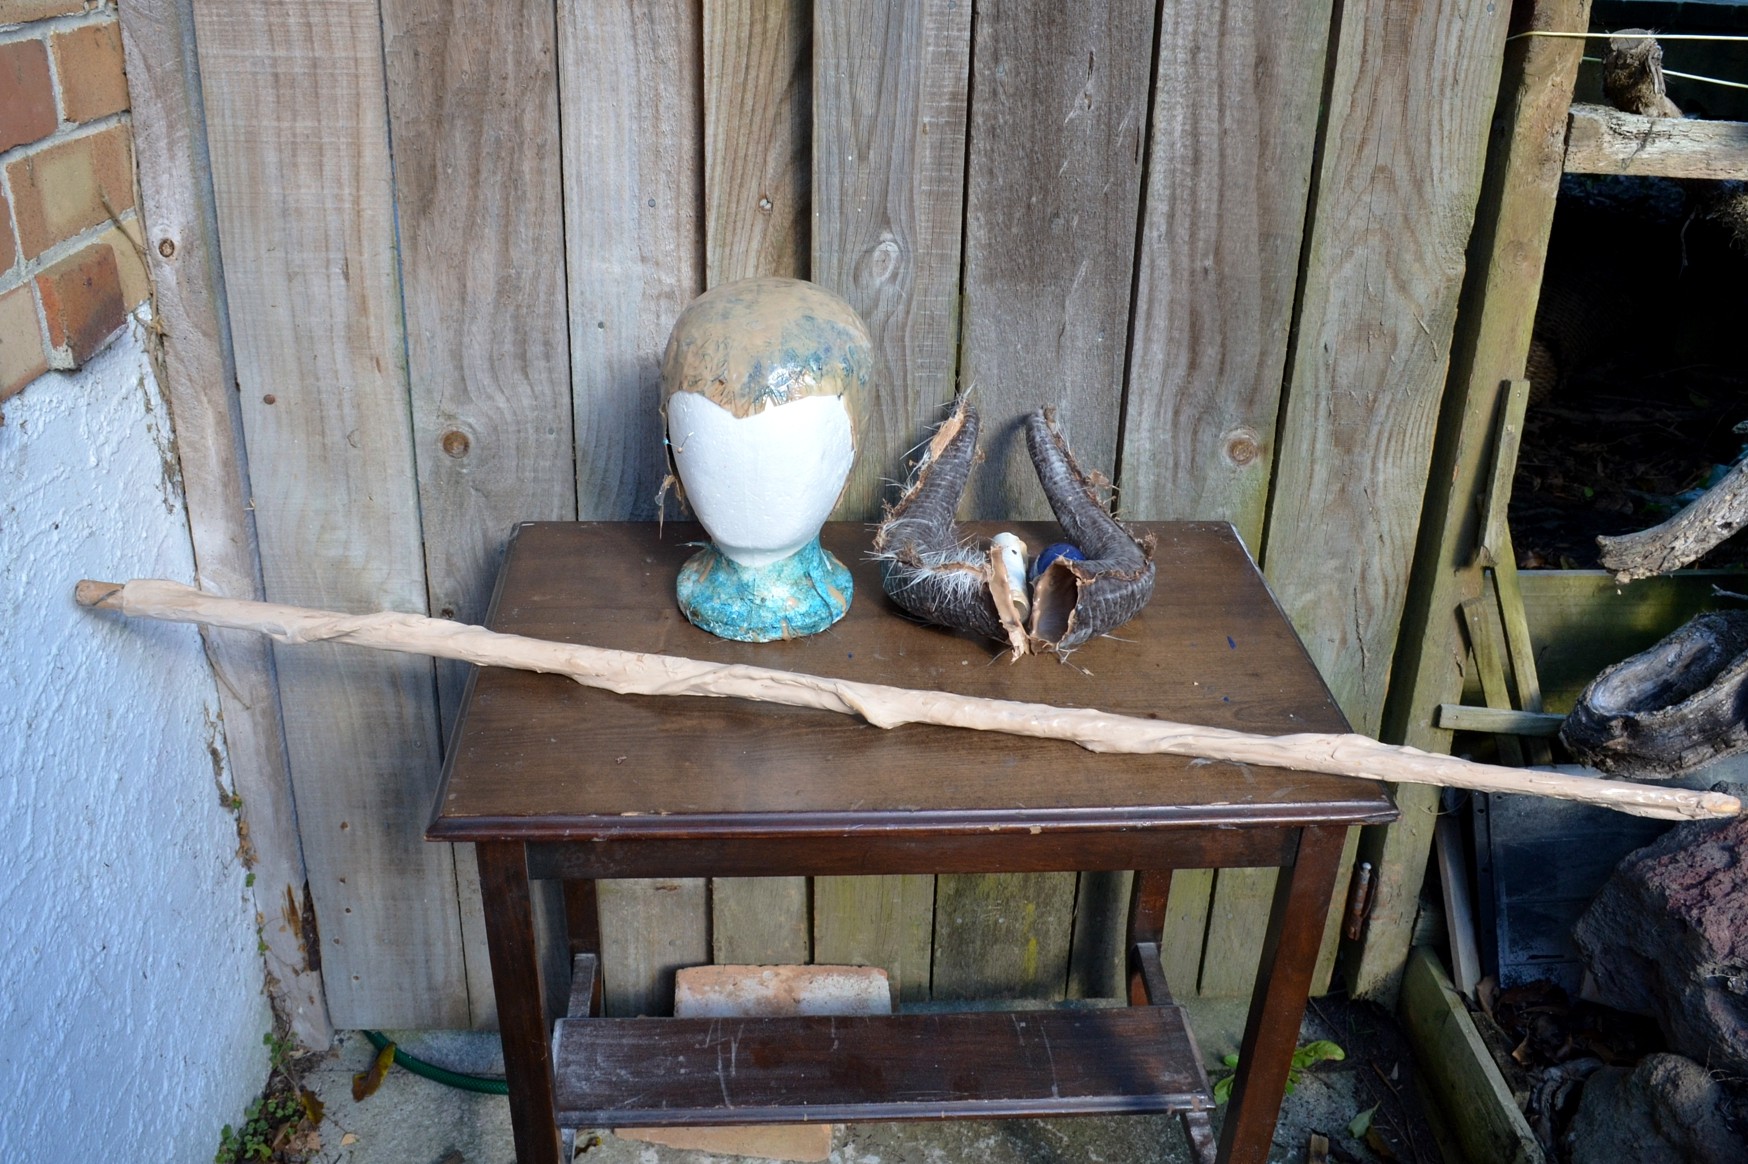

See the thin layer on the horns? It’s a bit tricky to do and I’ll probably not do that again. These will get a layer of black latex for the show so I don’t need to try and make some latex sheeting. It’ll stay well until I need to remove it 🙂
So how to stick the horns to the support? No idea just yet! They’ll be trimmed before anything else. And I’ll try and get some foam inside. Still not sure how one of the horns got warped but it must have been during curing as it won’t heat shape out.
Filed under projects: media recreations, Uncategorized
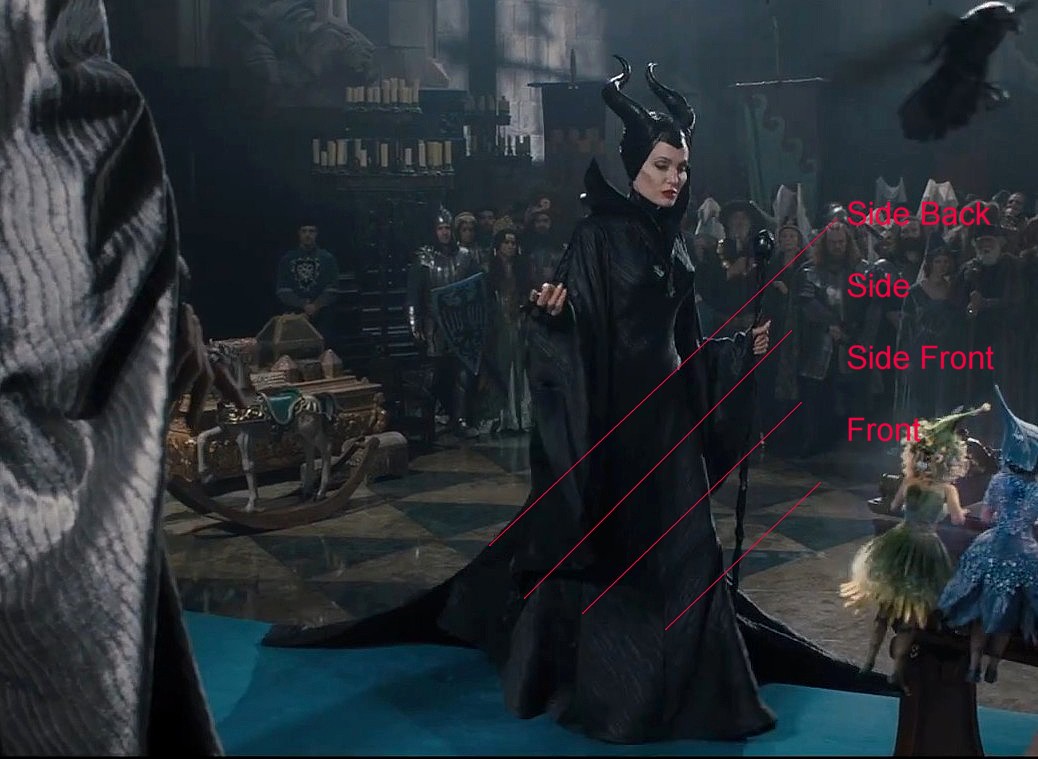
I had suspected but a few images put together really do reveal this quite clearly.
If you watch the Awkward Situation clip you can see how the train skims the ground without folding or dragging. If you watch the edge of the train as she goes up the steps it even catches and springs just like a hooped skirt. If you have ever worn hoops or a cage crinoline with flat steels/plastic it wibbles a bit like a jellyfish.


Note how the front edge of the train stops, it doesn’t just pull like fabric under tension it moves like there is a wired edge. And in movement the edge then springs forward once released from that first step.


Here the train is caught on the last step but this is mainly to show the front of the gown is not also stifened. It does have a fairly deep hem which does has some sort of facing but it still flows. It also looks like Angelina is wearing platforms to add to her height- note how the toes push the fabric out above hem line.
You can also see the wired edge also extends in to the seam where the train is sewn to the gown. This makes sense to help support the full train. Having now made mine it is very heavy indeed.
This then explains why that seam appear to be top stitched or otherwise additionally reinforced in other images.
So I had a look at stills again and they do also support the idea of a supported train. In the still below (screengrab) you can see how the train edge is under a lot of tension, but also there is a mystery “bump” near the join between the leather and shell fabric- it does not correspond with the step or any fabric componant of the gown. This is most likely due to a support underneath lifting off the ground- as she is turning this makes sense.
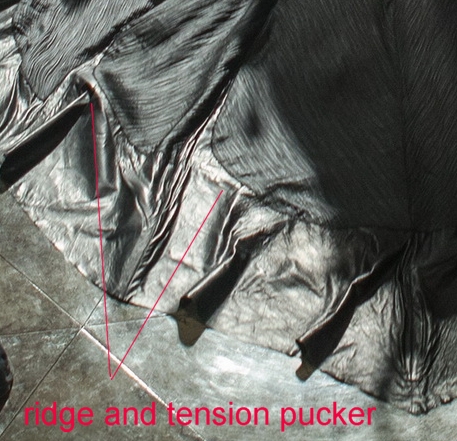
And in this still you can see a ridge that follows the main curve of the leather. And even where the layers are caught to the support hoop in the 2nd to left panel.
So a U shaped hoop on the bottom of the train and two gently flared strips inside the front edge of the train. Imagine a curvy scoop. To make mine I’ll be making a tube of fabric to tack to the underside of my train. And a wrapped facing on the front edge. Then wrap three layers of plumbers coil with sports tape to insert just before putting the entire piece on. I will have to use temporary fastenings to hold the ends in place so as to be able to remove them for convention safety!
I have also just overdyed a huge metal zip (possibly for a sleeping bag) so I will have a super mega firm fastening that will survive the pull and drag of this train. Then I can cover it with a spine.
And now to resize my collars 🙂
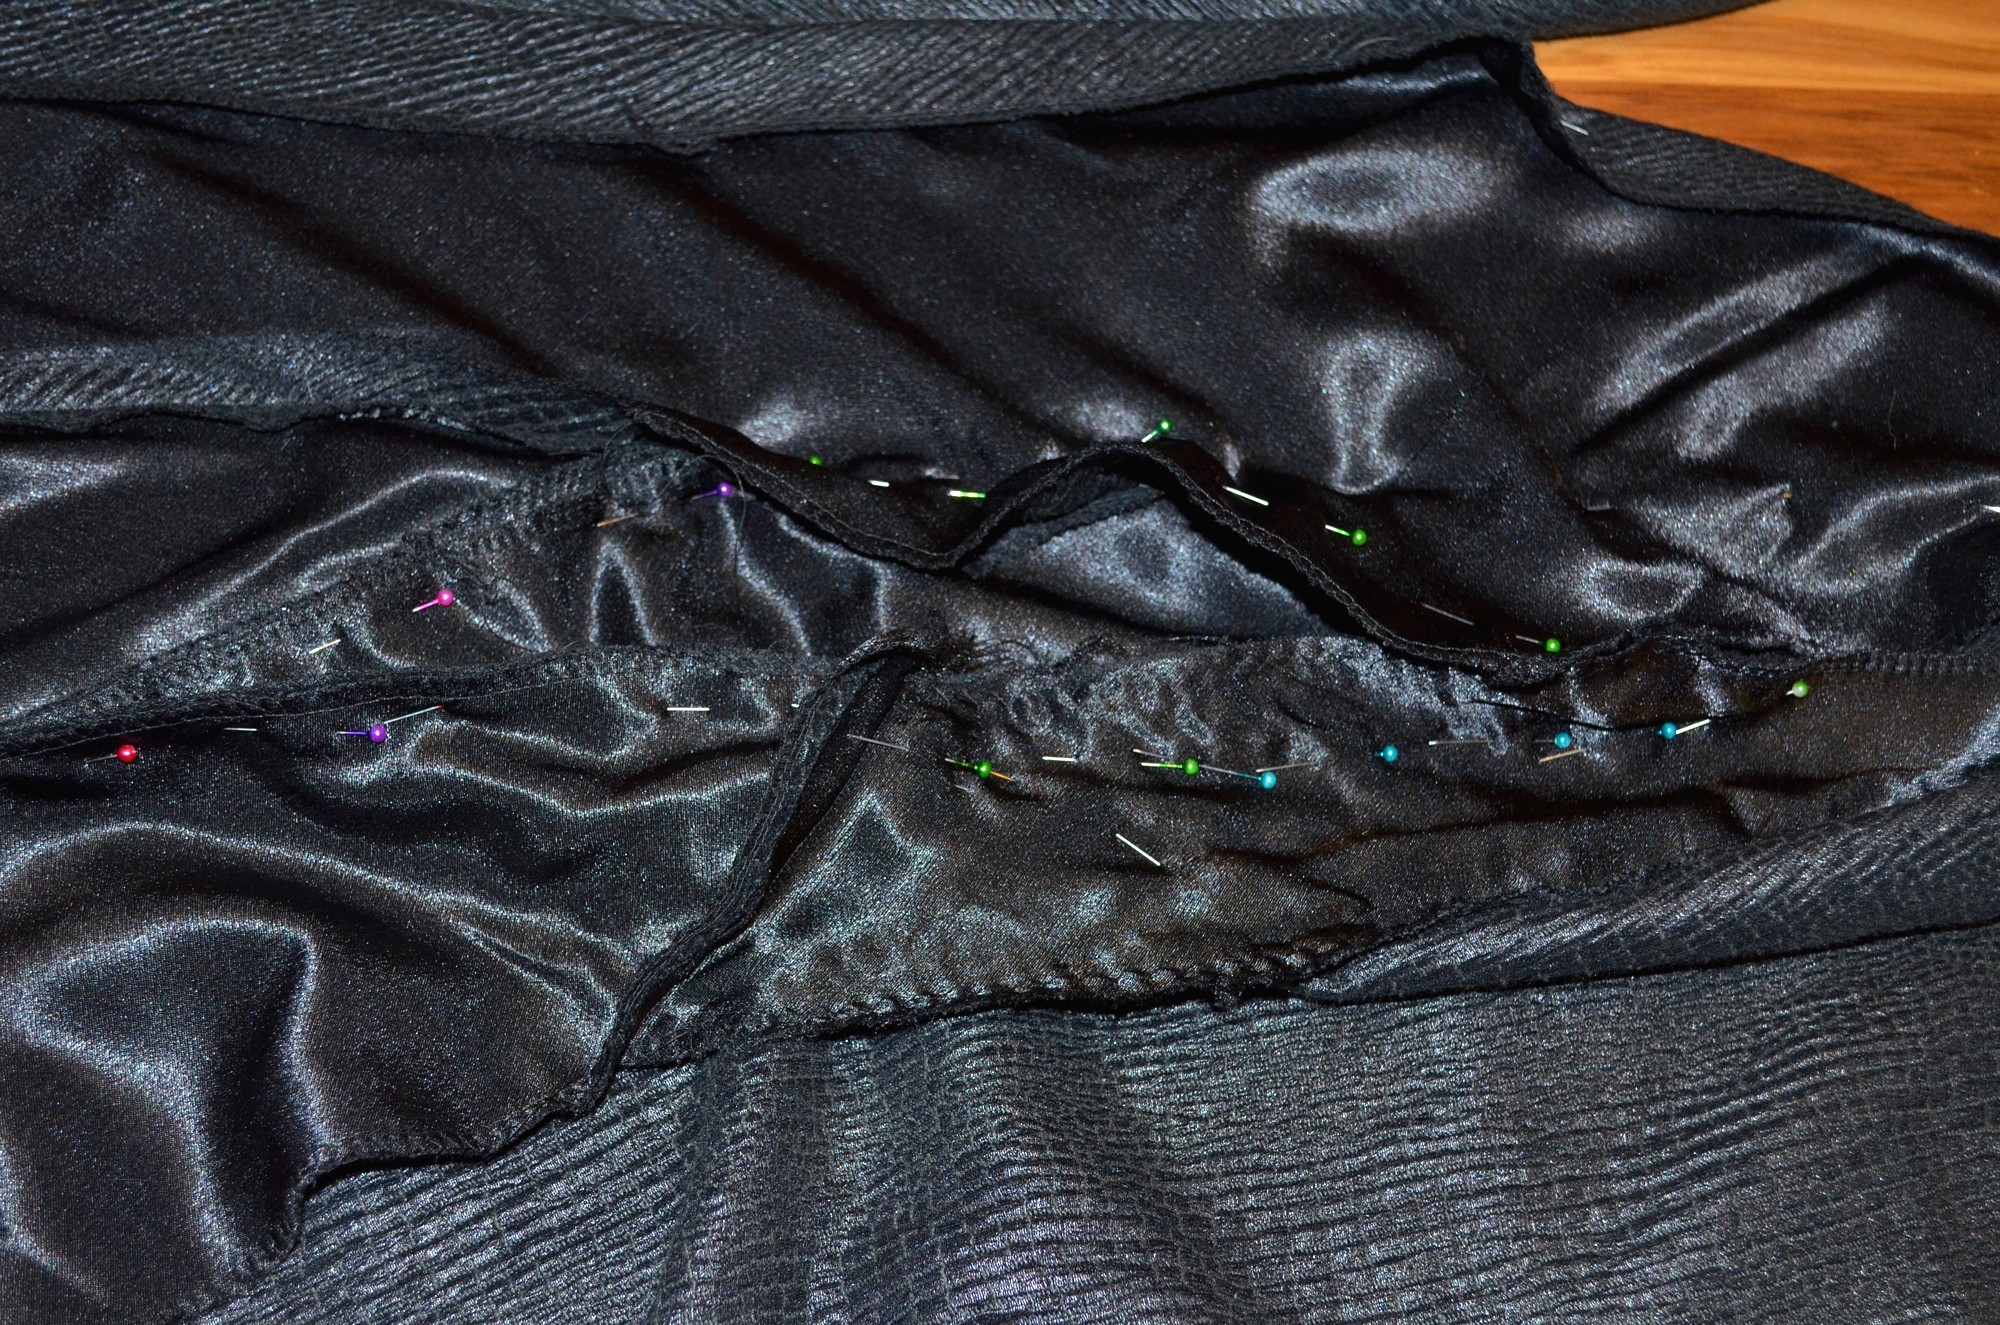
This is a sample of the crazy construction.
Interior: CF seam allowance at very top of photo. This shows the intersection of the hip/skirt gores fronts, sleeve, side back and back hip/skirt gore.
Same view but from the bottom looking up. No train or CB pieces so as to reduce weight when moving the pieces.
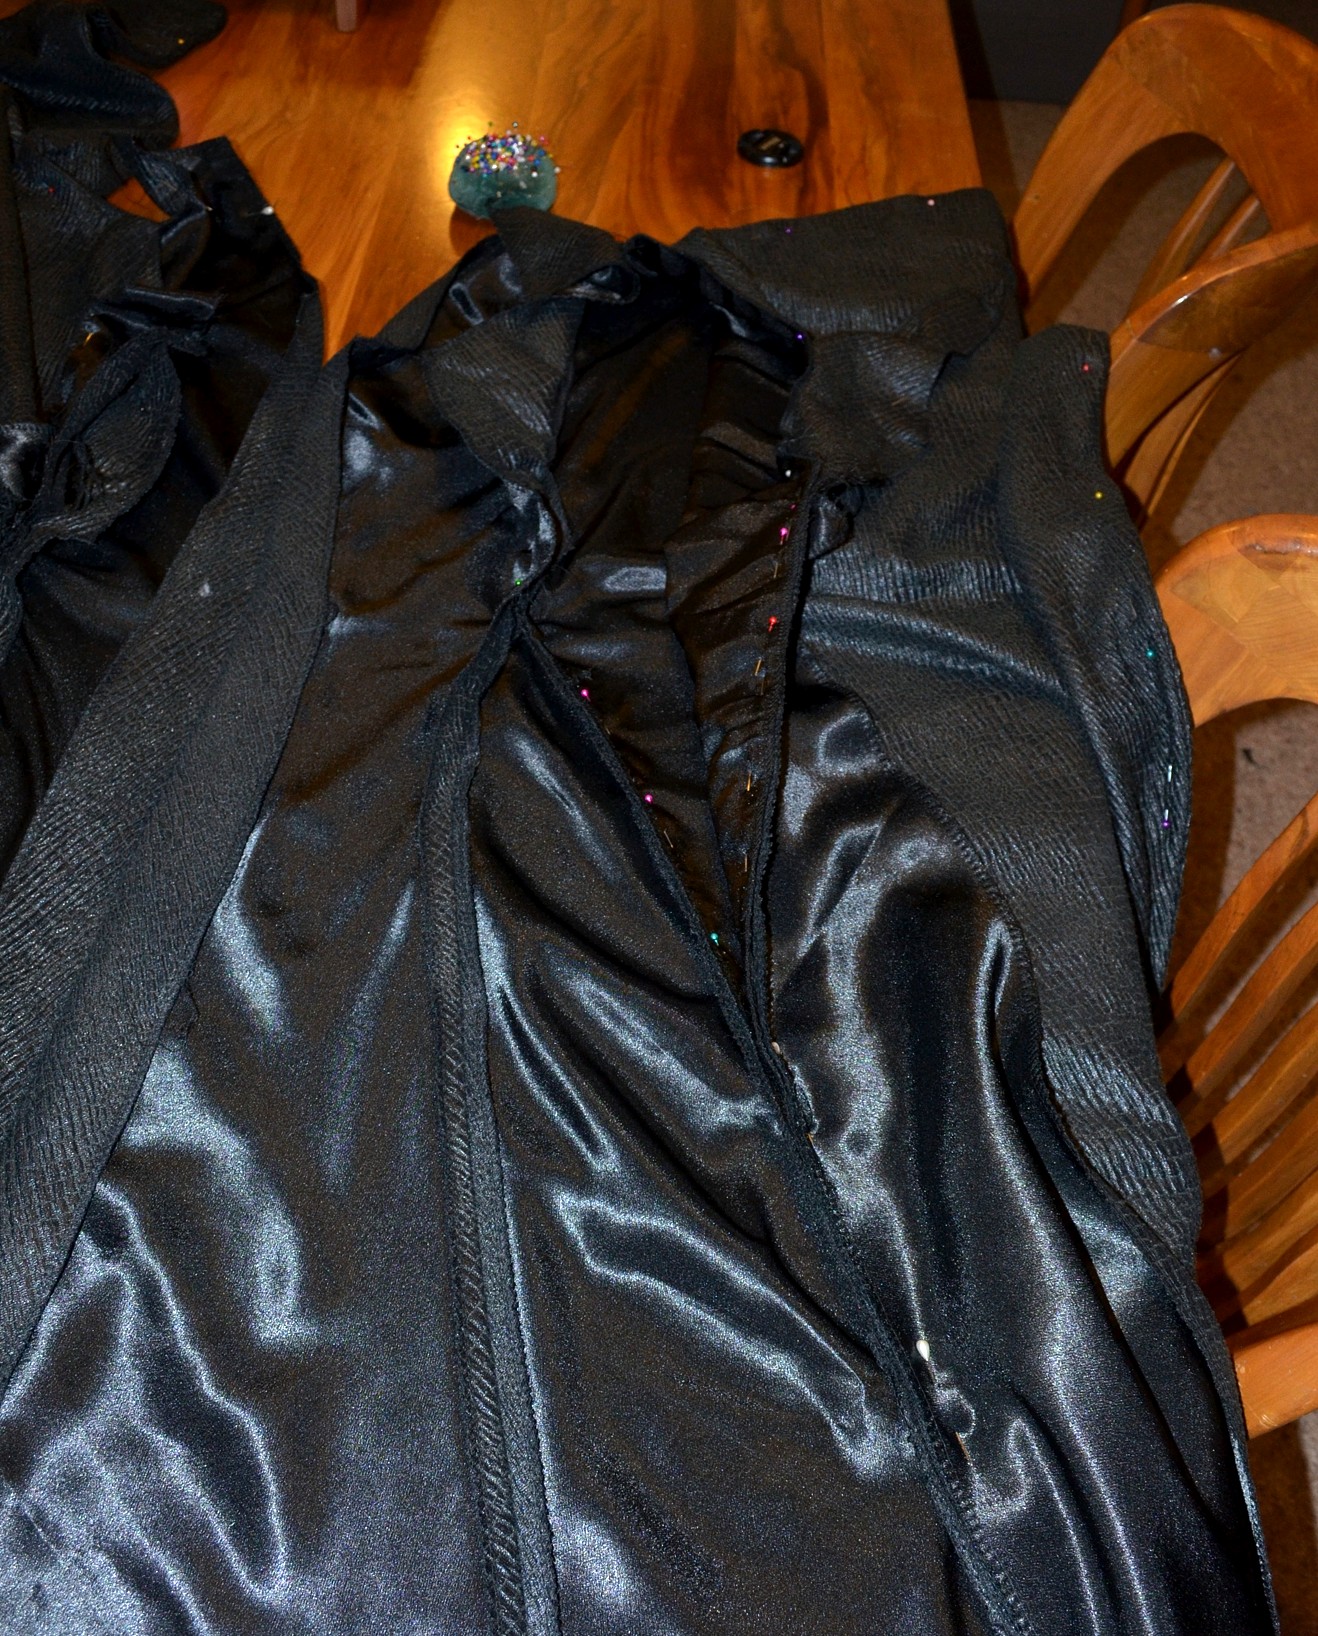
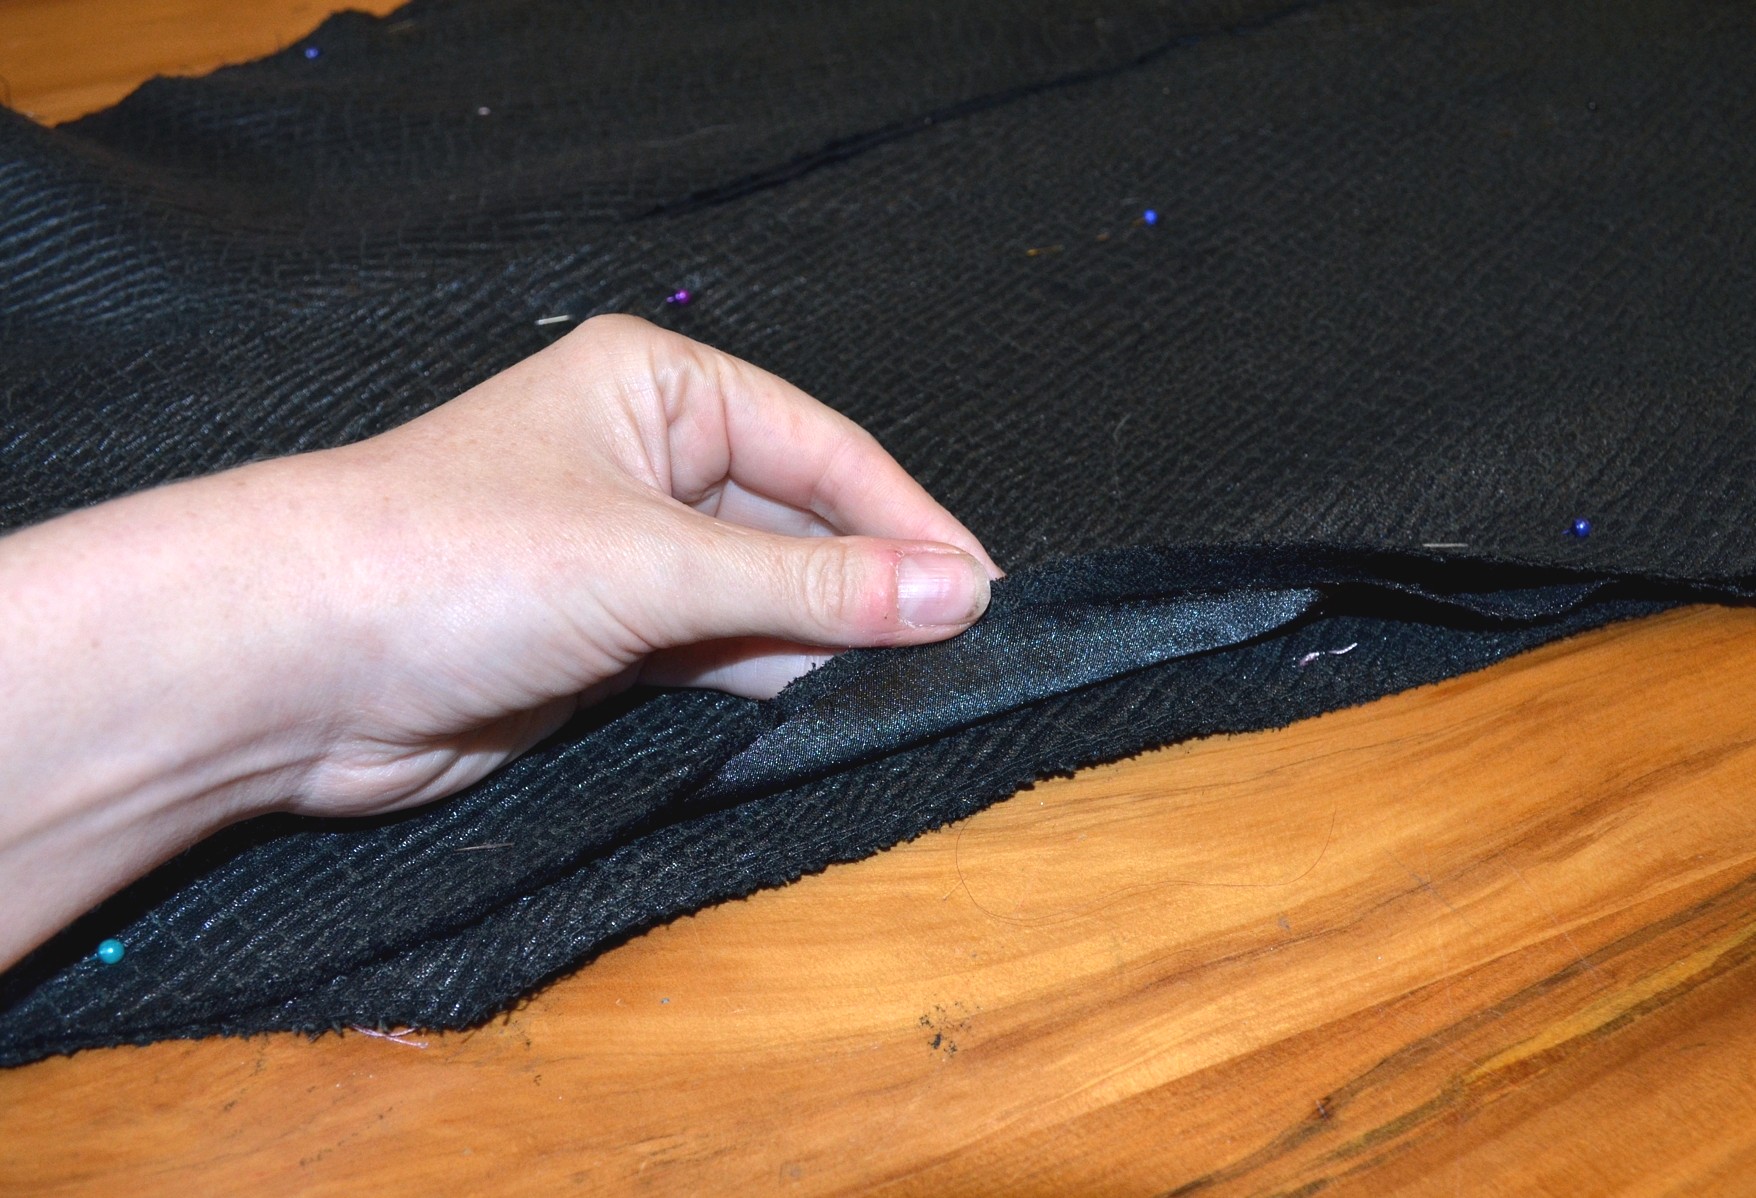
Overcasting the sleeve to the front panel. By overcasting I could then tun the body inside out and smooth over that join to sew properly.

After overcasting:
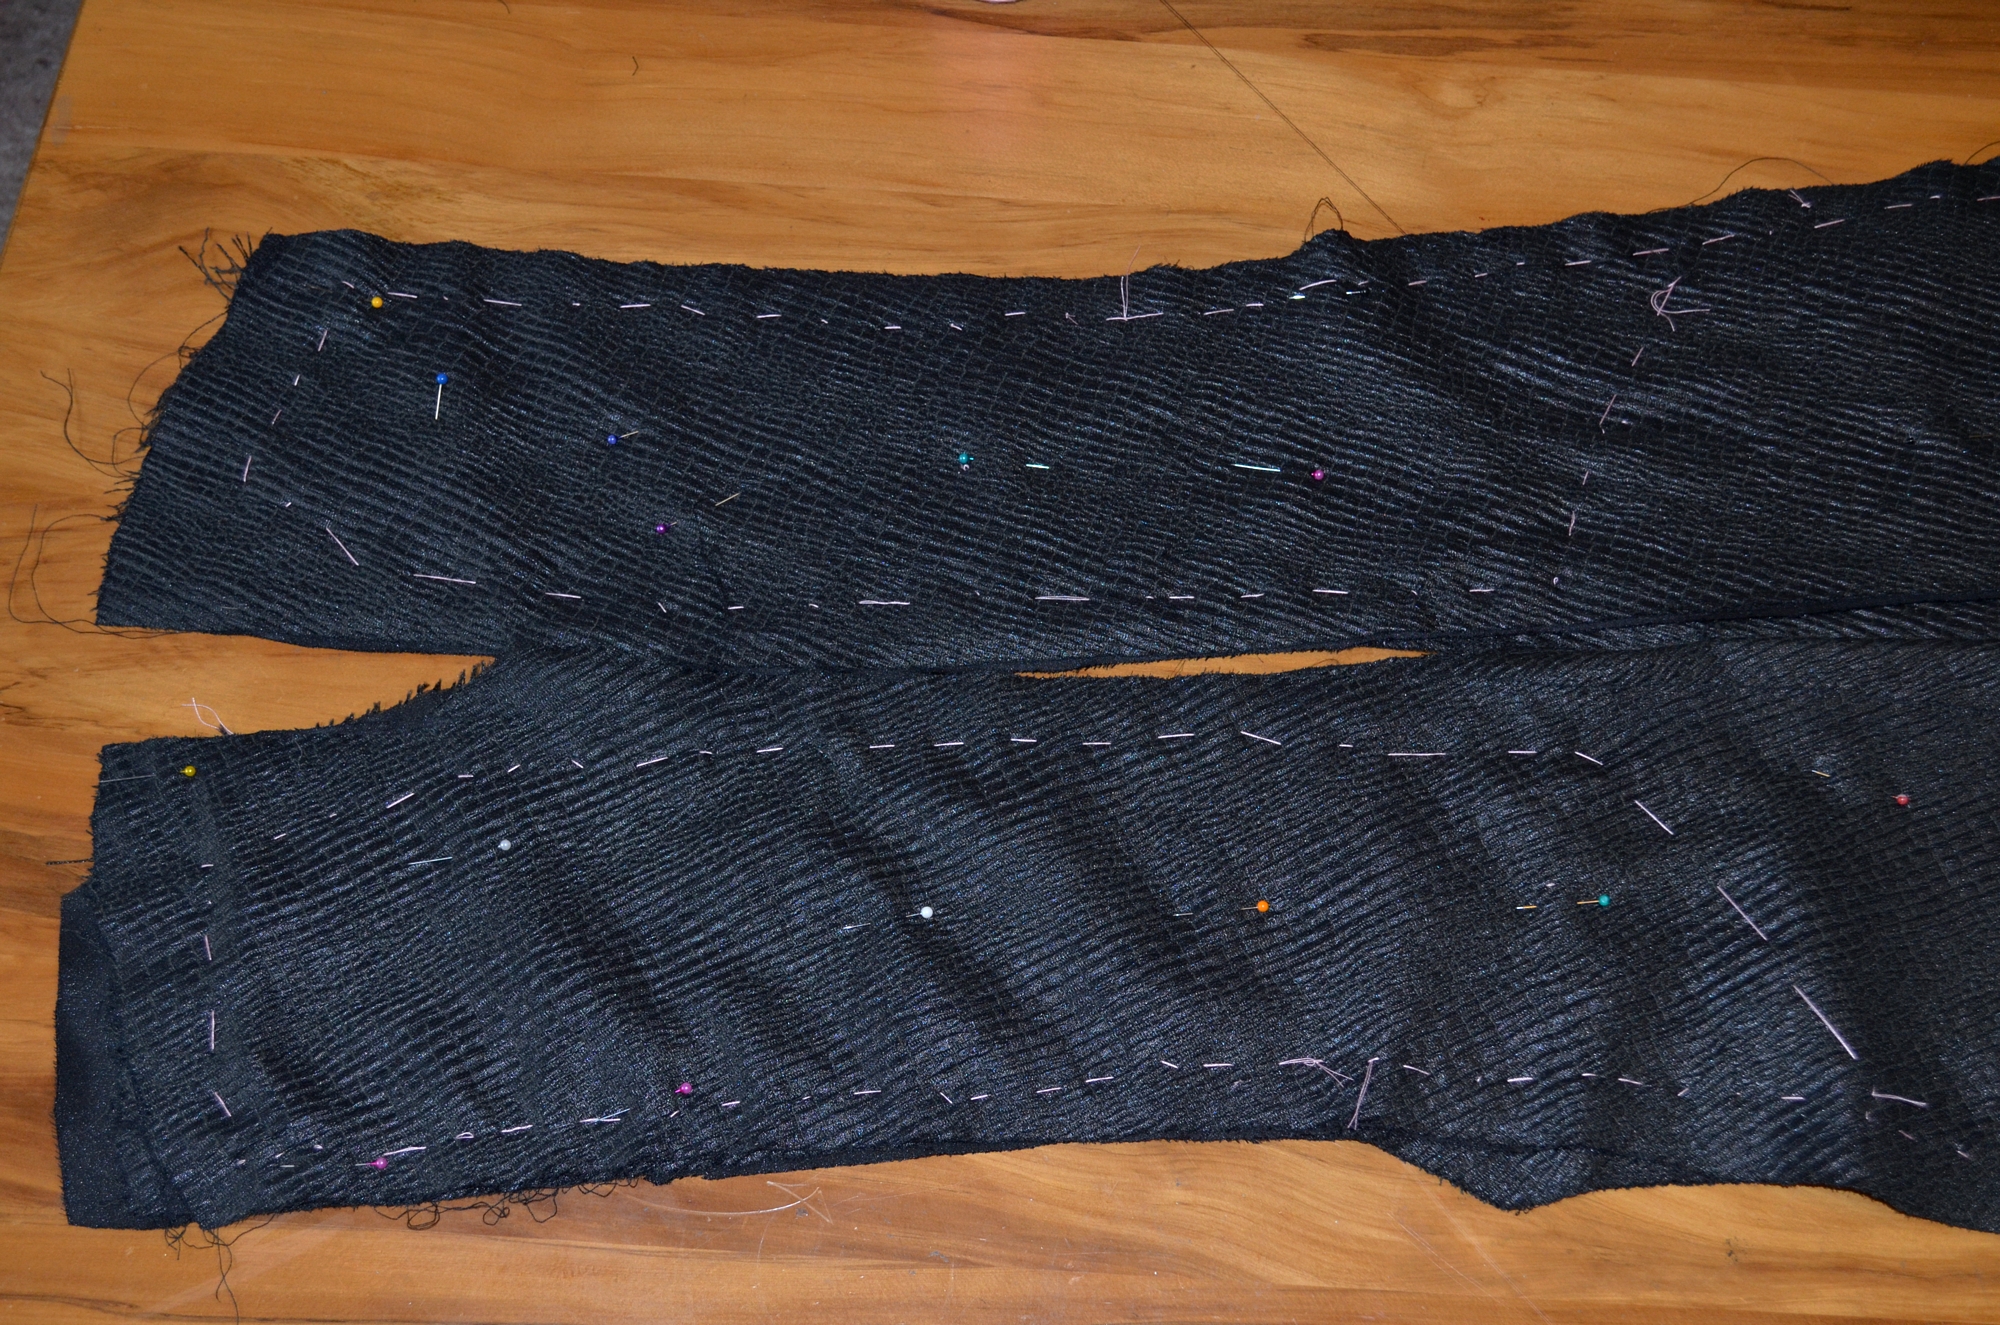
And both sides done:
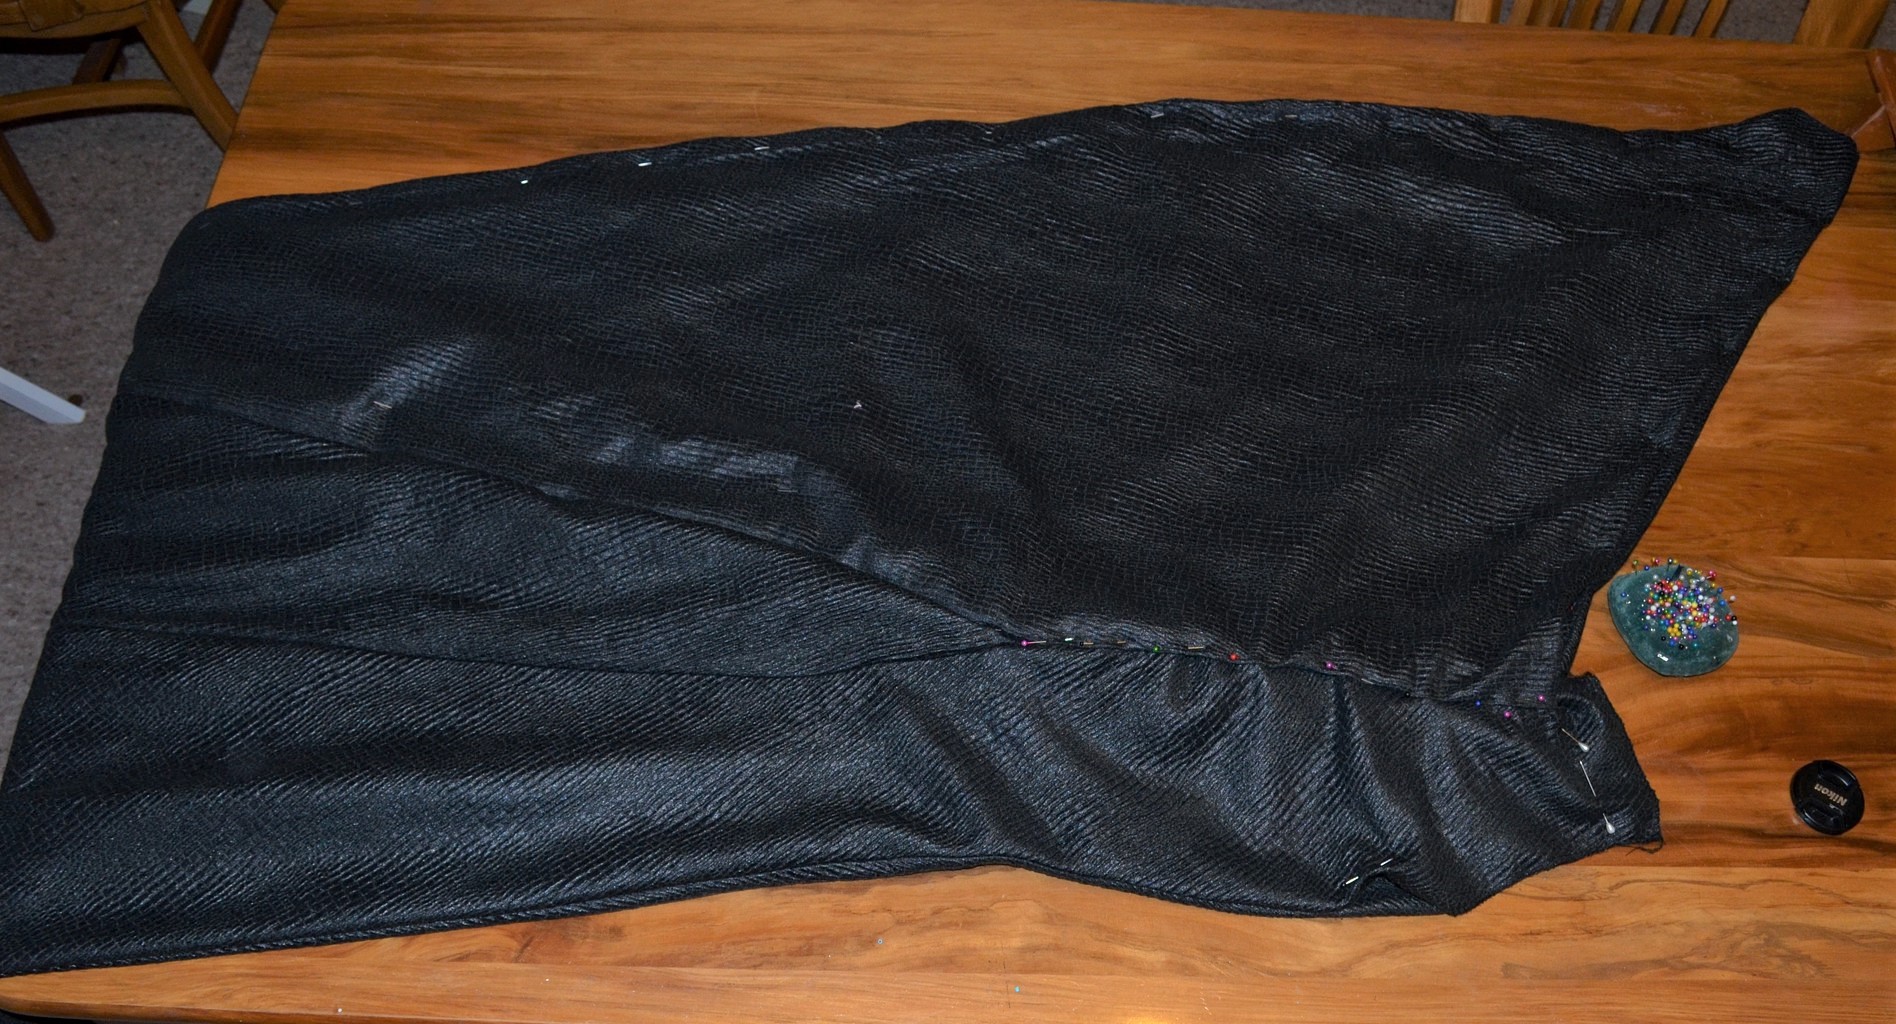
Then the train…. oy. The train panels are not the same shape as the CB gown. So I had to undo the outer panels of the train and lay them on top of the two back panels:

So not only that but the CB panels also didn’t match up so I had to baste the layers together, also undo a lotof the overlocking so that the bias laid flat on all four layers of each side…
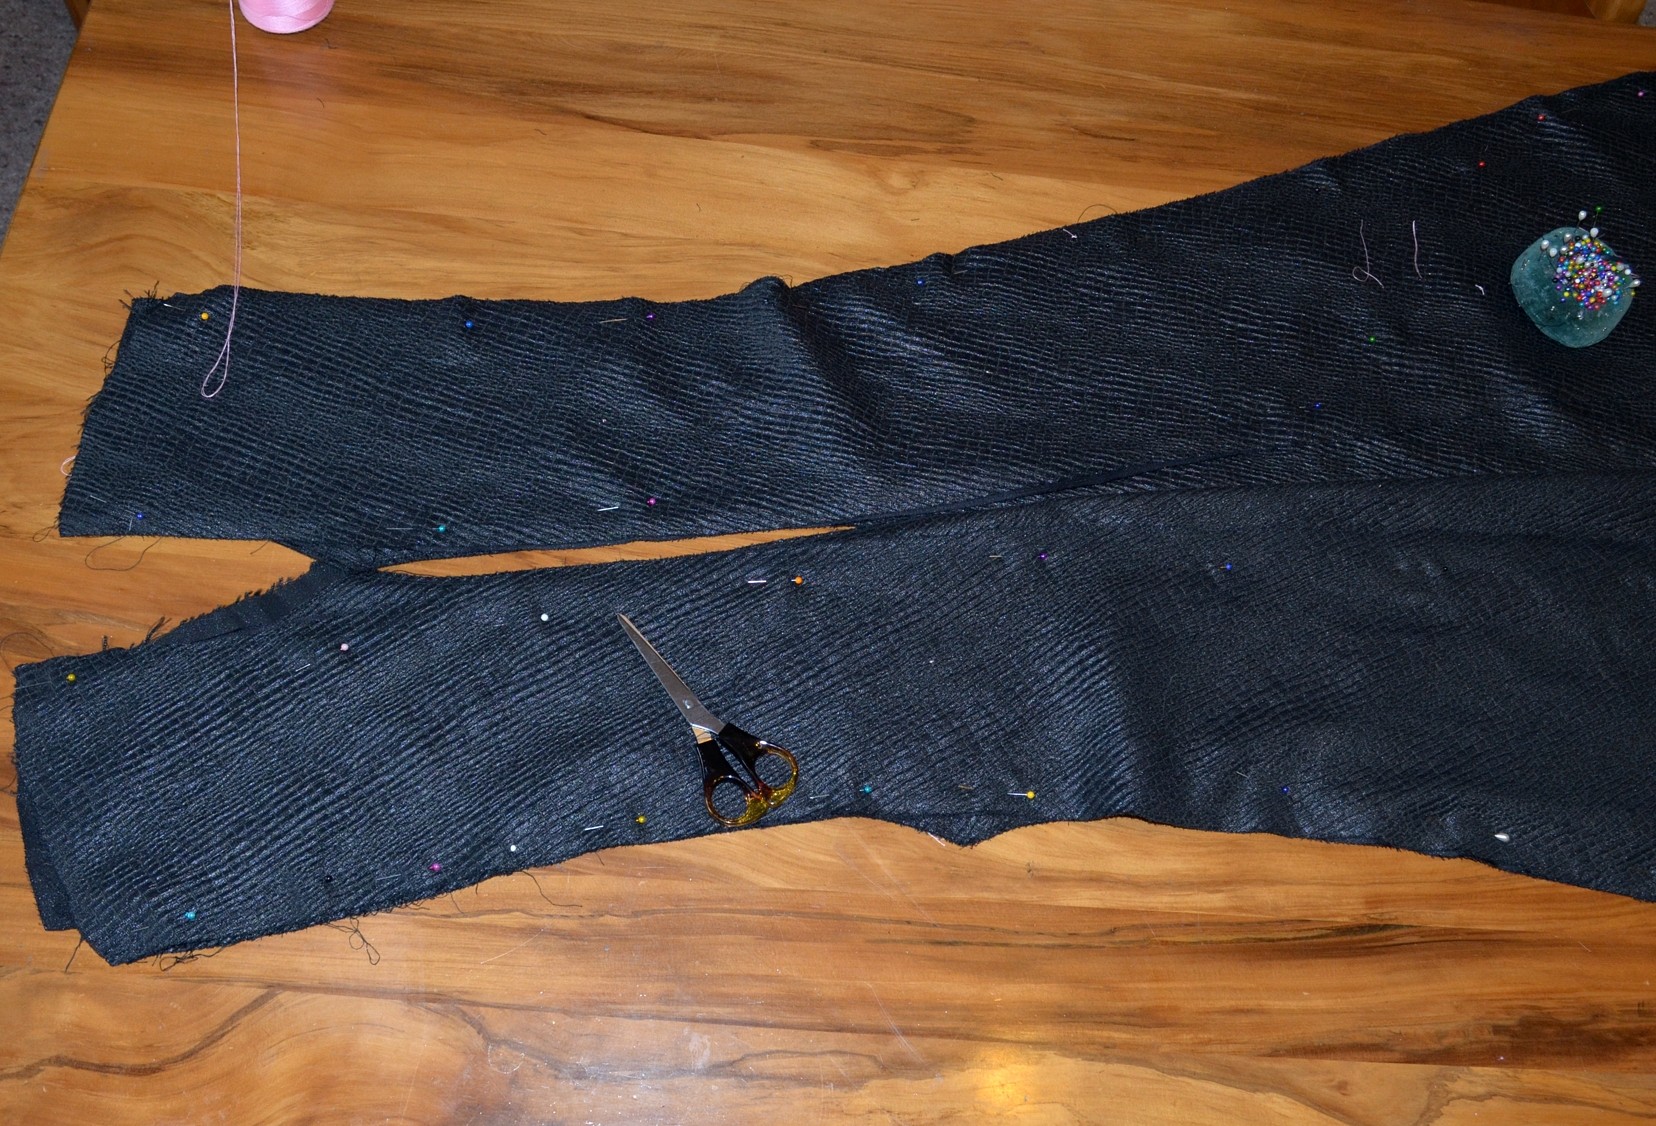
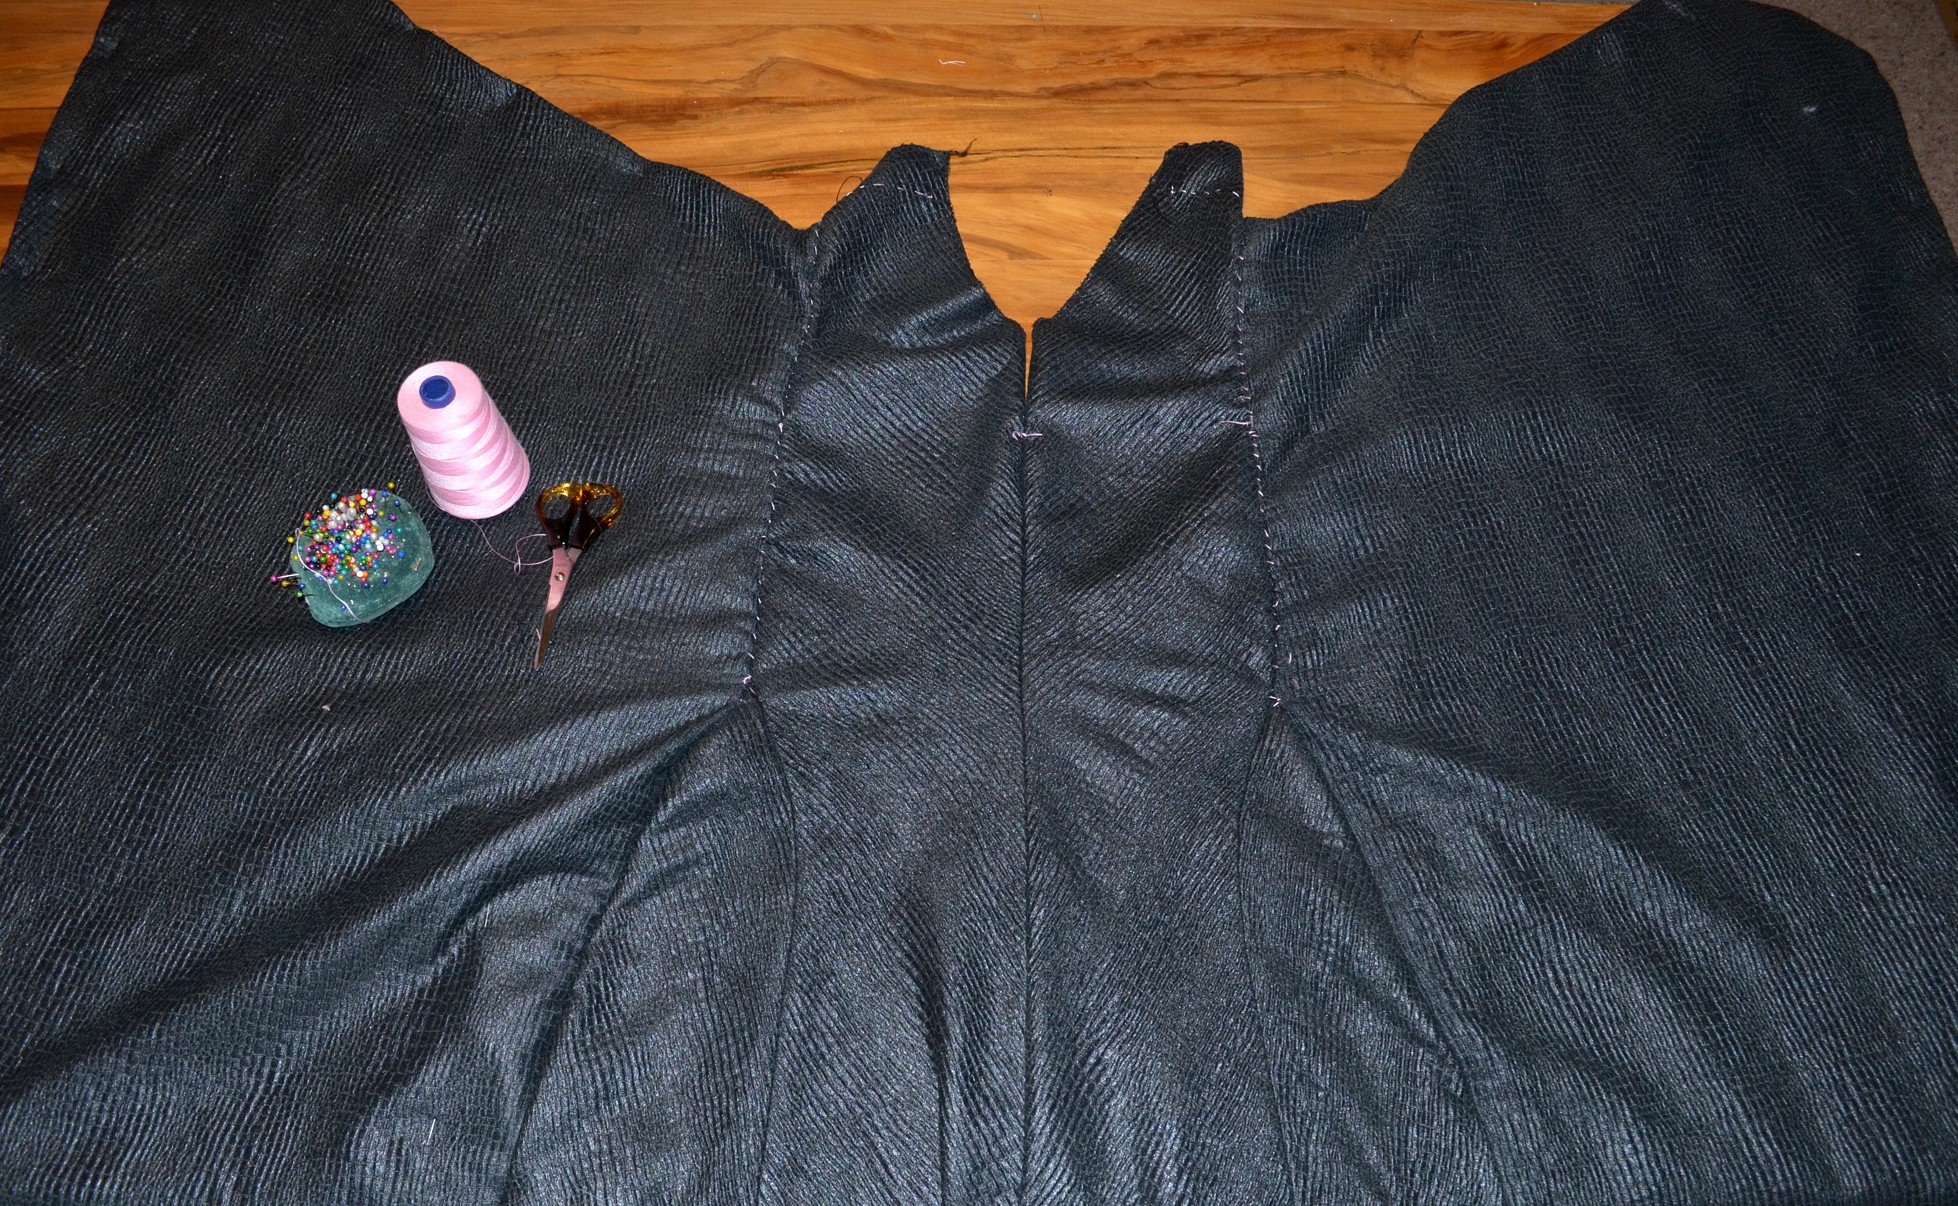
And then I cut and trimmed to shape:

And just a full view of the layers that are almost all sewn up. The sleeves have also been prick stitched along the edges to keep them nice and crisp.
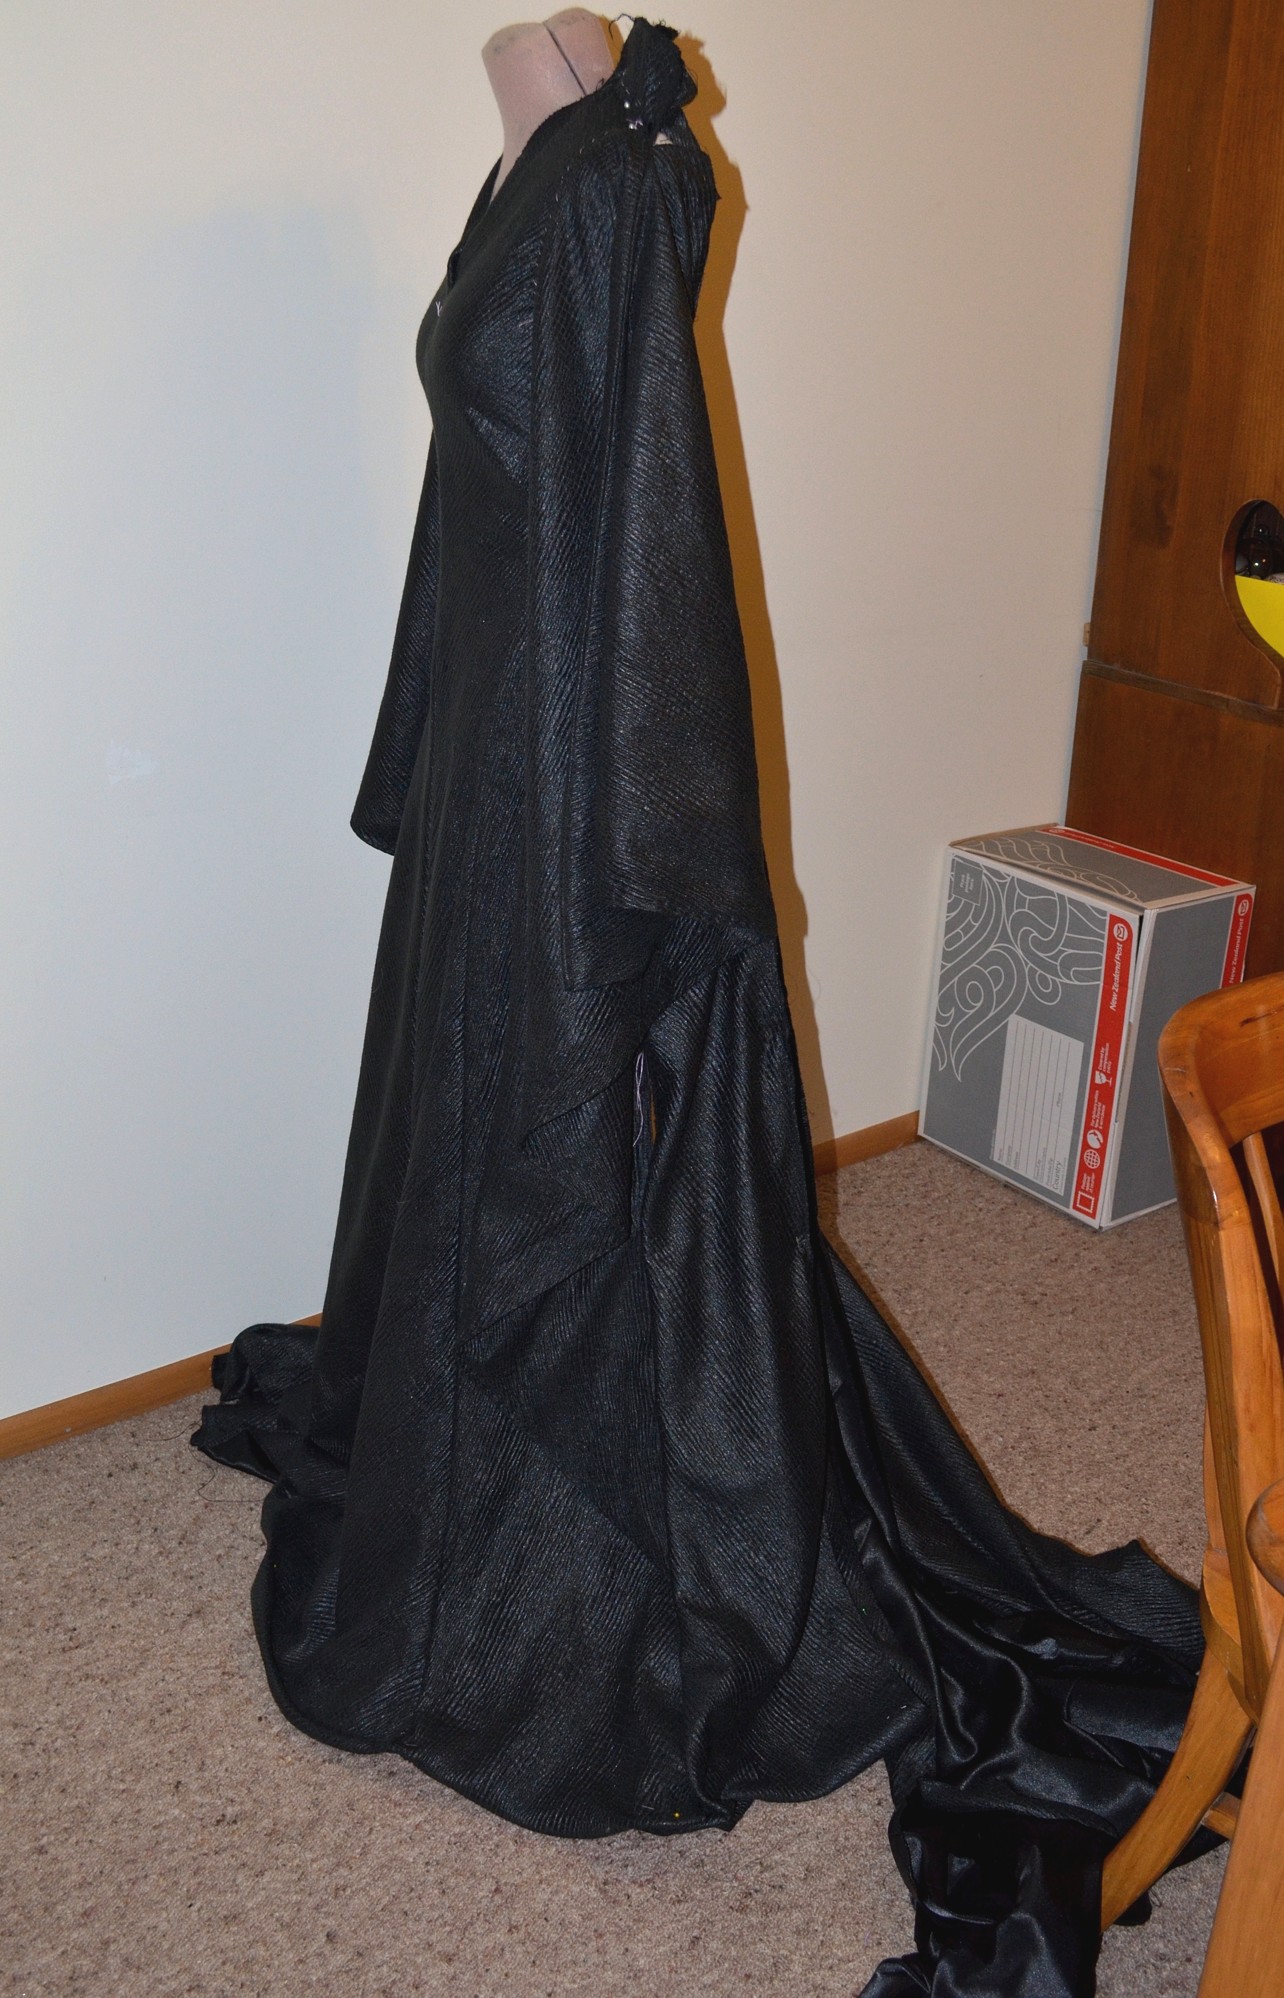
Filed under projects: media recreations, Uncategorized
REPLY
You ROCK! As always.
REPLY
Thank you 🙂
REPLY
This is hands down the best maleficent costume I’ve seen! Wonderful job. I want one 🙂
REPLY
Thank you 🙂 Super fun to wear, a total pain to make but worthwhile 🙂
REPLY
I love this!!!! Is the headpiece available for purchase?
REPLY
Thank you 🙂 I still have my molds and am thinking of doing a number of casts while I have the product (finally got a large amount of aerosil/cabosil which makes it lay up easily in a curved mold and not run out everywhere!