anna meyer dress and more stitching musings

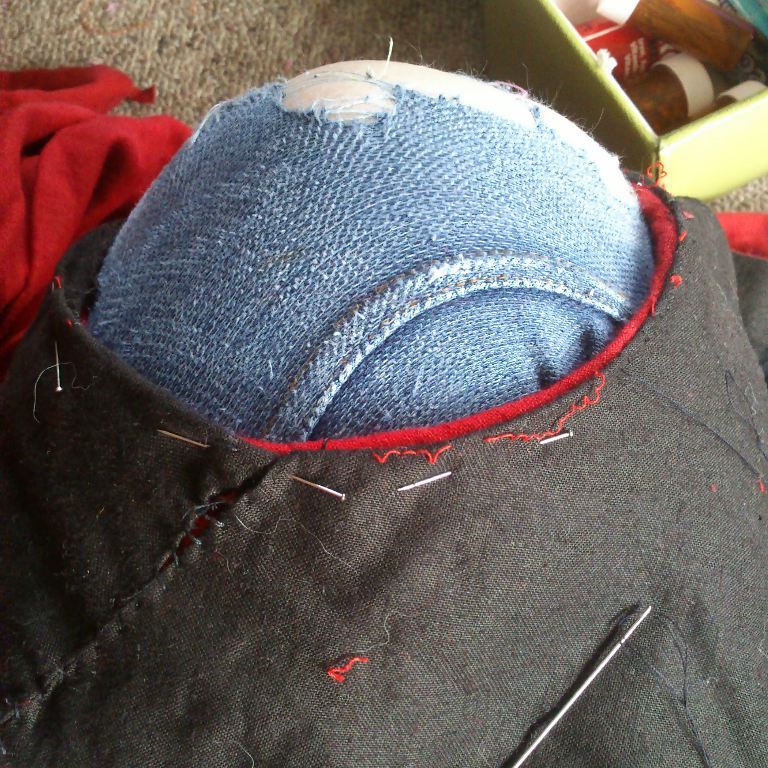
This was one of my earliest forays into handsewing. But I am not entirely sure I used the right fabric (a very fine tabby wool that feels like there is a tiny bit of overtwisted yarns to make for a slightly crepey surface.

But I do love it. But I have to accept I’ll never do the embroidery needed. I already gave away the Cleves inspired redo of the underdress (dyed it baby pink, it was very cute but too short for me really).

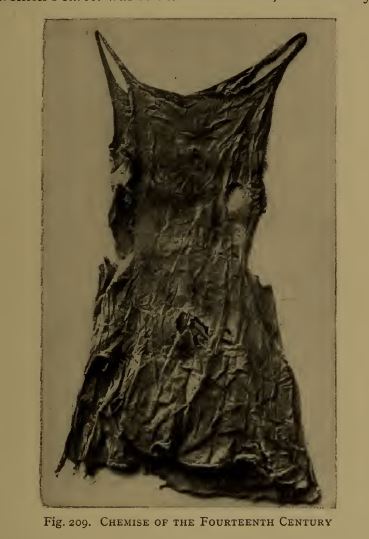
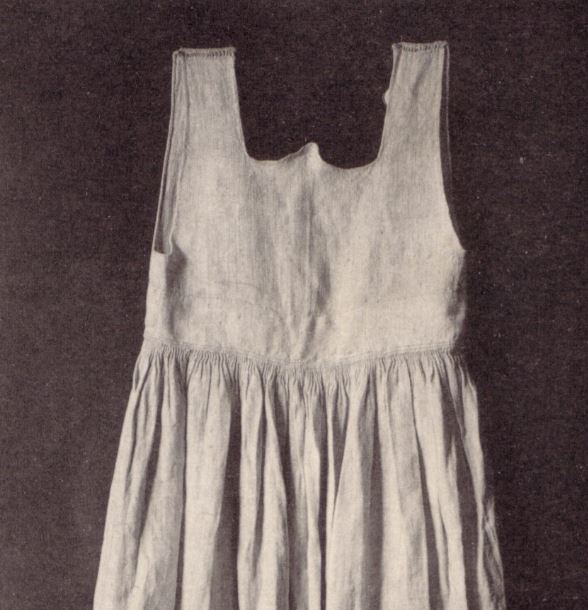
There are definitely lots of examples of finely pleated skirts and aprons of single layered fabric. This has been interpreted as linen when white but what if it’s not?

There are more extant pieces coming to light and one of them is a set of fine sheer silk with silk lace cuffs and collar. This makes me super happy as it is a great match to the silk organza I have to make a few sets of super sheer items.

But it does make for a bit of a new look at the inventories I have. There are lots of little pieces of cloth, not entirely always where they would be expected to be in lists of things. Also of course there is not a lot of consistency in spelling so basically I’m sounding words out and trying different levels of force. C/K is an easy spot, but G/K/C is closer to the interchange.

This year I have not devoted enough time to keeping all that fresh in my mind so I’ll be bringing it all with me to Canterbury Faire as well as some for public consumption parts of my Schnittbuch.

Okay, so I know of 19thC sewing books (stitching for linen goods and embroidery) and of model books. Also the tailors manuals. I think I have copies of everything possible (Including snippets from a Polish pattern book and the Milanese- both of which I’m still hunting down the full context.)

Does anyone know of books of stitching pre 18thC? I can understand the oral traditions of passing down mending etc. But there were people teaching sewing, either to professionals or for leisure. So, there has got to be a hand written book somewhere? There are glimpses in books of trades but it’s sort of tantilising rather than answers many questions.

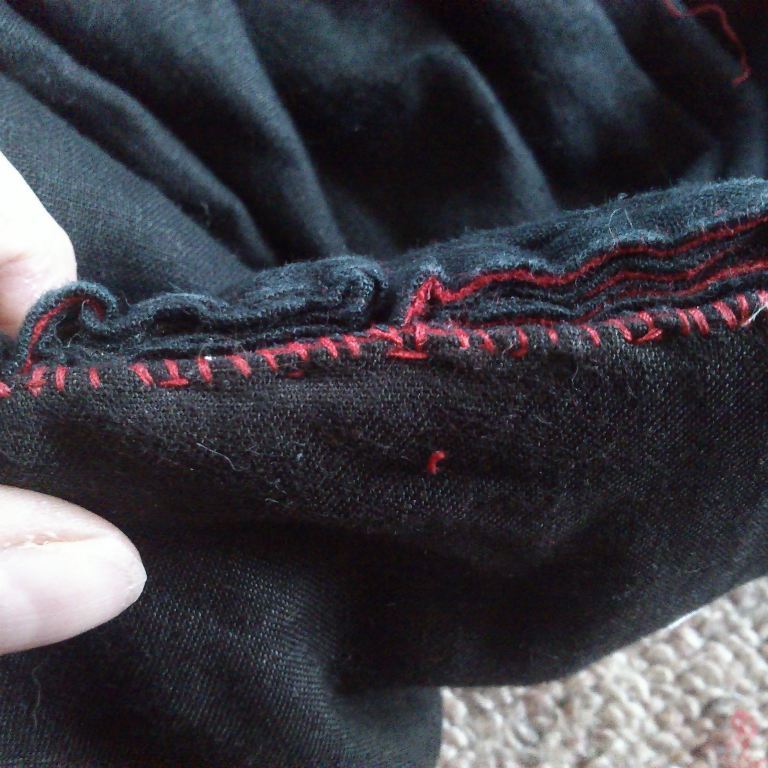
Some of those woodcuts though are amazing in showing construction (especially on the insides of collars or near a fastening. They correspond well to extant garments, so I think I would be pretty trusting of a tradebook printed that shows stitches.

I’m working towards producing my own book and so I would like to try and make my illustrations look like they come from the location (lots of printing in the area so that’s possible.) Working from the work done on extant garments is a big part of this. As is practicing line art. I have some lovely fine pens and they do seem to help. My hands are less sensitive now so it can be difficult to write or draw. Also my hands simply don’t bend in ways that help in this 🙂

cleves overhaul continues

I am giving serious thought to changing the shape of my hembden (shirts.) There are enough finds and illustrations showing plain linen garments worn directly against the skin. It’s not a terribly easy task to figure out how I want to do this, but remodelling garments like these are seen also.

Given the Cleves region kept hold of the tappert style (houppelande) for so long, and the underdress, it seems likely that white linen goods may have as well.

The style is very much about curves, it’s somewhere between Saxon and houppelande (which sounds weird but there it is) so there is a fair bit of fit in the underbust to waist and then softness above and below.

A full hemd adds bulk to the waist so I need to at least narrow mine a bit. There are a few options. But the Lenberg finds show fitted linen goods and there are more.

This is a 14thC chemise from Kohler’s History of Costume. Not credited in the English version. I thought I had a copy of Practische Kostumkunde.. but I’ll keep checking.

This is from Der Renaissancefund von Poysdorf I may be able to get the full article on ILL, but if you live in the US you can get the full journal it is from from HATHI Trust, Werke der Volkskunst, vol. 1. It’s described as grey linen, and one of the many books my brain has chomped through suggested that grey linen was especially used in clothing for the poor, via the church. I’m sure this is a single layer skirt and bodice but with a very wide waistband- possibly created by turning up a very long seam allowance, possibly allowing for continued use from young age.

This is one of the Lenberg finds and this photo is specifically from the Academia online copy by Beatrix Nutz (huge thank you to all scholars sharing their works this way.) (edit- removed the garment that is a lining, so as to not confuse, see Marion’s comment below. There is so much work to be done on these finds, also there is a scrap of yellow silk that is juts.. I want it.)

Des braies et soutiens-gorge au XVe siècle… Une incroyable enquête au château de Lengberg. In: Histoire et Images Médiévales 30, 2012, 20 – 27.


So here we have all fitted, semi fitted plain linen garments. Basically controlled fullness is the aim here.


I do want sleeves to protect my garment sleeves,so I do need to figure that out.


Also, this is not quite the same but a pair of what i think are linen hose, the calf is very fitted, there is a waistband and the fullness is maintained where needed.

This is not really the best scan of this book, but there is a very clear under layer aspect to them, the fitted calves would would under boots or hose really. It’s still an example of a fitted and full section.

cleves redo

I am remaking my linen Cleves/Cologne dress into a simple kirtle. To do this I removed the half length sleeves and turned the seam allowance under. I over handed the red linen and canvas layers to the canvas layer, then turned the seam allowance of the black linen lining and overhanded the edge to the previously turned seam allowances.

I also unpicked my overhanded waist seam to move the overlapping skirt edges to line up with the fastening end of the bodice.

I will need to cut down the neckline as the high curve is after 1550, while a slightly dipped square neck is more appropriate pre-1550.

Otherwise it’s very much the same- perfectly round waist, skirt fullness directed to the back. Side seams that appear to be in line with the back of the arm, very stable neckline.

Later the bodice appear to lengthen a little but it’s actually more to do with a more vertical bodice line- once you pull the body in tighter the bust is raised and the neckline creeps up. Narrower shoulderline completes the apparent lengthening.

Ideally that is 🙂 In reality bodies resist most extreme changes so I ‘m going to remove the hooks and eyes and add lacing rings so I can leave the kirtle open a little in front to soften the torso shape.

The skirt front gets an additional pleat that points to the back to reflect some of the artwork in costume books of the time.

crafty cleves christmas

These times of the year are both intensely personal and about community. Today I will be spending time with my mum and with friends. And we will create 🙂

So far I have taken a pattern from my woolen kirtle to remake with a linen lining- this is based on on the extant kirtle in Patterns of fashion as it is very comfortable and I am going to try and see how to lay it out for best fabric use.

I also made a basic outline for my schaube, mainly to check I have enough fur to cut all in the same direction- it seems so.


After spending a day yesterday sorting out some of my many old Frazzled Frau files. I still have about 1000 distinct images to sort, I am going to see what pearl designs I have that can be used for my new Cleves cap. It will also be used to decorate a brustuck (oh.. oh! I think I have something to follow up here.)

So I need to set up my frame. I think I will want the full frame up so I can possibly pearl several pieces in one go. Or just my little ones… let’s go see.


Oh! And my linen bleaches super fast suggesting that yep it really is linen 🙂

back to the cleves wardrobe

I’m going to finally spend some quality time with my SCAdian friends so I need a day dress that fits in with my new fancy frock. I’ve got my 1560s wardrobe mostly sorted (woollen dress, linen- it might get changed a bit to reflect newer research- sripy silk, velvet dress is in the process of being restored.) But this 1530s style is just so darn cute. Sadly the photographs I have do not do justice to my Anne of Cleves dress so I’ll be getting photos of my entire kit separately and get it online about the time I get my research up. I have two streams of research to get online and they depend on each other so there is a bit of a delay.

But I’m so keen to get this day dress sorted that I just cut the bodice and part of the lining now. And am about to cut a hat. Because pink hat to match pink frock is just too cute to pass over.

I’m hoping to get some linen to line the dress on Friday as I think I did spot some in a not terribly obnoxious colour. But I do need some nice plush velvet for the trim. I may be able to use heat n bond again to place the guarding and then hand stitch the edges down. The artwork doesn’t show a couched braid at the edges but all the extant pieces do. The Moritz von Schen schaube is especially nice for this. So I may see if I can find some narrow braid to sew down at the same time.

I’ll need felt to line my hat too. And I get to pearl it 🙂 I am ridiculously excited by this project again 🙂

up early watching rebels

I did find a dark grey fabric. It may not be dark enough but I’m making the tunic and gauntlets and will figure that out later. There is a big difference between concept and final model.

So it’ll be double layered and that means a lot of pinning today .


Just pressed the Elsa flurry as well.

actual progress

Genuine real Ahsoka Tano progress! I wasn’t sure if our oven would be reliable to bake my leather armour in. I wasn’t sure if the curves would flatten out while on the trays and I wasn’t sure it would be under 60C but over 50C to get the pieces steaming but not scalding.

But it worked! THe hip pieces are a little crisper than the gauntlets, they sand very well. But I don’t really want to try and soak the gauntlets again so there is going to just be a little extra edge seal to cure and sand back.

I can paint these today, though it looks like I interpreted the belt strap wrong, it has a single channel. This is fine as the belt more than anything scalded on the racks and then when it fell onto the oven floor.

My montral were not curing, the latex created an airtight seal, so I have then hanging fan heater height and gave them a few blasts to heat up the water and get that to evaporate. I sewed my Padme Light Blue skirt back seam and tidied the zip area, and even sewed most of my Jem dress on between 🙂

This is how I scaled my hilts. I knew they were much to flat to fit a working blade in the end. And that is still true. I did scale slightly to make them fit a 20mm tube (which is skinny enough for OT and Rebels era blades, the most common 25mm/1 inch) tubes are really good for prequel, TCW, and it looks like the new trilogy too.

I did check my machine. It is perfect for PLA but it’s not completely happy with ABS. I’d need to set up each time with a new adhesion layer (glue stick did help) and do one component at a time. And that was going to be a week of constant work. Not great for stress levels.

But my scaling made the hilts feel slightly oversized. It turns out I spotted other had this same conundrum of trying to fit a blade in. And so I tend to refer to my own hilts as FX style, after the MAster FX line of light up sabers.

Going by knuckle space it works, but my hand itself is much smaller. On my leg it feels right but I’ve rescaled to the dimensions I think look best and it’s printing now. I did also test and her hand fits four times over the body of the hilt but it looks smaller due to the size of her hands over all. So it’s probably best to aim for that effect in hand.

I’m doing Star Wars Reads tomorrow so sadly no Ahsoka, but I will have her ready for next week.


busy busy

While putting some more latex on Ahsoka and wetforming the knee cops I got a call to do a photoshoot today. Was able to put it off til tomorrow 🙂 It’s for the Herald article that I did a short interview for 🙂 So I’ve tidied up most of the issues with my frock, just need to whizz the chemise under a sewing machine. Or I can sew by hand for when I do eventually hand finish it. Hmmm…..

I’ve been watching Elementary today to do so and been able to do some back stretches again! Physio for my rib was pretty much to loosen all the muscles that tightened during all the flinching and flu while the break was healing.

I’ve obviously also been very wary of stretching and especially using props due to how I injured my rib in the first place. I’m a bit concerned about bone density as it has been treated before, and has everything to do with medication and disuease full stop.

Ahsoka did progress

It just is much like the lightsaber hilt progress: it looks the same as the last time….

So after posting yesterday I managed to paint a little more latex on the lekku this time right side up and as expected the extra internal latex did help a lot with montral support.

i initially bought a random length of what looked like a very skinny pool noodle to support my Shaak To montral (inside the upper section of the back montral that tends to collapse into a side ways 0 rather than a nice round shape.)

So I wanted some for ahsoka and actually asked someone at the hardware store and lo and behold, it has a name!

PEF foam backer rod (or gap filler rod also brings up some results.)

I use 25mm as it’s rigid but very light, and is carvable into points.

This is what it looks like. There are lots of products out there, this is from IndiaMart. I think mine is Sika brand as the roll is yellow. Also if anyone needs a small amount I have far more than enough so.. happy to send some.

So that is today’s plans. Get the backer rod into the montral to help the points stay vertical not fall outwards. And I need to get some elastic across the front of the headpiece so if can sit nicely on my head- it tends to bow out at side of my own forehead. That may be a job for internal rigging too. That will be a job for internal rigging.

I need to find some charcoal grey matte stretch fabric though. I really wanted to use the same fabric as my Padme dress. I might just see if I can remove colour because if I can I can overdye. I think it’s rayon. But there is Nick’s fabric and the other store next to it to try and find some reasonably priced sports fabrics.

I do have perfect sports fabric, it’s got a surface texture that matches the show but it is straight up black and I don’t see me being able to reduce the colour evenly. Though this could work with a light acrylic wash and airbrush… But that might just make it look painted.

Right.

So today, rig the montral and dry the armour. I finally got the ankles to form on the slightly scaled leg. I can also now cut the front piece and form that too. That is going to see some creative problem solving. The mannequin has sculpted knees. So I may have to form the leather over the elbows. Oh! Actually. I have a lamp that I don’t trust that is the perfect shape. So… let’s see if it is perfect.


ahsoka progress maybe

Well the fabric didn’t dye. But I have tested that pattern so many times now I know it works.

The leatherwork took a huge step forward though 🙂 Got the bracers, hand plates, hip pieces, narrow belt soaked and heated again. So I will be able to paint this week. The test scrap looks amazing. I know Fiebings is good but I’ve only really used the dyes and resolene before. The paint sets like woah, so you have to work really fast. But gosh. Really flexible.

And I finally got the last of the ankle shaping done for the greaves 🙂 So I can get the front panel sorted soon as well.

Still really bummed that the tunic failed again. Charcoal grey is incredibly difficult to get- and to dye even more.

But I’ve had some physio on my rib (well muscles from the hip to rib and spine to rib) and so want to at least try and get some more latex on the montral.