Category Archives: projects: early historic

Pre-1700 costumes. Historic, historic inspired or recreations from historical productions.

easy mantua cutting

(updated on my research site: https://www.thefrockchick.com/the-baroque-frock/easy-mantua-cutting/ )

I did manage to cut my fabric panels for my mantua, it really is pretty darm easy as it is all on the grain rectangles. It is pretty much exactly what I expect from a pre-1920s measure, cut, fit process. It looks a bit different but ultimately it’s a case of wait to floor, shoulders to waist and that’s it. Everything else is adjustable to suit.

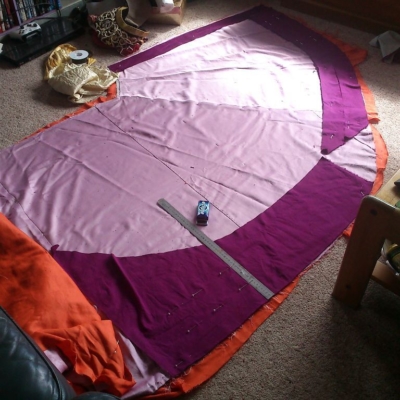
I knew I wanted my side extensions to be only one full width of fabric (so two widths of a more in era width. I cut (tore) one width from waist to floor plus a hand width for turnings. Then folded on the diagonal to form the two side extensions.
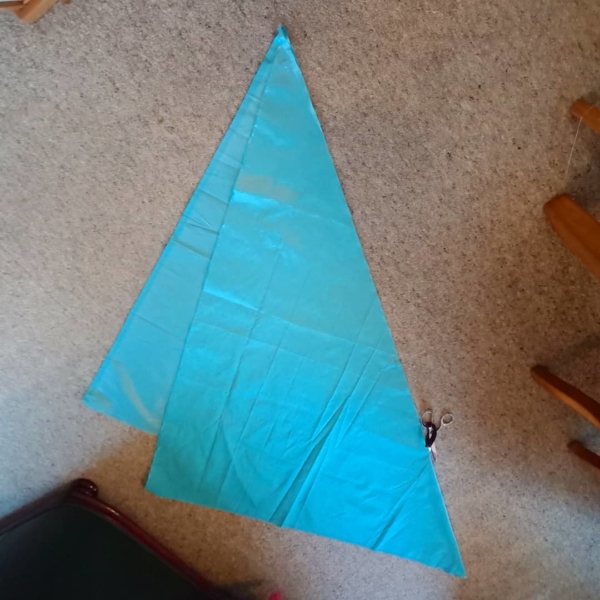
The underskirt is cut from three drops of fabric as these tend to be between 5-7 widths of in era fabric widths. I will wind up with side openings which will allow me to wear pockets underneath. The Henri Bonnart illustrations show a lot of openings for pockets.
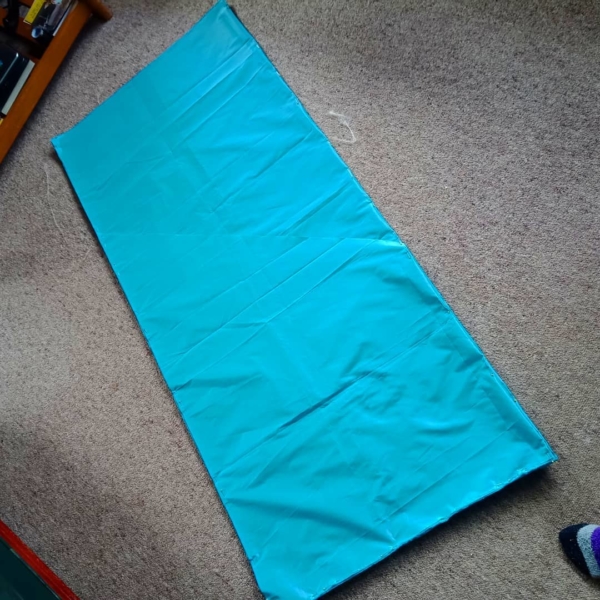
The front of the robe was cut from one full width of fabric as long as from my shoulder to floor plus two hand widths. One hand width is to extend the fronts over the shoulder, the other is for turning.

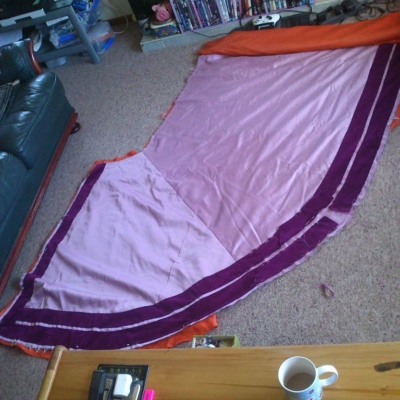
To cut the back panel I laid the extensions next to the front panels and lined up the remaining fabric from top of the front panel down to waist and then followed the diagonal of the side extensions.
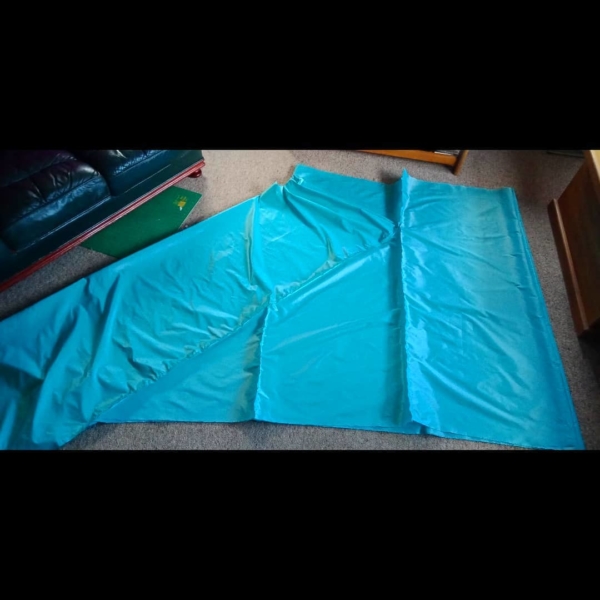
I didn’t want a very long train so I cut a curve about 3-4 hand widths.

The rest of the fabric will be used for sleeves and facings.

Since these I have machine stitched the joins and pressed them back ready for stitching. I haven’t yet done so as I need to really look through the Diderot stitches. Okay. Not totally clear but:

https://quod.lib.umich.edu/d/did/did2222.0000.178?view=text;rgn=main
The Encyclopedia of Diderot & d’Alembert Collaborative Translation Project.
PLANCHE IX.
Tailleur d’habits et tailleur de corps

Livre L’Encyclopédie. [38], Arts de l’habillement : [recueil de planches sur les … Diderot, Denis (1713-1784)
https://gallica.bnf.fr/ark:/12148/bpt6k9978d/f46.item

Points de couture.

Fig, 1. 2. & 3. Elévation & places de dessus & de dessous du point de devanten piquant les deux étoffes de haut-en-bas & de bas-en-haut.
Fig, 4. 5. & 6. Point de côté ramenant le fil en-deffous par-dehors après avoir piqué les deux étoffes.
Fig, 7. 8. & 9. Point-arriere ou arriere-point, repiquant de haut-en-bas au milieu du point-arriere après avoir piqué de bas-en-haut.
Fig, 10. 11. & 11. Point lacé comme le point-arriere, lieu qu’il fe fait au- en deux tems, revenu en-hauton ferre le point, & retournant l’aiguille on repique en-arriere commeau précédent.
Fig, 13. 14. & 15. Point à rabattre fur la main piquant le haut-en-bas & de bas-en-hauten-avant les points drus espacés & également.
Fig, 16. 17. & 18. Point à rabattre fous la main commele dernier au-lieu qu’ayant percé l’étoffe supérieure on pique-l’étoffe inférieure par-dehors, ensuite on pique les deux en remontant.
Fig, 19. 20. & 21. Point à rentraire comme le point à rabattre fur la main se faisant en deux tems en retournant l’aiguille avant tout il faut joindre à point fimple les deux envers l’étoffe retournée on ferre de ce point les deux retours il faut pour cela très-peu d’étoffe &les points très-courts.
Le point perdu n’eft qu’un point-arriere ajouté au precédent.
Fig, 22. 23.& Point traversé, couture à deux fils croisés.
Fig, 25. A, premiere opération; point coulé ou la passe, c’eft la boutonniere tracée de deux fils. B, la passe fermée du point de boutonniere. C, la passe achevée & terminée de deux brides à chaque bout quel’on enferme de deux rangs de points noués

Google translated:

BOARD IX.
Sewing stitches.
Fig, 1. 2. & 3. Elevation & places from above & from the fronten point pricking the two fabrics from top-to-bottom & bottom-to-top.
Fig, 4. 5. & 6. Side point bringing the wire in-bursts from outside after stitching the two fabrics.
Fig, 7. 8. & 9. Point-back or back-point, pushing up and down in the middle of the back-stitch after dipping from below upwards.
Fig, 10. 11. & 11. Point laced like the point-back, place which it is made in two tenses, returned to the top, turns the point, and turning the needle backwards.
Fig, 13. 14. & 15. Point to be folded on the hand, stitching up-down and down-up in front of the thick points spaced & equally.
Fig, 16. 17. & 18. Point to be folded in the hand as the last one instead of having pierced the upper stuff, the lower stuff is thrown out, then the two are stitched upwards.

Fig, 19. 20. & 21. Point to point as the point to be folded on the hand being done in two times by turning the needle before all must be joined at the same time the two to the returned fabric we iron this point both returns require very little material and very short points.
The lost point is only a back-point added to the previous one.
Fig. 22. 23. & Crossed point, cross-stitched seam.
Fig, 25. A, first operation; cast point or the pass, it is the buttonhole traced two sons. B, the closed pass of the boutonniere point. C, the pass is completed & completed with two straps at each end which enclose two rows of knotted stitches

Google translate can’t really understand it. But I am no better off reading heh translation here: https://quod.lib.umich.edu/d/did/did2222.0000.178?view=text;rgn=main

Figures 13. 14. and 15. Overhand hem stitch piercing from top-to-bottom and from bottom-to-top in front, the stitches densely spaced and even.
Figures 16. 17. and 18. Underhand hem stitch [is] like the last, except that having pierced the upper fabric one pierces the lower fabric at the outside, one pierces the two together fortifying.

The Encyclopedia of Diderot & d’Alembert Collaborative Translation Project.

http://hdl.handle.net/2027/spo.did2222.0000.178


https://quod.lib.umich.edu/d/did/did2222.0000.178?view=text;rgn=main
The Encyclopedia of Diderot & d’Alembert Collaborative Translation Project.
PLANCHE X.

Livre L’Encyclopédie. [38], Arts de l’habillement : [recueil de planches sur les … Diderot, Denis (1713-1784)
https://gallica.bnf.fr/ark:/12148/bpt6k9978d/f46.item

Fig, 1. 2. & 3. Points noués simples de neuf différentes formes.
Fig, 4. Points noués doubles de trois différentes sortes.
Fig, 6. & 7. Points croisés de simples & doubles de neuf différentes sortes.

Google translation:

Fig, 1. 2. & 3. Simple knotted stitches of nine different shapes.
Fig, 4. Double knotted stitches of three different kinds.
Fig, 5. 6. & 7. Cross points of single & double of nine different
kinds.

To be honest it is the section on linen items that has nice clear hemming illustrated.

LivreL’Encyclopédie. [38], Arts de l’habillement : [recueil de planches sur les … Diderot, Denis (1713-1784)
https://gallica.bnf.fr/ark:/12148/bpt6k9978d/f46.item
PLANCHE Iere.

Livre L’Encyclopédie. [38], Arts de l’habillement : [recueil de planches sur les … Diderot, Denis (1713-1784)
https://gallica.bnf.fr/ark:/12148/bpt6k9978d/f46.item

FIGURES
Fig, 1. Le point de surjet.
Fig, 2. Le point de côté.
Fig, 3. Le point-arriere ou arriere-point:
Fig, 4. Le point devant.
Fig, 5. La couture rabattue.
Fig, 6. Le point noué ou point de boutonniere.
Fig, 7. Le point de chaînette.
Fig, S. Le point croisê.
Fig, 9. Peignoir en pagode:
Fig, 10. Bonnet piqué.
Fig, 11. Coëffure de dentelle.
Fig, 12. Coëffure à deux rangs ou à bavolet.
Fig, 13. Grande coëffe en mousèline. A coëffure en papillon sur une tête de carton.

Google translation:

FIGURES
Fig, 1. The overlock stitch.
Fig, 2. The side point.
Fig, 3. The rear-end or back-point:
Fig, 4. The point in front.
Fig, 5. The seam folded.
Fig, 6. The lockstitch or boutonniere.
Fig, 7. The chain stitch.
Fig, S. The point crossed.
Fig, 9. Bathrobe in pagoda:
Fig, 10. Quilted hat.
Fig, 11. Scallop Coif of lace.
Fig, 12. Coeffure Coif with two rows or bolster.
Fig, 13. Large mussel cockerel mouseline coif. A butterfly coif on a cardboard head.
Comments Off on easy mantua cutting

Filed under fitting a fashionable shape, projects: early historic

new cleves dress

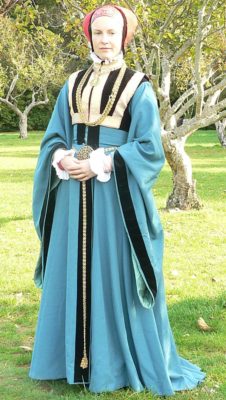
There are times when you just cannot ignore an opportunity and one arose to get a length of the Sartor reproduction weave of the cloth of gold fabric of the Golden Gown of Margareta in Upsala.

Sartor’s reproduction has a 36cm repeat of the pattern

So, for years I have wanted to recreate Anne of Cleves wedding gown or her black and gold gown. But I just have not found a brocade (or brocotelle, or cloth of gold) that really would match what I have seen or read.
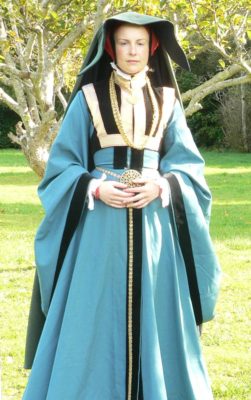
Sartor’s other fabrics are magical, absolutely magical. But this weave, though it is 15th Century is closer to the fabric seen in the guarding of gowns all over the Saxon and Westfalen regions.

The fabric is being woven right now. So it’s not available as pre-order any more. I have enough to make the same style of dress as I have recently made or the same style dress as one of her mother’s gowns.

So this means I also need to publish my information about those images or this is my third pretty dress with no information.

I think I have a way to get through it though. I have a few blog posts already added. I just need to get all the Cologne information out first.
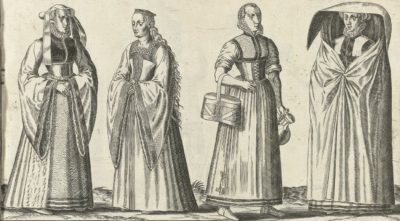
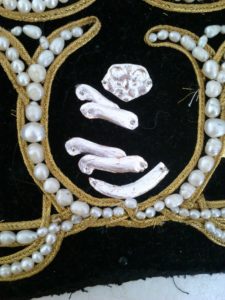
This means all the Bruyn portraits first.

Then I can do the Trachtenbuch information. (I have gone through what I think is finally all the books including the italian. I don’t think I have found any more images.)

Then the inventory information.

Or should I just publish the Cleves stuff. It would be out of context though. right lets see what the gallery functions of my blog can do to make it easier.

Leave a Comment

Filed under projects: early historic

hemmed

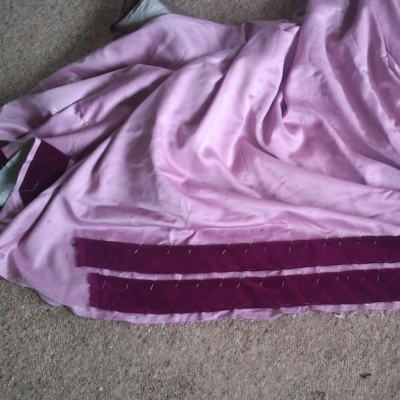
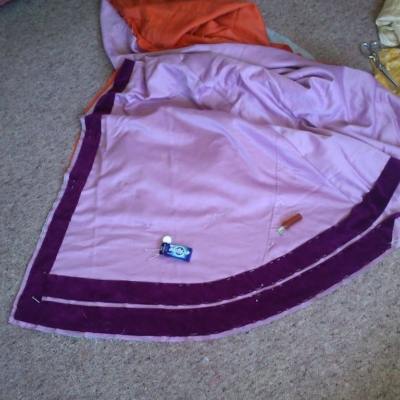
My pink Cleves gown is hemmed! It’s full enough I can do the overlap even if my source art doesn’t show it. But I’ll have a lot more to say on that later.

The front is flared and the sides but the back is fairly straight. This makes the centre back spring a lot more from the body with the hem not folding as deeply as it could. But also ugh! How did I wind up with a 2″ wide piece missing!

Mr Carlo really loves this fabric. Like loooves.

Initially i was sewing on my knees until I found I could weave my needle through the fabric and not pick up the carpet. So that made it much easier to sew the curves without stretching the fabric.


I am looking at getting my Schnittbuch up this year, as well as a whole lot of research, and thus loads of documents for others to sift through. There is a lot, not a whole lot of costume info, but lots about life in the region.


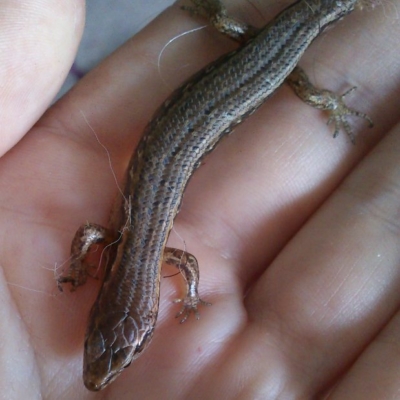
Ginger fluff loves skinks. Luckily he is interested in the twitching tails so we’ve been able to rescue the actual skink. They are pretty canny. They play dead in my hand but as soon as I get them near foliage they can hide in, VROOM!

Leave a Comment

Filed under projects: early historic

cleves progress

I’m taking a short break now from hand sewing. I have cohesive bandage to lay down as I think I’ll need it.

Anyway. I forgot how annoying and fiddly it is to hand sew  a piled fabric to a fabric that is springy but without a pile. Thread just stretches and the turn under moves. Like moves moves. I am not sure I can adequately measure so I have to eye it.

I also think I’m doing it wrong. It’s absolutely right going by portraits but every single extant example has a narrow braid/twists of thread to hide what is likely a raw edge. Because yes, velbet has always been a PITA to work with. My best work involved making card templates and pressing and steaming my velveteen over it and still unpicking every single hem at least once.

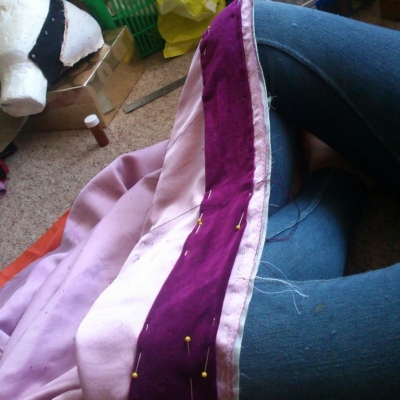
I cut my guards to shape. 8cm wide from one selvage for the fronts and then I laid the fabric over my right sikirt front and pinned at regualr intervals 8cm for each guard. SO far so simple. But the velveteen has a nap. Which means turning and turning the remaining fabric to make sure the pile goes up- so the velveteen looks the most rich.

Then I lined up left over to the back centre which means piecing at the sides. This is based mainly on what Alcega has to say- actually all the Spanish tailors. All piecing is at the sides. Like everything. Or under arm, but basically sides are a mess, underarms next, CF and CB pretty much untouched. The Austrian tailors also show piecing in places we may not automatically think of.

I suspect it has everything to do with expectations. We expect no piecing- we limit most pattern pieces by the width of fabric. this is mostly okay when you can top and tail perfectly shaped pieces. But historically really special fabrics were narrow. So it was expected that they would not be wide enough so vertical seams at regualr intervals were expected. And ad they tend to be near the side seam it is a handy place to add any piecing as ther eis already an expectation of seams there.

So Centre Front and Centre back being, usually, cut with the selvages are expected to be continuous.

There are obviously exceptions. But this is the rule.

Anyway, so after matching fabric I was even able to follow the curve to cut my neckline guarding. And then was able to make strips for arm guarding.

I only hand sew while sitting cross legged. SO I do have to stop every so often to stretch. But knees make for a very handy “frame” to stitch. Also you can adjust tension by just moving, and also it only take a pin at each seam being worked on.

I’m not 100% convinced on the source being accurate. but I basically have two two portraits to go by otherwise, and they do confirm wide bands. And later examples show at least one wide band about the width of one of thee, and lots of religious paintings where it’s basically zero guarding. I think this is an acceptable variation in terms of colour, texture, and width of guarding. I like the tone on tone, the original is black on pink but it looks so Saxon. I love Saxon, and Cleves did have Saxon influence (Sybilla married the Duke and kept up correspondence with her brother so yes, very definitely an influence.)

So there is heaps to go and I have to pace myself or risk not being able to go to the event at all. I can work on hems while there as I have my linen kirtle and silk frock. So you know. I am set to just pack. But I want this dress and hat. And then I can upload my resources.

So i think I should do some stretches and call it an evening.


Also I have to get to the city some time soon. I know I have a reference for Jocabaa wearing frocks that outshone brides and also got numbers of how many cows brocade cost…

Leave a Comment

Filed under projects: early historic

a new hat

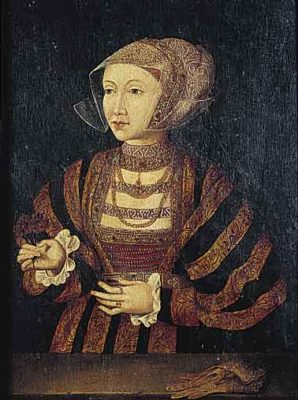
I am going full Cleves all the time 🙂 Ever since I read Anne of Cleves by Mary Saaler I have wanted to make all the outfits described as hers. I haven’t hit a jackpot in terms of a list of her wardrobe before she left for England but Hall cronicles her appearance enough. And I have gone and read a digitised reprint and it seems to ring true. But before all that I am trying to make a hat seen in my favourite protrait of her.


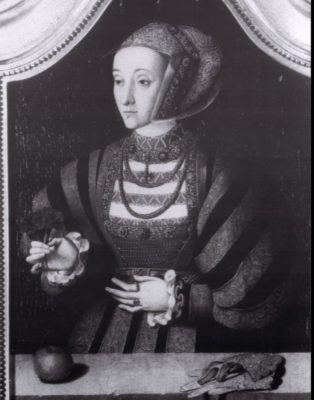
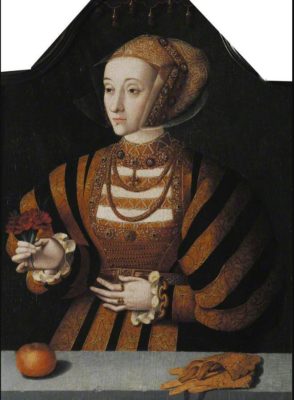
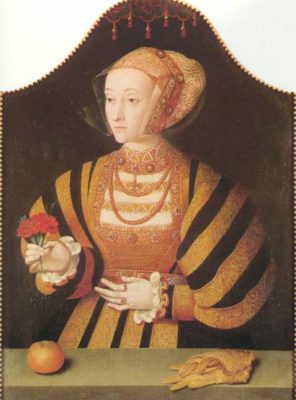
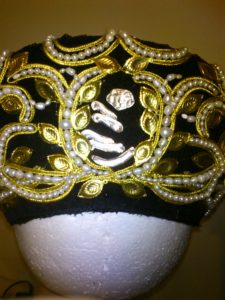
This was sold in London in 1930 and disappeared until The Rosenbach recently revealed that they had this portrait, https://rosenbach.org/blog/long-lost-triplets/ (Please note I have tried to adjust the perspective). This shows a gold coloured baret over a gold covered stickelsche with pearlwork (the colours can be identified in the Rosenback photos while the details can be seen in the copy from Saaler.

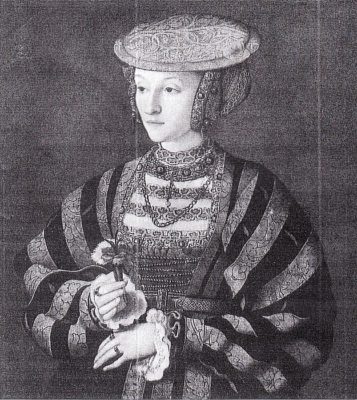
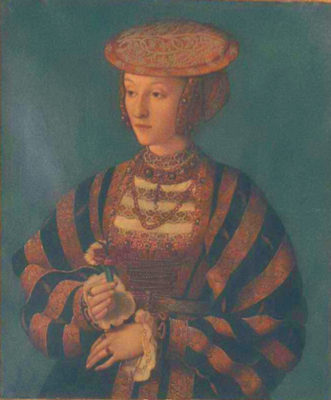
The St Johns University portrait. On the left from Saaler, on the right a photo directly of the portrait as per the Art Fund websitehttps://artuk.org/discover/artworks/anne-of-cleves-223303


The St John’s Portrait is the one that is was X-rayed and discovered that her nose was originally painted longer. Of course historians have take that to mean he nose was made smaller to flatter. I believe it to simply have been a mistake. The Rosenbach portrait is clearly the most sensitively and deftly painted of all these portraits.


There are a few files of the St John’s portrait that are of different contrast levels. However I do believe this to be a different copy. It is clearly different based on the fall of the shadows of the fruit and the gloves. The tacks around the edges of the painting are not in the same position as the St John’s painting either.

https://web.archive.org/web/20030315083403/http://www.asn-ibk.ac.at:80/bildung/faecher/geschichte/maike/bilderkatalog/tudors_stuarts/abb20p.htm

Most files are now over at: http://www.kleio.org/ except this portrait. So I do not know the provenance.

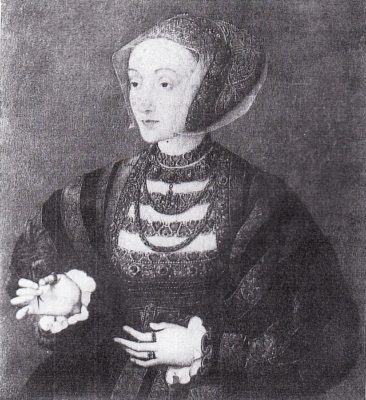
This is from a photograph at the Witt Library and is part of an article in Burlington Magazine, “A Portrait of Anne of Cleves” March 1992, issue 134 pages 172-175. This is the only copy that keeps the three rows of brocade of the skirt- the majority of skirts of this region overlap so the three rows make sense in this light.

And this is a copy at Hever Castle itself. https://www.hevercastle.co.uk/news/6th-january-1540-henry-viii-married-anne-cleves/


So that is five copies of this portrait from close to her time in England- though in absolutely classic dress from her home. The mix of Dutch and Saxon styles is particularly clear.


Leave a Comment

Filed under projects: early historic

more gear from mina

(Mina is the shortform of my SCA name and tends to be used just as a nickname for me- I like it 🙂 )

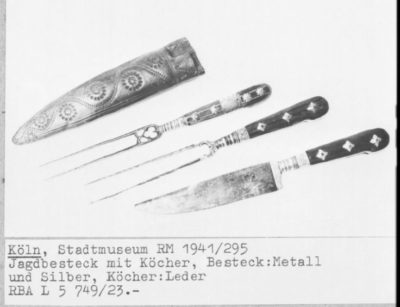
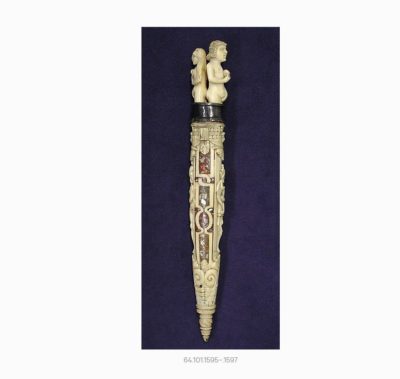
I just grabbed a set of a knife and fork from Trademe- mother of pearl handles, silver decorative join to the functional end. Not suse the content of the functional end.

They are really lovely, and fit what I wanted 🙂

I want to make a case for them. So it means having them in hand sooner rather than later 🙂 I am not entirely sure how they are made but I have a few options to work with.

So, why a knife and fork? Aren’t forks out of era. Nope.

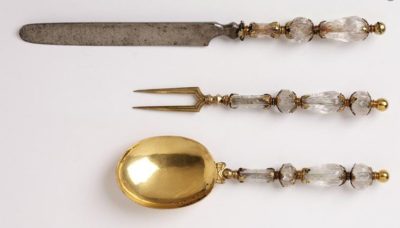
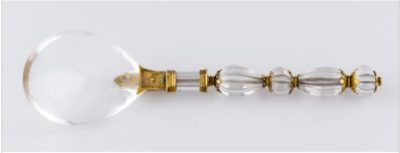
My favourite set ever is Italian and is made with rock crystal.

http://collections.vam.ac.uk/item/O112430/cutlery-set-unknown/

It seems to have been redesignated later than 16thC but there are similar that are earlier.

http://gyujtemeny.imm.hu/gyujtemeny/kes/1434?i=1377

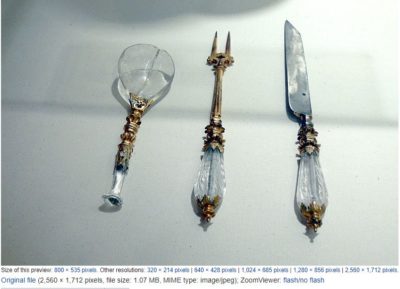
https://commons.wikimedia.org/wiki/File:Wien_Schatzkammer_Deutscher_Orden_-_Essbesteck.jpg

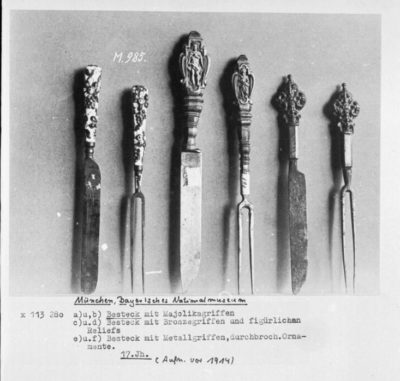
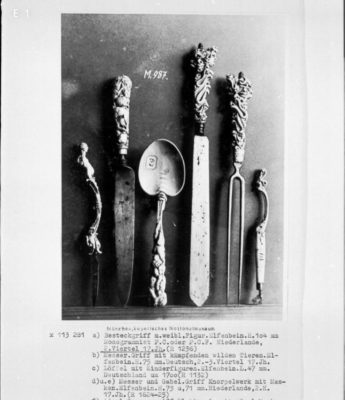
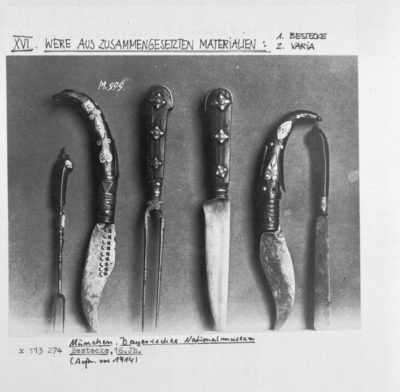
So I originally tried to find modern cutlery I could adapt, but Most just cannot- I need each end to unscrew and have a core to thread crystal on to.. So a look around at further designs:


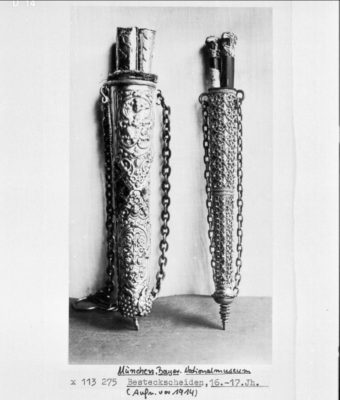
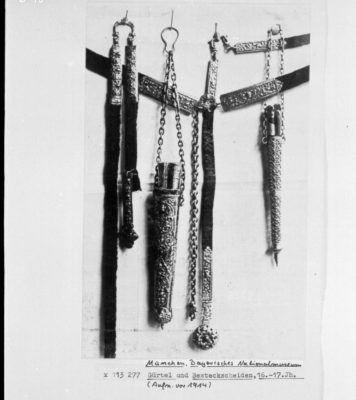
All from Bildindex, info in photos. All 16-17thC and across the states.

So my theory is that we don’t just see sets of knives in the Trachtenbucher but possibly knife and fork sets.

Mostly the forks are long tined. I personally do not want to run the risk of poking myself in the face with them so I am fine with a smaller tine set further to the end. In the first image there is a case that may be associated witht he matching set.

But now for the cases:

https://www.bildindex.de/document/obj05227007 https://www.bildindex.de/document/obj05227006

These could well be wedding knife sets. There don’t seem to be a top end to the cases. And they seem to be silver.

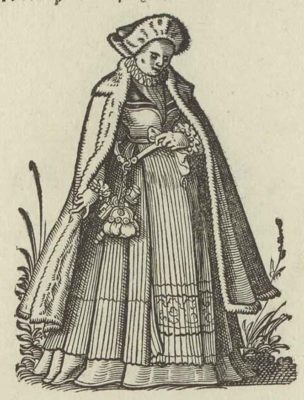
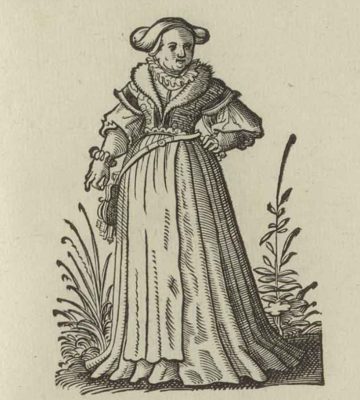
These do appear to match the sets worn in the trachtenbuch.

These are from Weigel’s book https://commons.wikimedia.org/wiki/Category:Frauen-Trachtenbuch_(1586)

https://www.bildindex.de/document/obj00290368  and https://www.bildindex.de/document/obj00290368

These are from de Bruyn.

These appear on both unmarried and married women, so I think these are a status symbol- I found single knives in cases on working women though.

So, any evidence that these are knives and forks:

https://www.metmuseum.org/art/collection/search/210073?rpp=60&pg=1&rndkey=20140327&ao=on&ft=*&where=Europe&what=Knives&pos=38

This is later, but the case and cutlery are a match.

And

http://www.britishmuseum.org/research/collection_online/collection_object_details.aspx?assetId=1477461001&objectId=35872&partId=1

c1600.

Yes! I can make a case like this from the scraps of heavy russet I have. I think I’ll need to learn some techniques from shoemaking as I’ll want really crisp edges. But I’ll be able to embroider the case 🙂 or… I still have diamon shaped brass stampings I used for my Valois ouches set. They could be shaped to fit.

Anyway. Yay! Now I need to find a matching spoon to carry in my purse 🙂

Leave a Comment

Filed under projects: early historic, Uncategorized

another wrinkle sorted

I have been trying to work out a way to have fancy chemise sleeves as per my Cleves dress and just was getting very lost. Until I remembered that I already have the solution. pins!

This is my c1560s woolen Cologne gown. This is taken pretty much from the de Bruyn Trachtenbuch. So the skirt overlaps at the front to allow it to be worn open or closed. The sleeves are half length with matching hanging sleeves. The sleeves are actually half length and then matching hanging sleeves pinned on.

This is not totally interpretive. Hanging sleeves are listed separately in inventories and it is possible to see the pins in the woodcuts.

(A. de Bruyn, citizens from Cleves.)

Okay so they look more like thumbtacks here, on the far left, but that curvy line is also seen in obviously pinned on fitted sleeves (also found in inventories.)

Note also the watered silk lining on the far left. And what is a likely glossy lining on the far right. Note the turn backs of the sleeves and skirt. And the short sleeves over fitted sleeves. This is a fantastically modular wardrobe,

(A. de Bruyn, citizens of Cologne)

So you can see my wool gown is much more Colone in style but uses the Cleves plate for the pins information. I think other plates show pins used horizontally, which is how I use mine.)

The sleeves for my earlier Cleves dress are probably held on in a similar way. I’m assembling my current cache of images and documents to see if it does have support not just makes sense. It is also helping me figure out how to use my decorative under sleeves as well. No one puts brocade or heavy embroidery on something direct to the skin or part of a washing chemise.

So, very excited, I’ll be able to make more sets of hanging and under sleeves for my earlier dresses which makes them possible to be worn for a week long event.

Leave a Comment

Filed under projects: early historic, Uncategorized

stickelchen progress


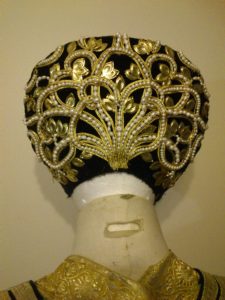
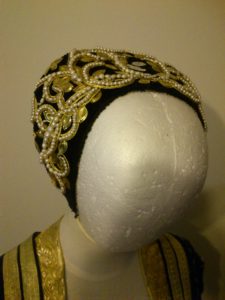
My Mr Boo tribute fits in really nicely. He will need to be unpicked to put the embroidered body in place but I really wanted to test the shapes and embossing depth and get used to it first 🙂 he will have a little fat belly. He’ll have his ears and nose partly etched so his heart nose is really

obvious.

But the rest of the leaves and pearls have been stitched down too 🙂

The front piece will need leaves to have holes stamped out of the end. So not doing that past 9pm as it is now though!

Leave a Comment

Filed under projects: early historic

big day

Finally have my studio feeling spacious. There has been a lot of digging through stash to divest the burden, still lots more to go and we have so much old furniture to get rid of too.

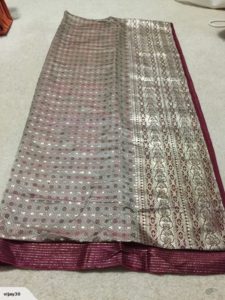
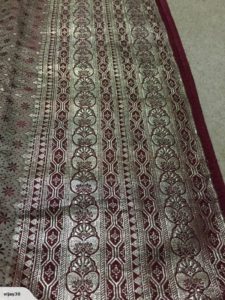
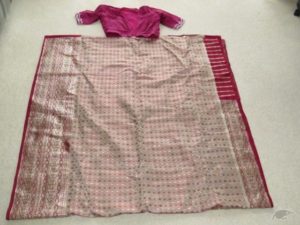
Anyway. Today I cut and pressed all the gold trim of the saree. Well now gold. I used RIT color remover to turn the base fabric yolk yellow and the metal tarnished to gold.


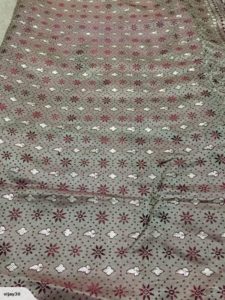
These are photos from the auction. As soon as the seller added these I clicked by it now 🙂 That double border does go from one end to the other, or did, and there was a 2 yard length on the other side (one width). Real metal, cold to the touch.

The space between the double border has also been turned into narrow trim for the chemise.

The main body? Well I’ll have to cut to shape then use that for the kirtle bodice. That is mostly not metal, but a double satin. It’s pretty darn amazing as a piece that has been totally able to be used with minimal waste.

Today I cut the sleeves and lined the bodice and refitted it (based on the Mary of Hungary bodice which really relies on the bias at the waist to fit!) So on the whole really stepped up to get this ready.

I have plans to go to Hamilton Gardens with a good friend and get photos. Honestly, I just want to get all my gear out there and photographed. All of it. No, no exceptions. All  of it.


Leave a Comment

Filed under projects: early historic

very down

Not sure if fatigue is worse this year or what, but today has been spent trying to be at least upright and it has felt like a struggle all day, and that is after a day sleep that usually does help.

But we did have “not a storm really” last night which brought down this tree. And it was partially sheltered by the garage and house next door.

So pretty much all I did was overhand over my seams to stop them from twisting in the skirt.


Okay I did also manage to mostly remove colour from the saree borders, but I have to be careful as it’s the same kind of fabric as one I took too far. And there are still red patches.

Leave a Comment

Filed under projects: early historic