I think I solved it
Well I have divided the hilts into reasonable lengths and created supports so now… now I hope I can just make a curve and use the plugin. Hopefully. I am exhausted.
Well I have divided the hilts into reasonable lengths and created supports so now… now I hope I can just make a curve and use the plugin. Hopefully. I am exhausted.
The site will default to your WP login but if you aren’t logged in you can use FB, or Twitter at the very least. Woo!
After using the shape bender I used hidden geometry to work out why the end looked blunt and then added lines.
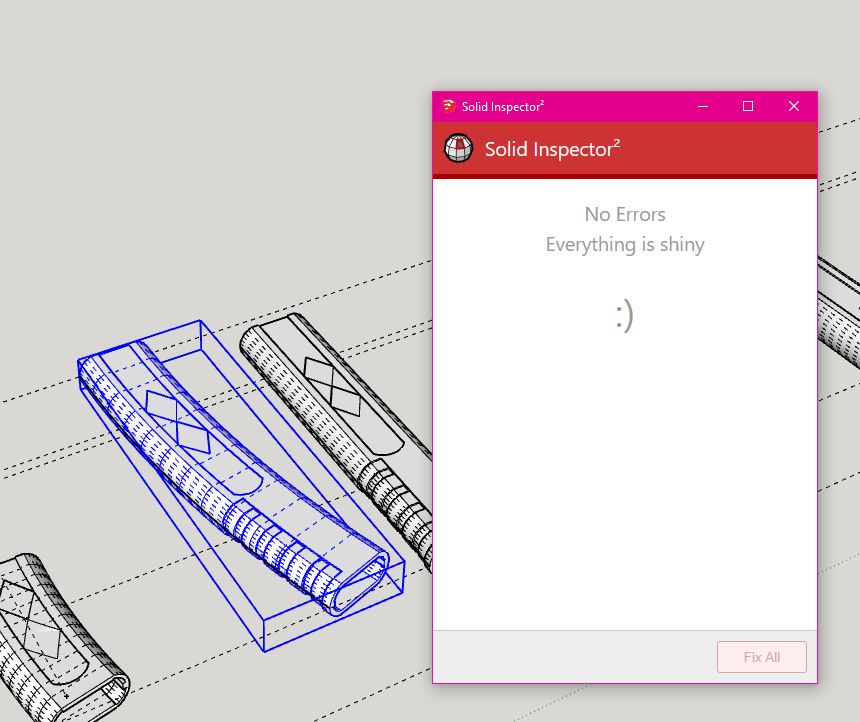
And then used Solid Inspector2 to check for errors. It actually fixed some things that were meant to repair, but not my edges which I did expect.
And then I found trying to slice through horizontally just did not work. The model is perfectly horizontal but as soon as I intersect faces it doesn’t. So lots of short pieces like for Ventress 🙂 I know that worked so this should work too 🙂
I started making fairly the overlaps to help join those pieces once printed but I’m not so I like them, so I’ll spend a little more time today on making ring supports instead.
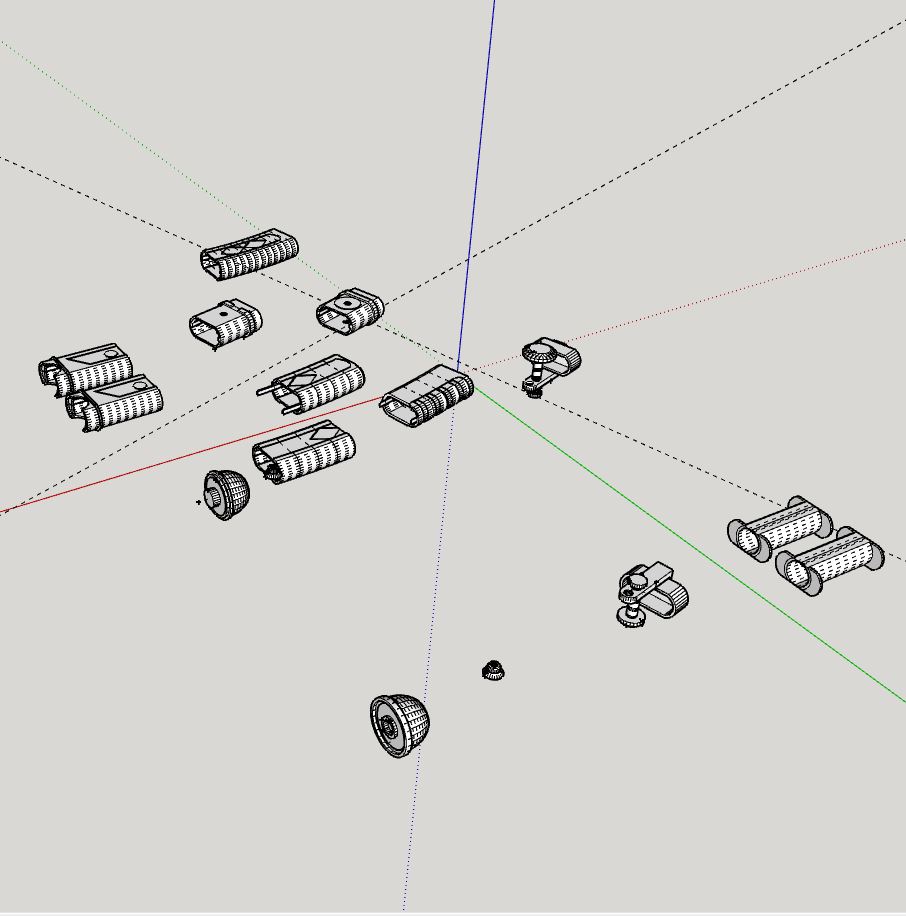
Each hilt is more than 10 pieces. This is to better reflect the different materials (copper, silver, black) Also to allow the same print to be used as non functional and functional by having some separate blade holders able to be used simply as support, the end cap being functional with the D ring holder and screw. I kept getting errors using the bolt making plugin so I’d rather just not use that atm. It should work at a larger scale but I did find scaling could be unpredictable with curves,
These also have to be arranged in correct alignment for printing. which I will do once the connecting sections are added.
I find this quite painful and painfully slow work. A lot has had to be drawn by hand even after using tools and plugins. For example the supports I’m making can’t be just extruded as they connect into pieces on a different angle. So I have to copy from one piece and add to the first and then measure and draw to size. Luckily 5mm seems to work well so I can at least be fairly consistent with that 🙂
It’s seriously fiddly work, lots of copy paste and drawing on the inside and outside
So I have had this site linked for a while. I’m old school and I also like to know how and why methods are used. I was always perplexed why we just tore strips of paper for our paper mash projects. There was nothing machy or pulpy about it. At all.
Turns out like with everything what we were taught in school was “lies to children” as in we were not taught the full method. What I know I was taught was basically the support stuff not how to detail.
http://home.eol.ca/~props/recipes.html#rec1
These are all for modelling types of mash. I have adapted recipe 2 for my Maleficent horns. So to this end:
Mash mixes:
1 roll kitchen paper towels- recycled paper &
3L of boiling water
3 heaped dessert spoons flour &
2/3 cup cold water &
2 cups boiling water
250ml outdoor pva
extra roll of paper towels, extra PVA glue
Paper pulp:
Boil 1L hot water in a very large pot. CAUTION- SAFETY BREAK! Make sure to use a pot that is at least twice the volume of the water. Paper is solid and when water boils the bubbles will build up underneath until they are big enough to move solid wet paper several inches deep! This will usually mean a significant force and so potentially will boil over or splash and burn you. I used a large stock pot.
Start tearing paper in to strips. CAUTION- this will take some time! I boiled water in a separate jug to add to the boiling water as I added paper.
First start pulling paper from the roll and fold along the perforated lines. I do about five sheets. Then tear with the grain- in this case it is with the length of the roll- along all five layers of sheet. Strips can be up to an inch wide. Then tear across. CAUTION- this is difficult and you will tear diagnonally as the paper wants to tear with the grain all the time.
Add paper to the water aiming for a balance between wetness, safety and maximum paper:water ratio. One roll will take a lot of water.
Once finished simmer for 2 hours. Am currently 30mins in to this.. sigh!
Paste:
Boil the larger amount of water in a medium pot. Mix flour and cold water to a slurry. Once water is boiling quickly pour and beat the slurry in to the pot.
Stir and immediately set to simmer. Strain while hot but not boiling and set aside to cool. Currently waiting for the mix to cool.
Next post will be about making the support frame! While waiting for the mixes to cool before mixing them together!