another dress making book

How to dress well on a shilling a day: a ladies’guide to home dressmaking and millinery.

Highly recommended for the text as it describes the order of sewing and how to. That paragraph on the “bulgarian fold” is really amazing! At least for coming out and stating that the “peacock” style train is impossible to self arrange! Which is something I have trying to get across when getting photos of my gowns with trains- they need a wrangler to look good!

princesse dress source!

The World of fashion and continental feuilletons (1879-1880)

I have seen this in Patterns of Fashion 2 for years so it’s nice to be able to put it in context!

There is also a skirt pattern that shows the top and tailing cutting layout but also the curved upper section for fitting over the hips!

And this section is repeated a few times, handy for those who were collecting the magazines by month!

Plate 178 has a style I love, the self trimmed gown, the vertical folds at the neck.

Maybe I can do this with my princesse petticoat? It would make it so very much more useful!

There are other columes online too!

oh no!

I still believe one of my beaded skirt obsessions was from a tiny book on costume, probably wedding dresses and is almost certainly gone (the library probably has removed the book from even stack.)

But I think I may also have totally forgotten that one of my favourite costumes from film has a very heavily pearled tablier!

http://www.wornthrough.com/2014/02/museum-life-film-costume-in-the-gallery-and-the-archive/

and:

https://www.flickr.com/photos/bauhausfrau/albums/72157632918697746

https://www.flickr.com/photos/bauhausfrau/8529951256/in/album-72157632918697746/

https://www.flickr.com/photos/bauhausfrau/8529951464/in/album-72157632918697746/

In fact this so closely matches my image in my head that perhaps I was thinking of it all along!

Though the company that created the gown is very well known for using historic sources so there may also be some influence of the same sources!

wedding gown musings

Sierra Boggess shared this image yesterday and can you see what has made me so excited? The fabric is thin. Well fairly thin- the flash and angle allows us to see her skin across the arm while the fabric looks more opaque closer to the armscye (where the fabric turns and follows the curve of her shoulder.) The sleeves are either unlined or lined with something very fine while the bodice is flat lined in a solid white.

I tend to double line my bodices and either not line or line my sleeves in a very thin material too.

Also if you follow the lines of the fabric on her sleeve you can see how very shallow the sleeve head is. This is both era appropriate and theatre appropriate as it means you can get your arms over your head. Notice the small wrinkles between shoulder and armscye? Yep. Modern patterns try to eliminate that by using a very tall sleeve head and that is what gives us limited arm range.

The effort to make a garment look good on the stand makes for a garment that is far less practical.

Anyway, just my thought process when I look at new/different images of the same garment 🙂 It’s all about the fit.


Oh and there is probably a bit of ease in the top of the sleeve head, I use three rows of stitches to do this rather than two as it does makes the fine gathers almost invisible.

Happy birthday to @andrewlloydwebber!!!!! So grateful you are on this planet!!!

A post shared by Sierra Boggess (@officialsierraboggess) on


Mon Mothma progress

I don’t like to use patterns, I find infinitely more success with drafting (more than drafting, and drafting more successful than using an existing pattern.) It has everything to do with modern pattern blocks. In general bodies vary each generation but there is a fashionable shape as well as a fashionable size.

My shape goes against modern fit models in a way that does not conform to the methods of correcting a pattern.

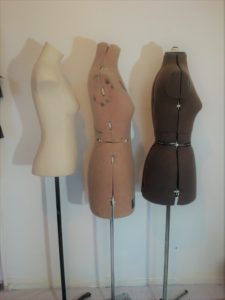
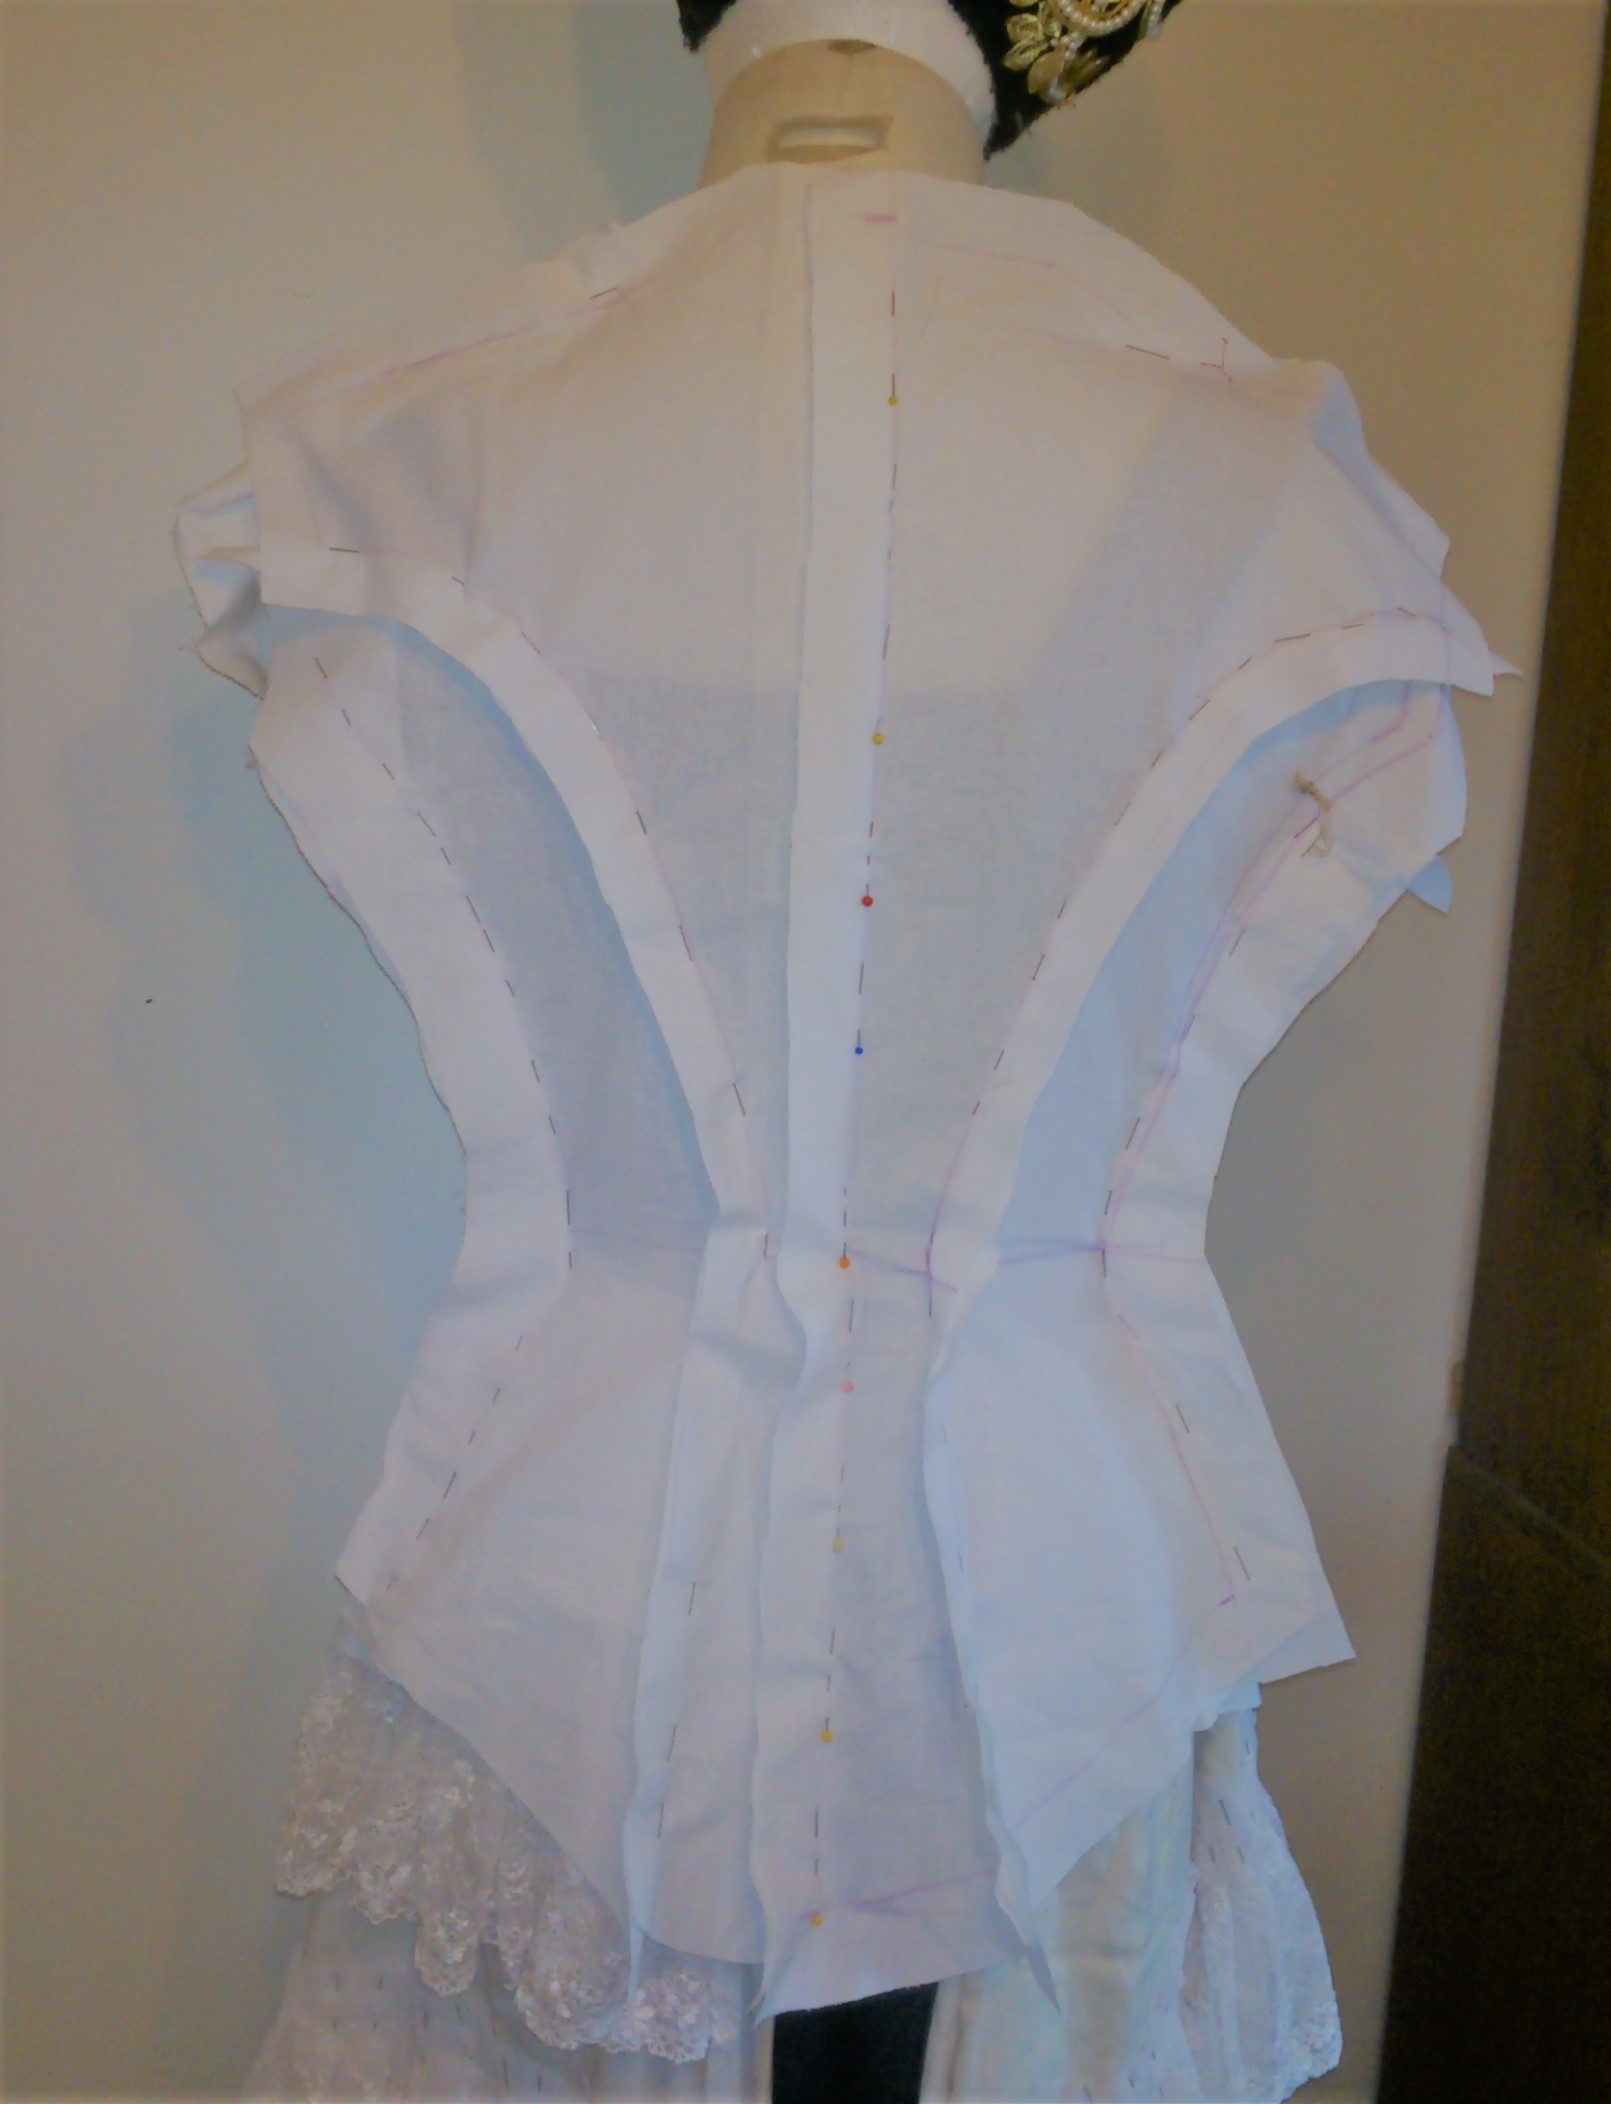
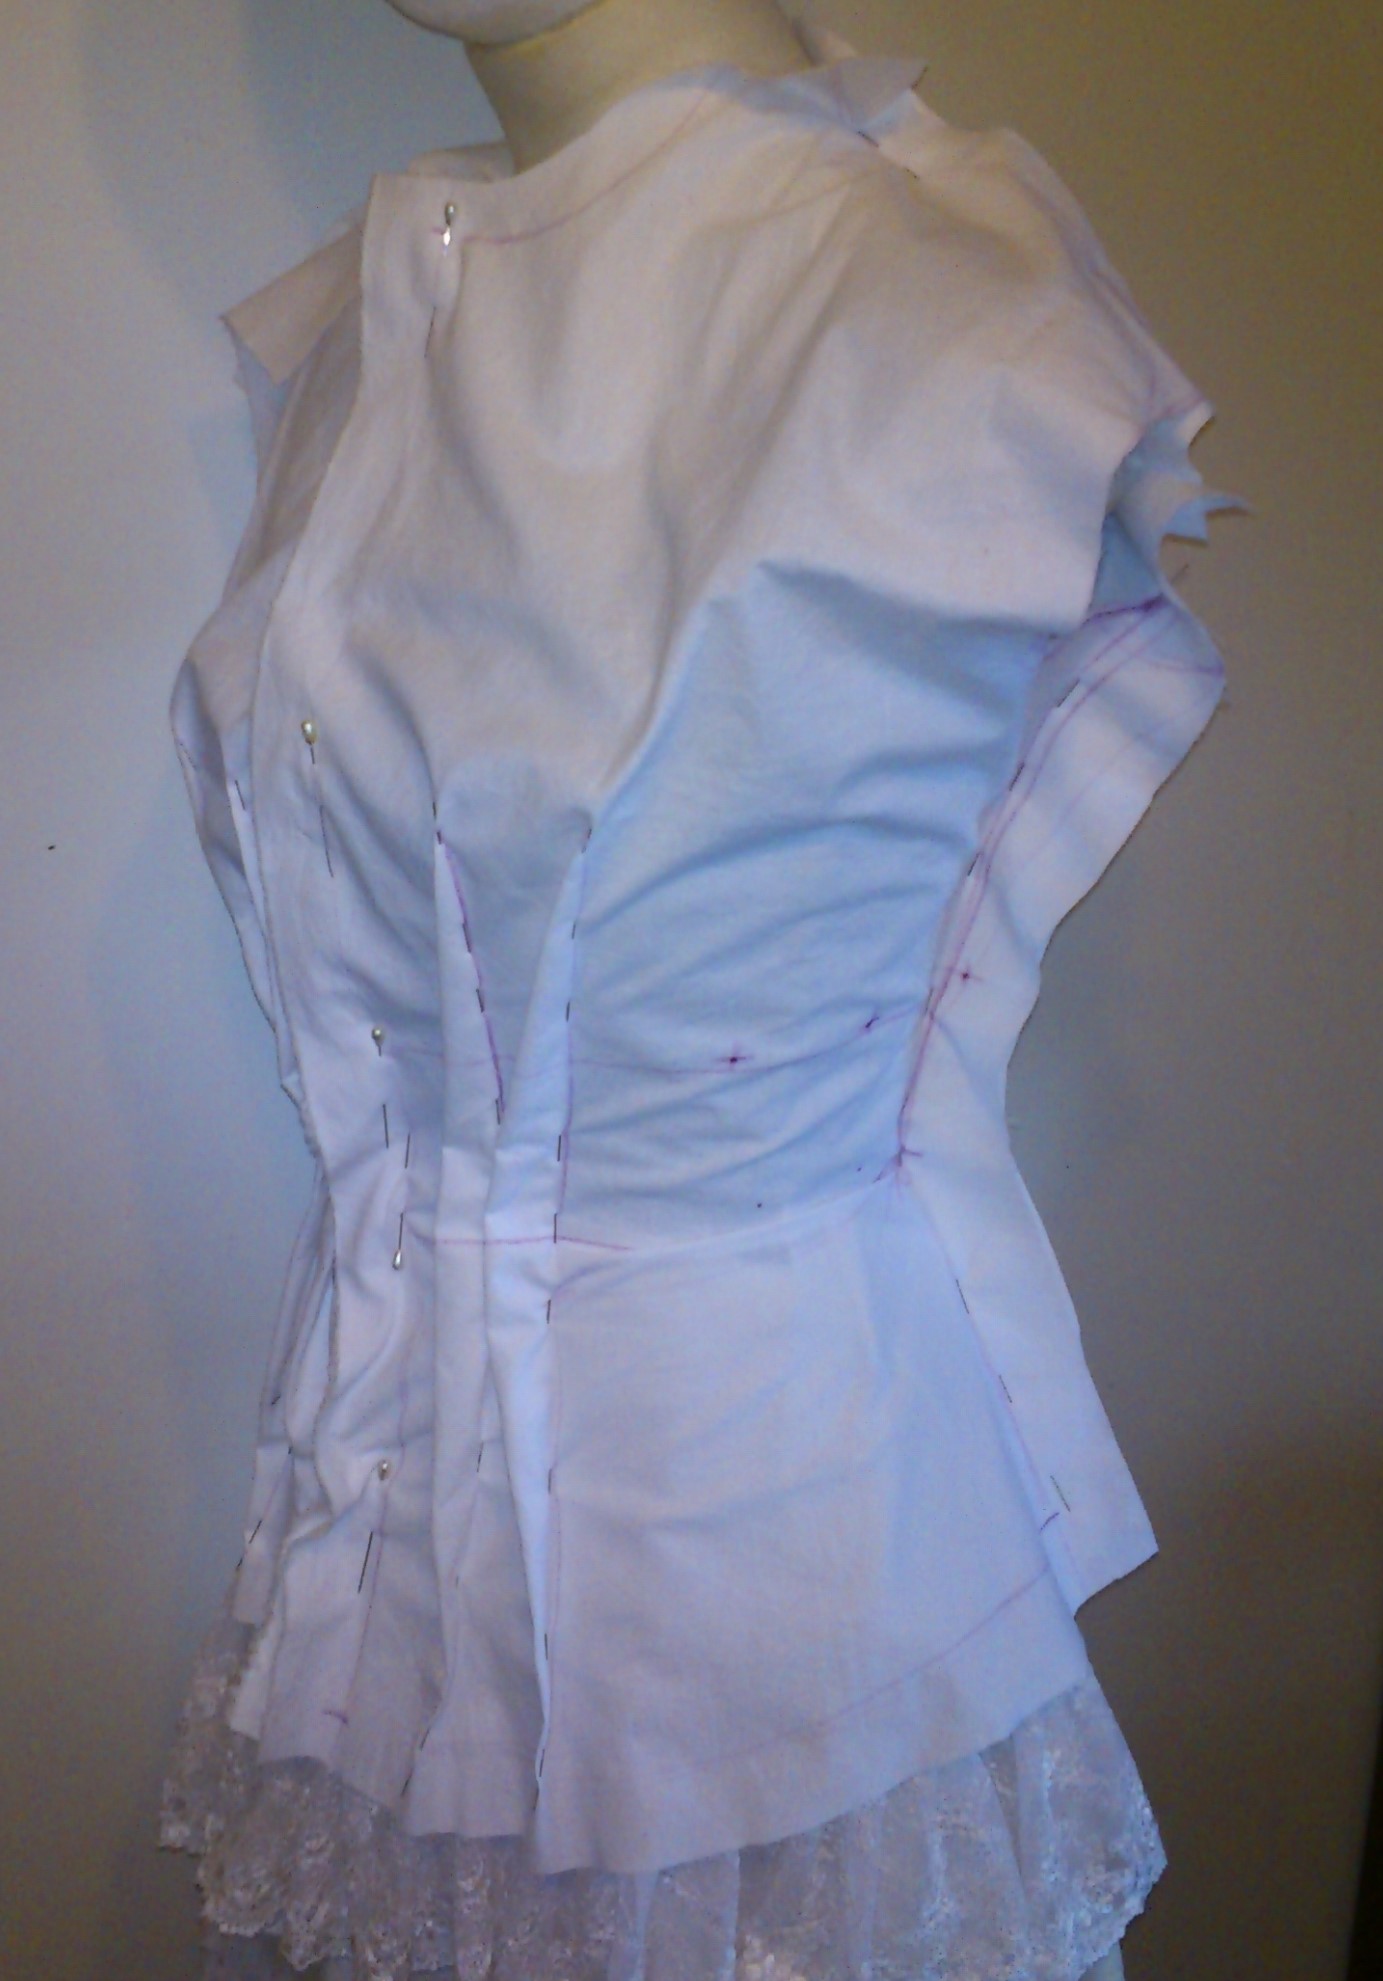
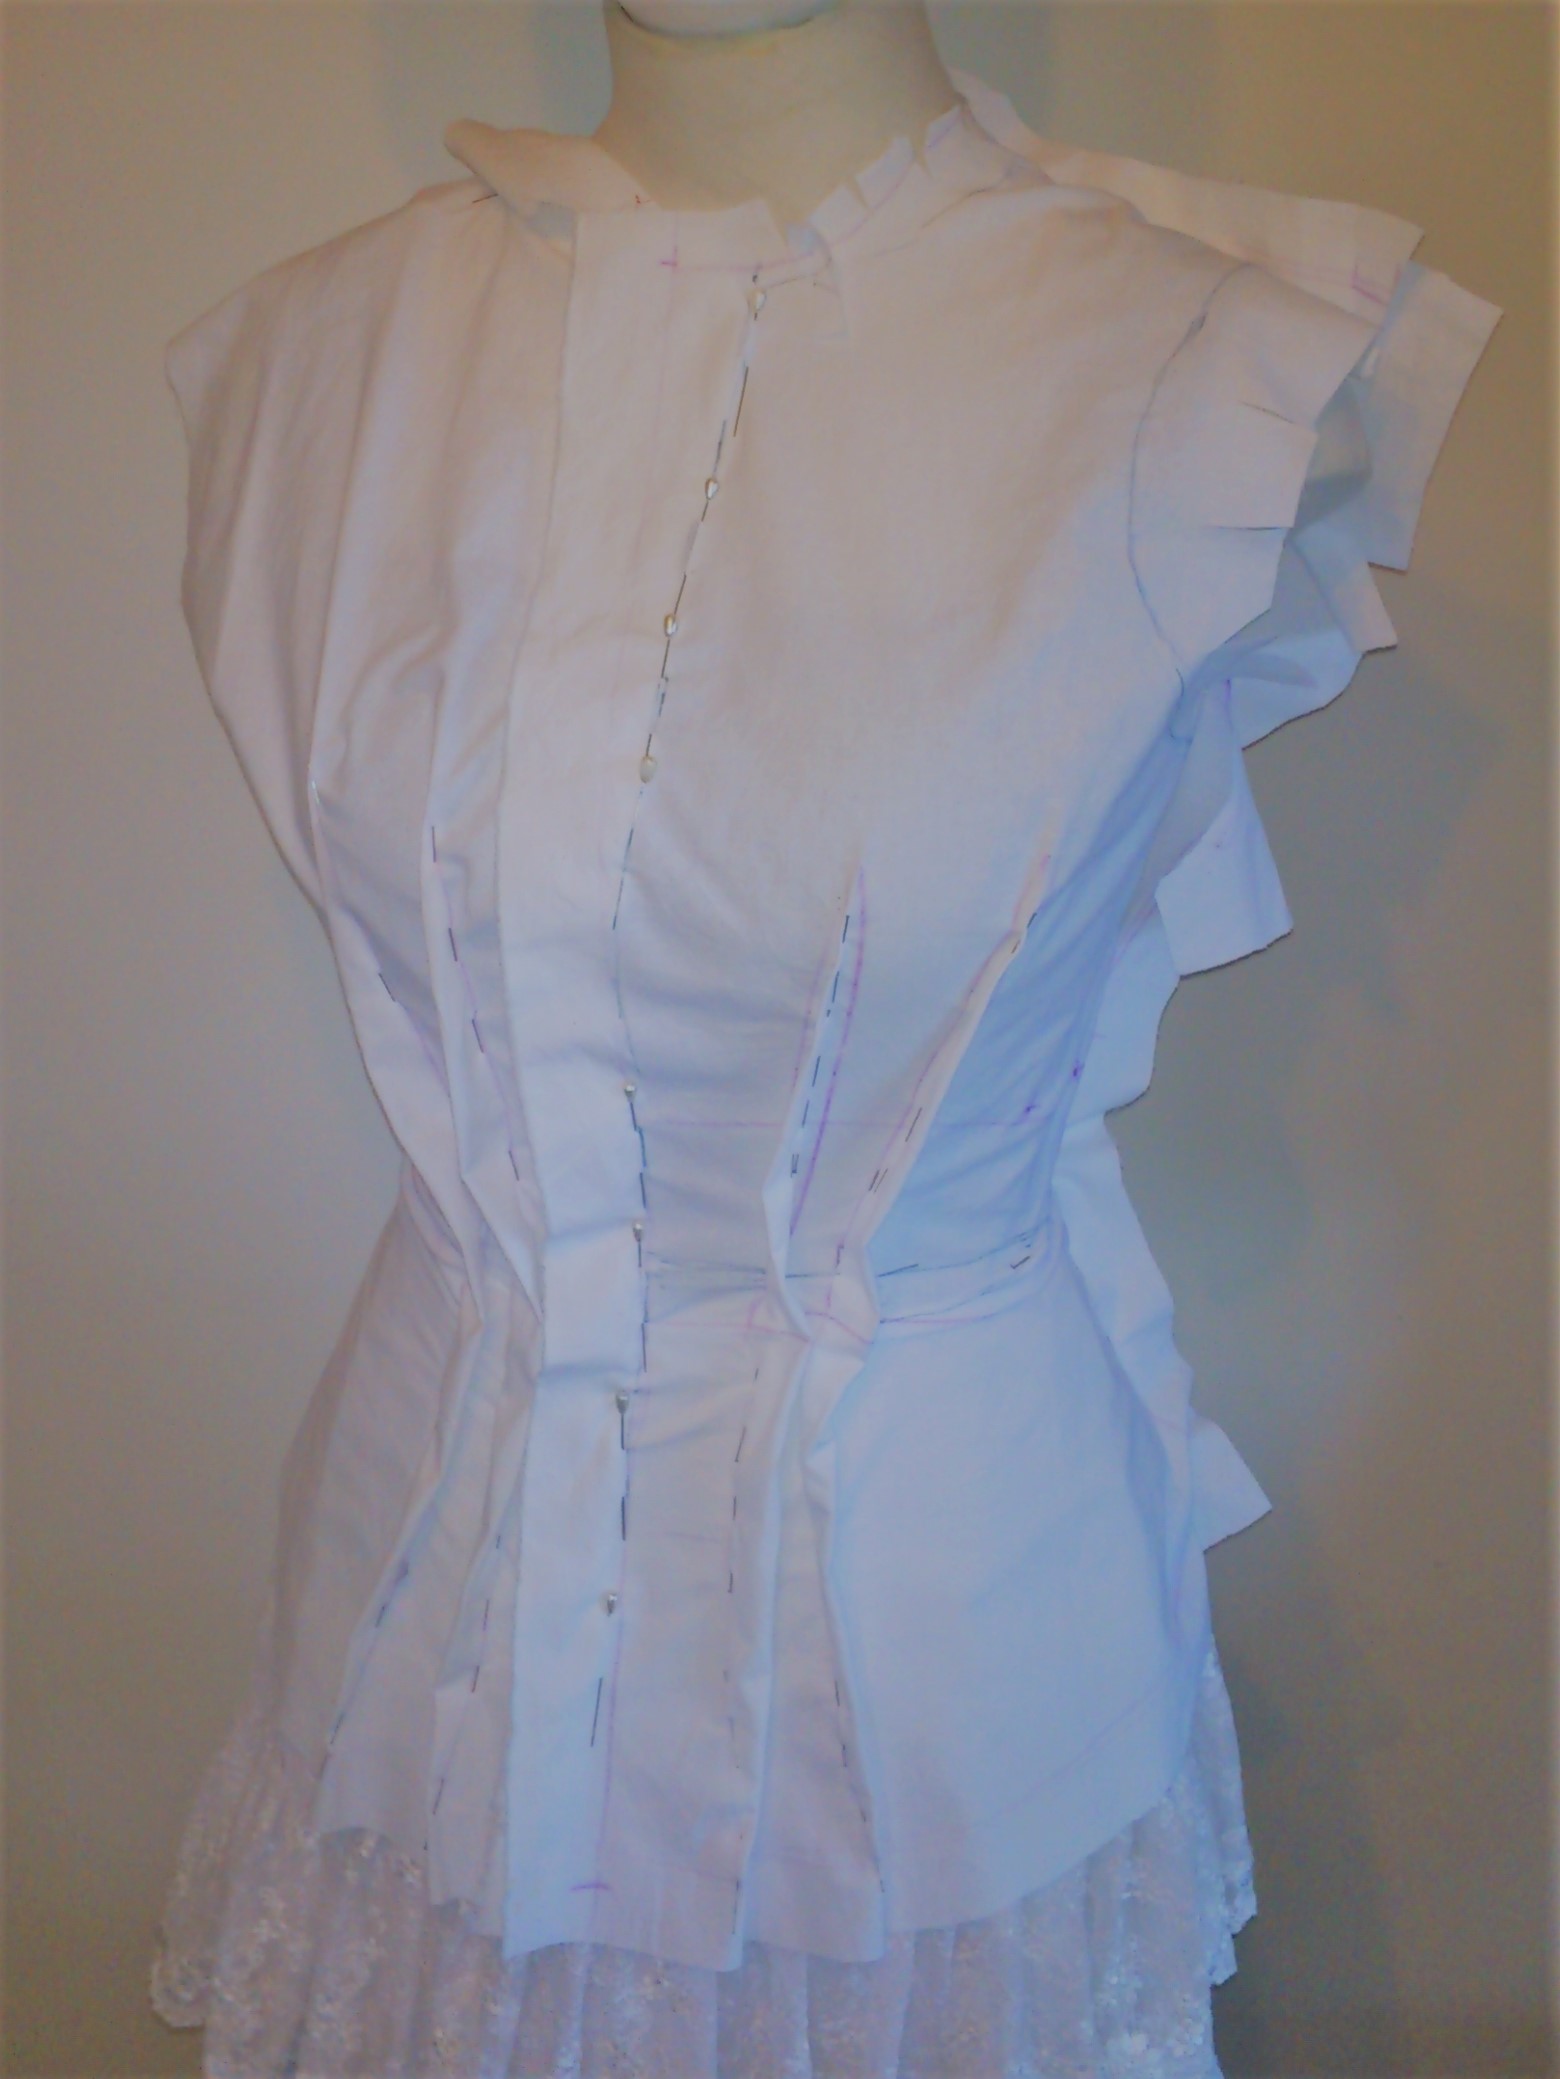
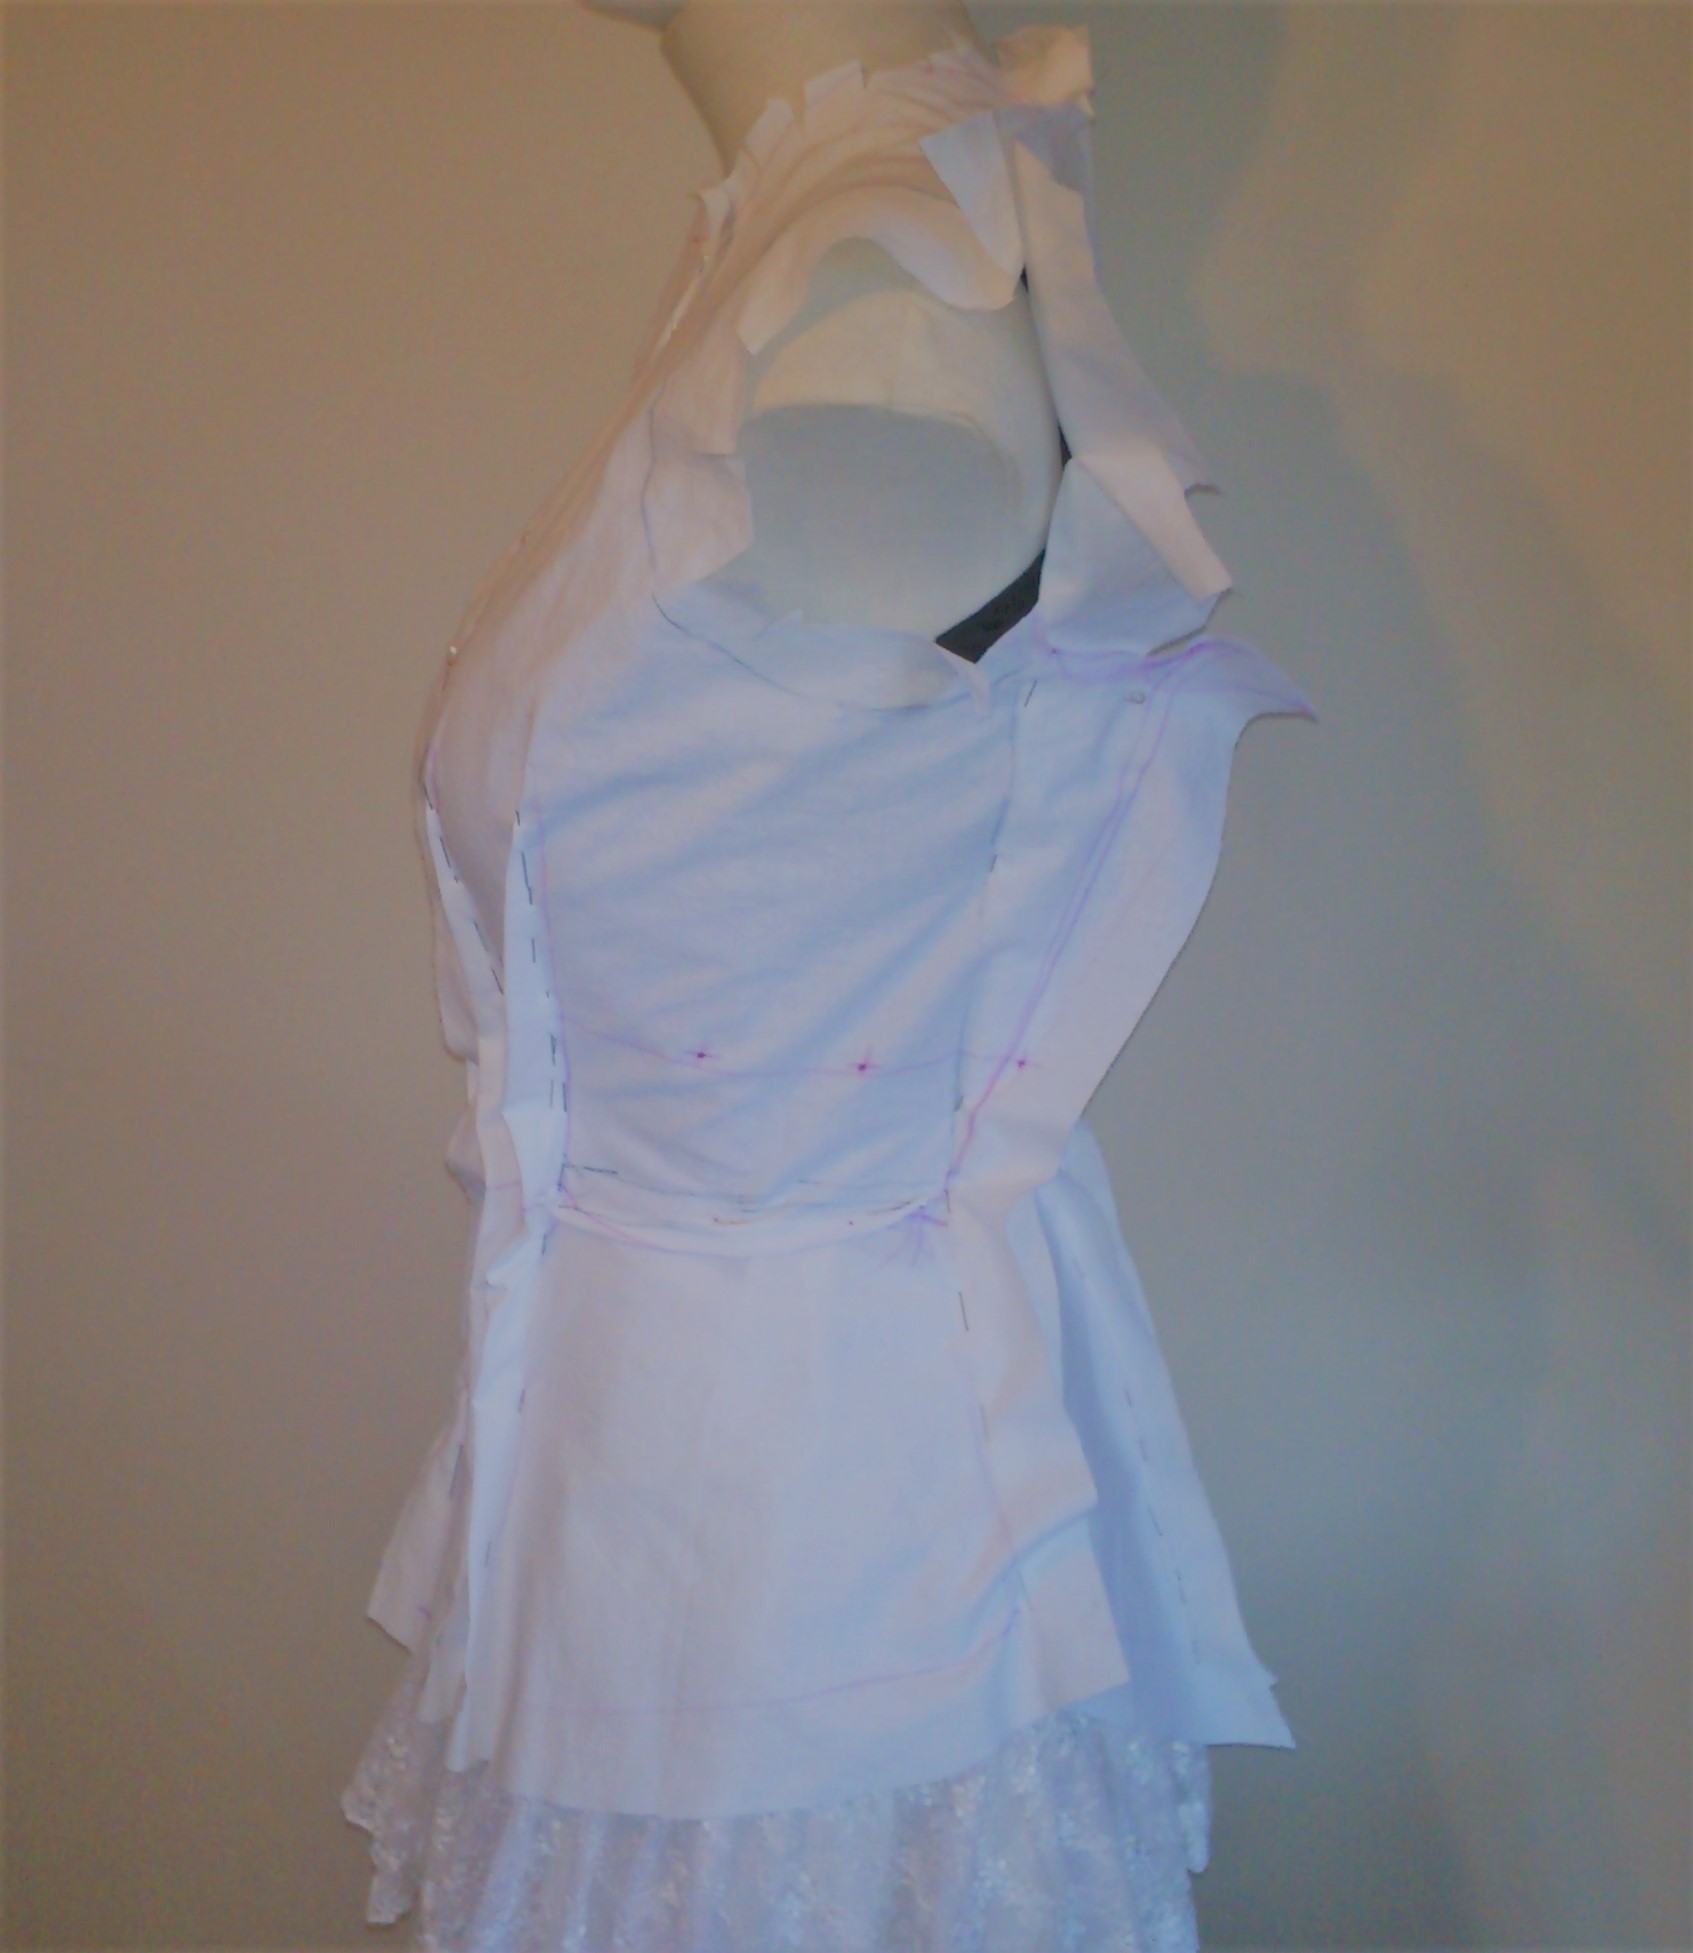
(photos above- three mannequin torsos on narrow stands stood side by side to illustrate differences in shape despite being set to the same size. The mannequin on the left of each photo  is covered in white cloth and is not adjustable, the mannequin in the centre is adjustable but is narrower across the chest/waist/hips, but wider in profile, the mannequin to the right is much rounder in all directions and has a much rounder upper back with the armscyes set further forward.

Once again these three mannequins show the different fashion shapes.

Why is this important for Mon Mothma? Isn’t it just a robe?

Nope! She has Raglan sleeves, with four seams each sleeve! Her robes have semi-princess seams (they do not cross the bust point but do terminate in the armscye.)

I do collect vintage patterns when I find useful ones however. Or useful to me 🙂

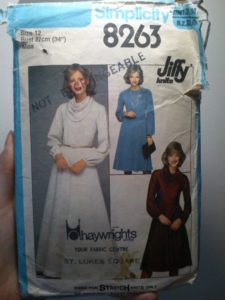
(photo above: a vintage pattern from the 1970s, three women in different variations of the same garment- all with full lower sleeves, semi fitted through the body, and flared skirts)

The dress is unfortunately four panels but has the raglan sleeve to a closed neck 🙂 And bishop sleeves.

The samples are actually much more true than I am used to so I did add too much extra SA when transferring but here is how I did it:

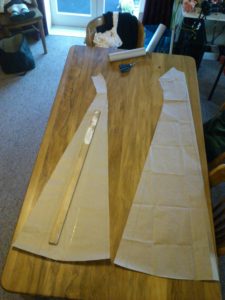
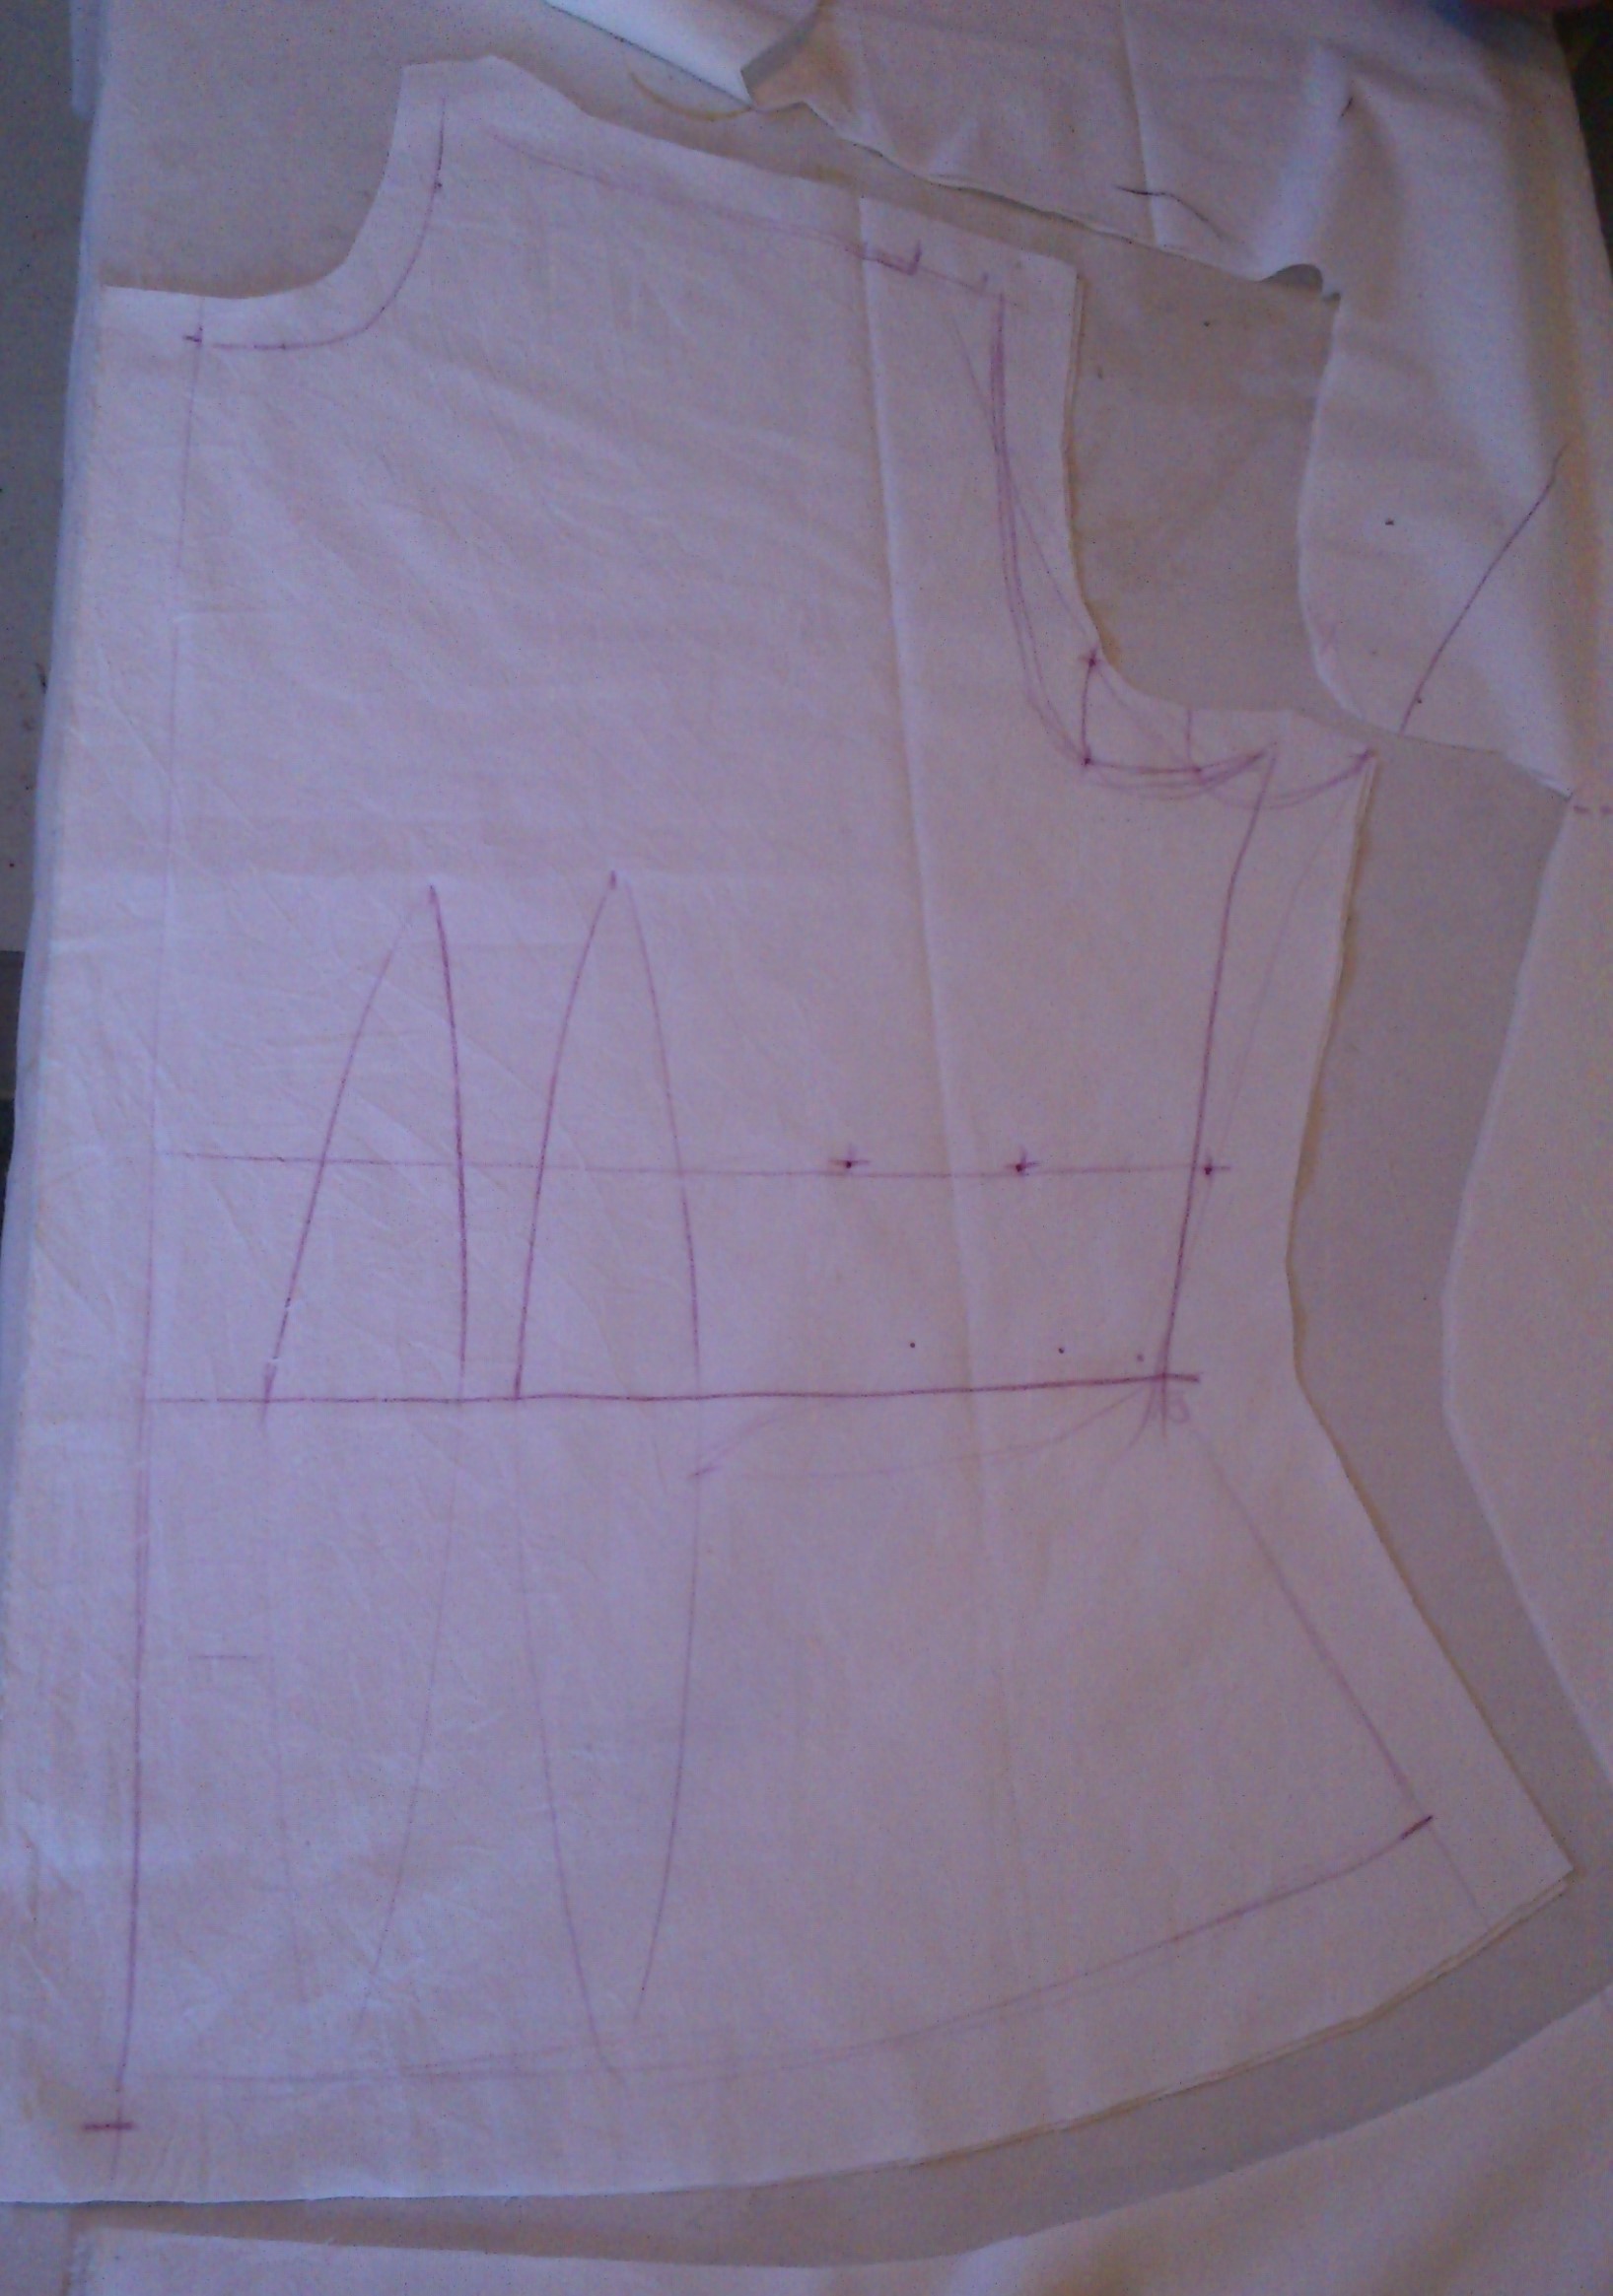
(Photos above: three stages of a pattern alteration, description in following text.)

I transferred all patterns to brown paper. I traces each pattern a short distance from the edge of the paper to allow the paper to be folded straight whereas in the original pattern the dress panels all tapered in to the waist and out to the hem.

For the front dress panel I first drew and then cut a semi princess shape from the front. This left a much narrower side front than I wanted, but the front needed no more work.

I then used double sided tape to stick the outer side of the new side piece to a length of narrow brown paper. I then flared that side seam out about 20cm at the hem and tapered it to the waist.

I repeated on the inside of the side panel.

Now the patter for the dress front has a side seam and a much fuller hem.

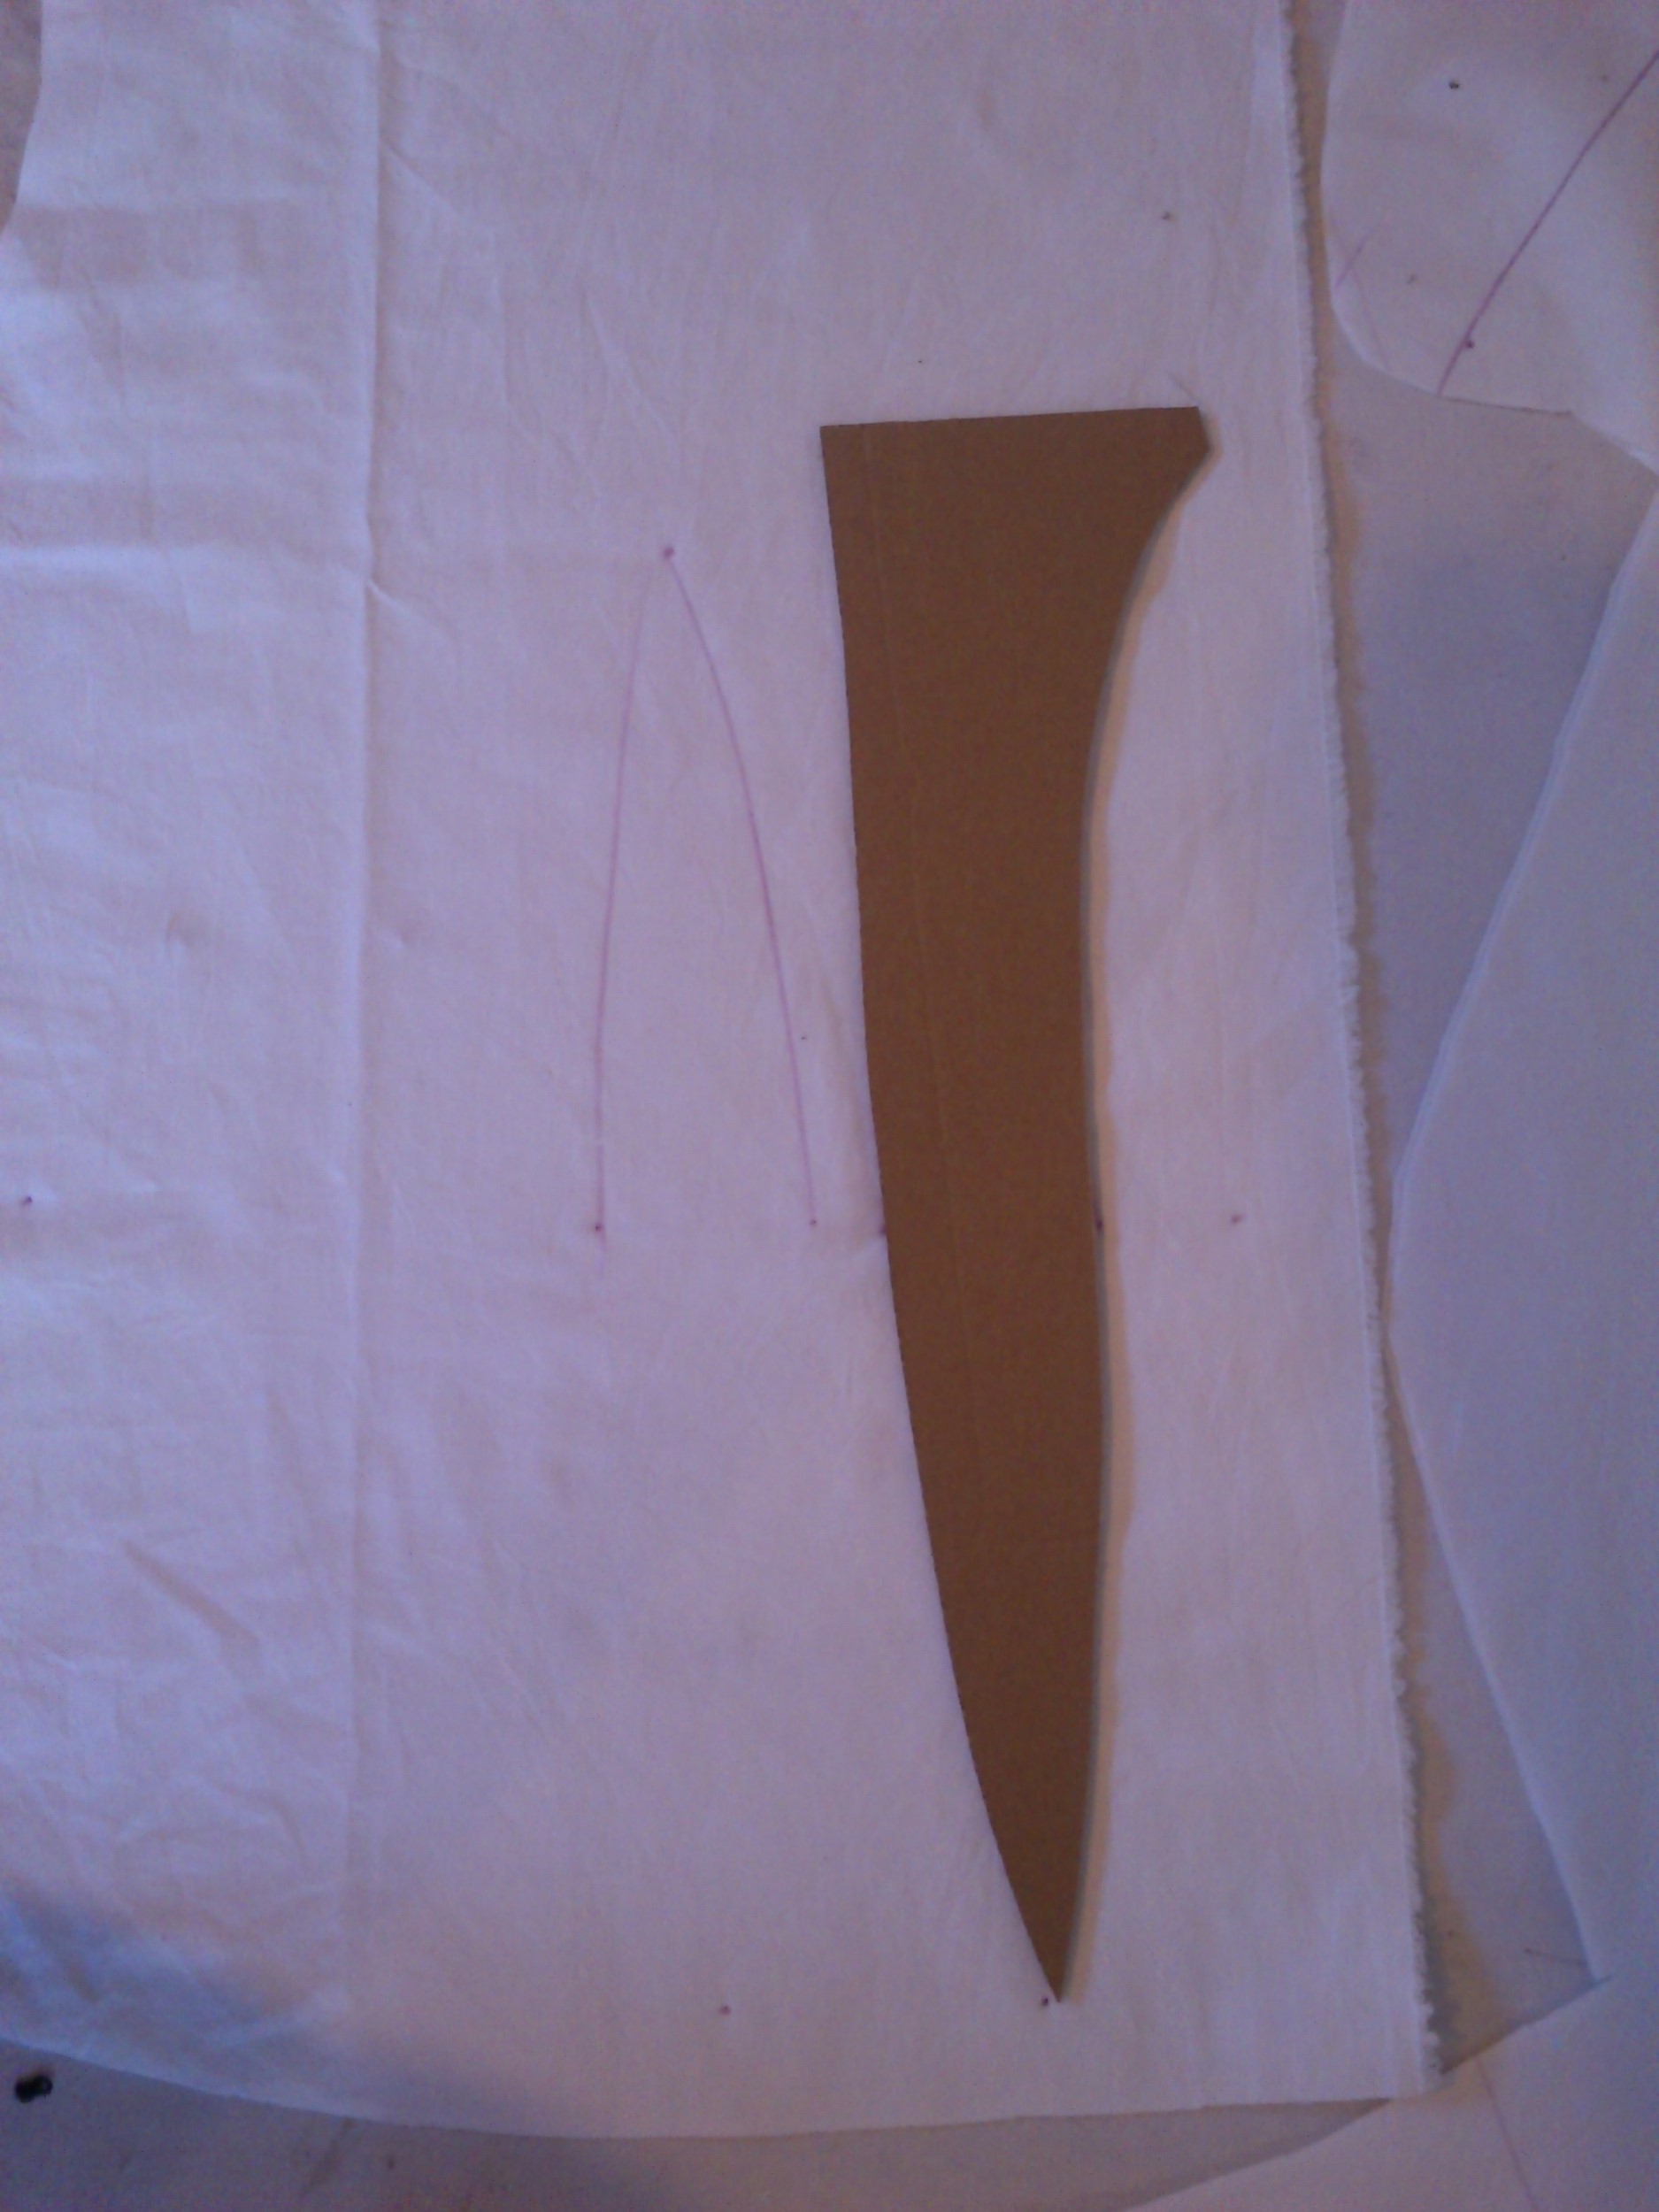
I repeated this for the back panels and the sleeves.

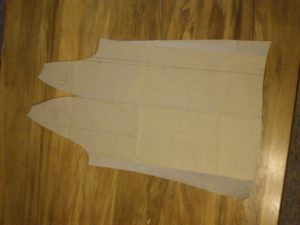
(Photo above: traced sleeve pattern on brown paper, parallel lines to divide the pattern into four.)


Since then I have cut the shell fabric and a stabilising lining. The lining is a loosely woven fabric to allow airflow when worn.

I overestimated my seam allowances. The next step will be to assemble this on the form that is going to most easily allow for a semi loose fit but also allow for shoulder shaping. So I shall use the non adjustable mannequin as it has curved upper shoulders at least.

rock the frock

era: 1870s

Material: silk satin, cotton, baleen

found: possibly ebay 2012

This corset is exactly what I need 🙂 I am truly sorry for not reverse image searching but this corset is so perfect I just want to share it!

And this photo is exactly why I love it!

I am pretty narrow for the Victorian shape, I need very straight up and down support everywhere except my hips and bust. This photo? Wow, it’s flat. I mean flat. This flat profile around the torso with room for hips and bust is exactly what I need to be comfortable and still achieve one of the ideal shapes for the eras I love. Yes, you can often find a range of ideal shapes for any given era with a bit of time to go through all the resources out there.


The only aspect of this corset I want to change, as I have already recreated a similar set- is to move the shaping at the frome of the hip (ie over the belly) to the side hip. This is just much more comfortable for me and keeps my hourglass shape that tends to be pushed towards the front in corsets of this era. I’s also avoid boning over the side of the hips as these would be inclined to cause the stays to stick out at the hip not mold around.

And the final image shows the construction is in keeping with the Der Bazar corsets (found in my Antique Fashion sections.)

1876 draft update

The draft really didn’t need a huge amount of adjusting, I may just need to adjust some of my measuring 🙂

The back is lovely, it’s just too wide in the shoulders, and my mannequin does have a higher shoulder than me.

The front is a bit of a mess, I always have this trouble with drafting systems from this era though, so it’s no different. I can however use the changes made today to determine how to take measurements for the next run through.

So basically the same issues as with corsets I have scaled, with other patterns- I have a proportionally narrow torso. I am hour glass but I do not continue to taper out past my lower ribs.

But strangely I had to lower the waist at the side and raise it at the front. This is partly because I clipped the armscye and smoothed the excess towards the upper back and that then also spread down the side.

I also lowered the bust dart points, mainly because I think this mannequin has a very long shoulder to bust measure vs me. But it’s nice to see that this was a relatively easy remedy.

Overall? would recommend for someone who is used to these kinds of drafting tools.

The instructions are lengthy but a bit confusing only because the diagrams are super simple so it can be hard to work out immediate if you are looking at the the draft lines or the tool. But it was pretty easy to do once I got the hang of it. 🙂 Next step is to see if the tool will give the same corrected shape with the new measurements 🙂

The basque was very easy and worked really well for me for over a natural form shape 🙂


1876 basque

The science and geometry of dress
by Jackson, Louisa L., Mrs. [from old catalog]

Published 1876

So, the trouble with the system is the “bust” measure is a sort of not really measurable distance where the armhole (arm size) and the side seam end.  And then you take the back measure separately. Not a full measure all the way around. I used my padded form but still estimated where the side seams would sit. I think I need to tweak it a bit more. But other than my near universal shoulder/side of bust fitting issues I think the scale works.

If I look at the patterns taken from existing garments the arm hole is most definitely not as per the first pass of the tool. I need to get a bit courageous about trimming here! Also to adjust the super rigorous dart placement- the drafting tool is quite old fashioned in that it feels like it’s from the 1860s-very early 1870s. This is about the time there should be two side back seams that slope a little more gently. So I think the tool will work, it just won’t look like the diagrams but will look like the extant items.

The additional steps to make a basque though are brilliant. And it does show exactly why the cross dart sits where it does. This is where fabric naturally folds in at the waist with the basque (called skirts in this book.)

You can see how the fabric is super full in the armscye and above the bust. I’ll smooth the fabric over the stand and then compare to the tool to see what I would recommend in terms of using modern equipment.

The book is very unyielding in the  sens that the distance from CF and CB to first dart is specified. And the distance between darts also specified. The tops of the darts are also very much decided by the tool (while the height is adjustable the distance from centre front is not.


I do love the basque and how the darts are formed! If nothing else I am keeping the dart tool!

I compared the diagrams to extant patterns and yes, I will need to do what these do: rotate  the armscye towards the centre front.


These are all from Patterns of Fashion.

1876 tool update

Okay, so the body templates are very wrong! My scale isn’t too far off but the markings on it are not perfect. I will do an annotated run through. One problem is the book says to lay the front waist tool 1″ from the edge of the material. but the tool already has a 1″ mark (A). That is not the 1″ that it needs to be set from the edge. Not if the bust measures are to work.

Having tried this tool I know now that the miniature is really not a perfect scale of the full tool as it will appear. The dart and side seam rules are good so I have now made a single file of all the miniature tools.

Some of the markings are wrong. The vertical measures should all be identical distances ditto the perfectly horizontal. So I scaled to the dart rule and made sure the distance between the edge and the lower bust mark as 9″ and this now makes all the “standard” measures line up.

The science and geometry of dress
by Jackson, Louisa L., Mrs. [from old catalog]

Published 1876


thumbnail of 1876minitoolfront thumbnail of 1876minitoolback thumbnail of 1876minitooldart thumbnail of 1876minitoolsidecurve

So these all match, I started with all the mini tools on one file and scaled. everything that I know to be inches seem to match up.

I’ll update my earlier post with the new files 🙂