Well my Nordrhein documentation in general is taking a bit longer to ready for sharing which has meant it is taking a bit longer to get the Anna specific information up.
I am trying to cite all my images. I have been cropping images of non-allegorical women and girls to get a very clear undistracted view of dress of the region. Right now I have about 114 left of 326 plus a few to add in as lower quality but good overall impressions. And then I can add in the skant printed depictions of contemporary dress. I’m also finding the handful of images that did not make it through the upload process!
In doing this though I may have some evidence of different attributions. But again I need to hold off until I get these files properly cited so that there is the full context.
And I have found a few higher resolution images than i worked so very hard to create but hey.
I have shared a few duplicates of the Bruyn portrait before, but I thought I would dedicate a post to images of Anna after her death.
For some reason there is a belief that there was no interest in Anna by anyone in England either while she was alive and in the the centuries after. This is often used to prove a painting to be not only authentic but by a master.
But it is not as simple as that. Especially not of this era.
Anyone who has used any of the Trachtenbucher know very well how many figures were copied and to varying degrees of accuracy.
Personal books could also contain a great number of copies of portraits from print or paint and could even be commissioned by the artist.
Where an artist is unfamiliar with a style of dress worn by the sitter they can at times use what is familiar to them.
But as far as suggesting there was no interest in Anna is to ignore the number of reproductions clearly marked as her.
The National Portrait Gallery website alone has several copies:
Anne of Cleves by Wenceslaus Hollar, after Hans Holbein the Younger etching, 1648, NPG D11254
Anne of Cleves by F. Patton, after Hans Holbein the Younger line engraving, probably 18th century, NPG D24187
Anne of Cleves by Cornelis Martinus Vermeulen, after Adriaen van der Werff, after Hans Holbein the Younger, line engraving, published 1707, NPG D10541, NPG D10542 , NPG D10543
Anne of Cleves by Jacobus Houbraken, published by John & Paul Knapton, after Hans Holbein the Younger, line engraving, 1740, NPG D24188, NPG D42237, NPG D9087
Anne of Cleves by T. Woodman, by Henry Mutlow, after Hans Holbein the Younger, line engraving, published 1 August 1784, NPG D10544
called Anne of Cleves by Francesco Bartolozzi, published by John Chamberlaine, after Hans Holbein the Younger, stipple engraving printed in colours, published 3 June 1796, NPG D19386
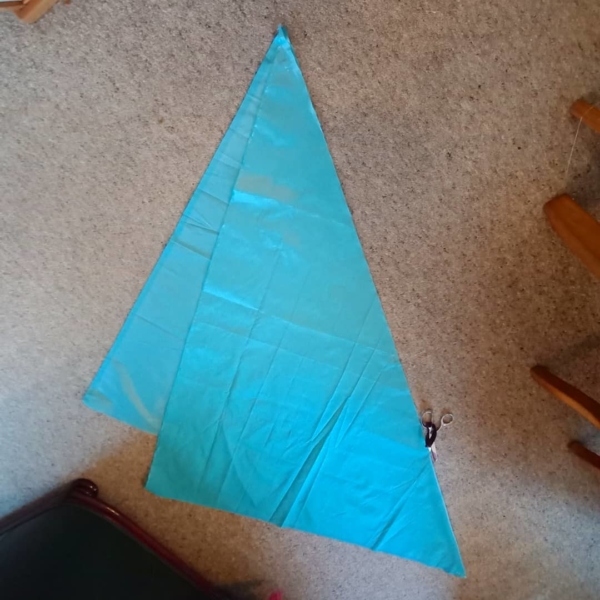
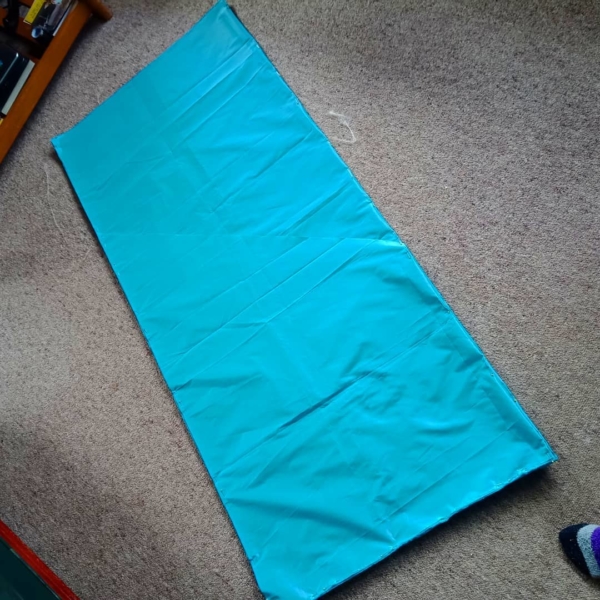
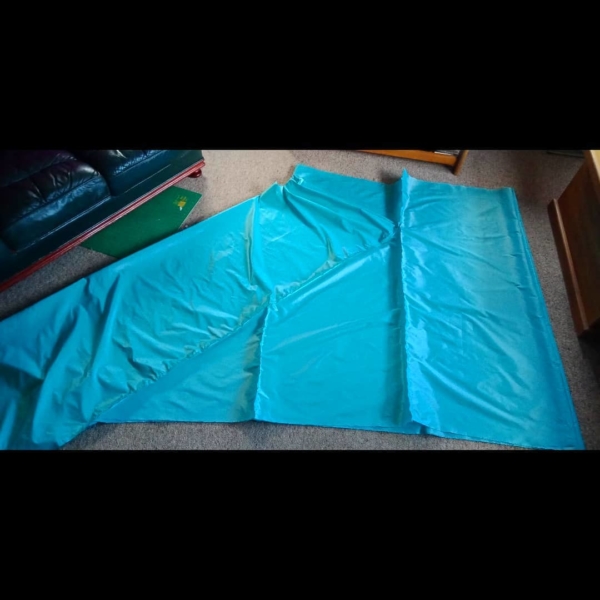
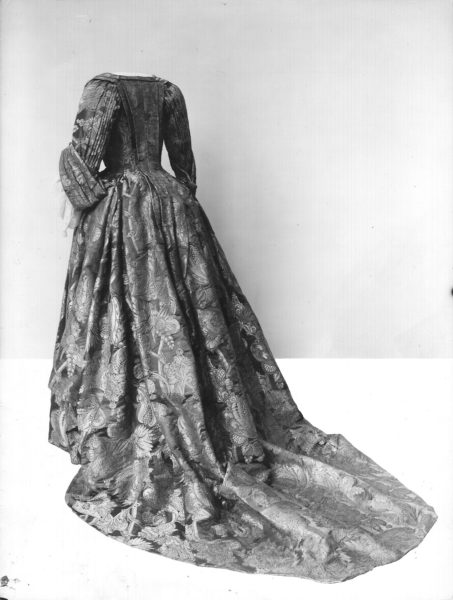
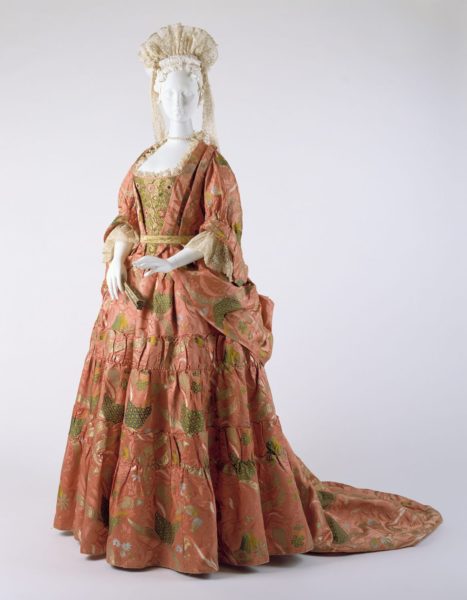
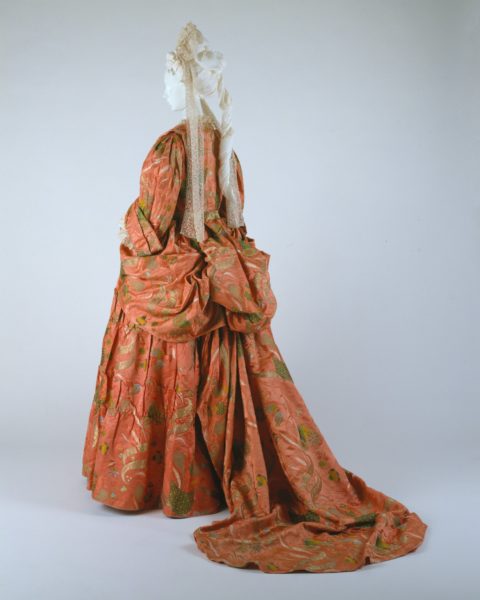
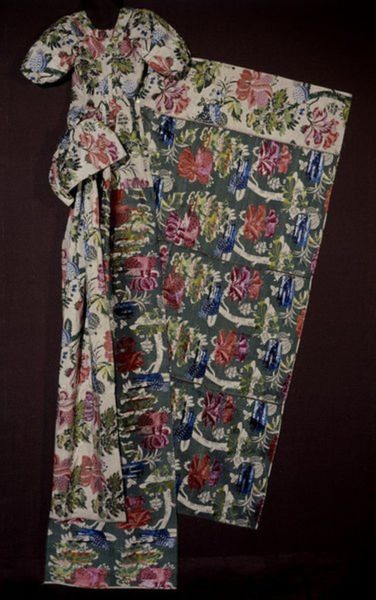
I did manage to cut my fabric panels for my mantua, it really is pretty darm easy as it is all on the grain rectangles. It is pretty much exactly what I expect from a pre-1920s measure, cut, fit process. It looks a bit different but ultimately it’s a case of wait to floor, shoulders to waist and that’s it. Everything else is adjustable to suit.
I knew I wanted my side extensions to be only one full width of fabric (so two widths of a more in era width. I cut (tore) one width from waist to floor plus a hand width for turnings. Then folded on the diagonal to form the two side extensions.
The underskirt is cut from three drops of fabric as these tend to be between 5-7 widths of in era fabric widths. I will wind up with side openings which will allow me to wear pockets underneath. The Henri Bonnart illustrations show a lot of openings for pockets.
The front of the robe was cut from one full width of fabric as long as from my shoulder to floor plus two hand widths. One hand width is to extend the fronts over the shoulder, the other is for turning.
To cut the back panel I laid the extensions next to the front panels and lined up the remaining fabric from top of the front panel down to waist and then followed the diagonal of the side extensions.
I didn’t want a very long train so I cut a curve about 3-4 hand widths.
The rest of the fabric will be used for sleeves and facings.
Since these I have machine stitched the joins and pressed them back ready for stitching. I haven’t yet done so as I need to really look through the Diderot stitches. Okay. Not totally clear but:
Fig, 1. 2. & 3. Elévation & places de dessus & de dessous du point de devanten piquant les deux étoffes de haut-en-bas & de bas-en-haut. Fig, 4. 5. & 6. Point de côté ramenant le fil en-deffous par-dehors après avoir piqué les deux étoffes. Fig, 7. 8. & 9. Point-arriere ou arriere-point, repiquant de haut-en-bas au milieu du point-arriere après avoir piqué de bas-en-haut. Fig, 10. 11. & 11. Point lacé comme le point-arriere, lieu qu’il fe fait au- en deux tems, revenu en-hauton ferre le point, & retournant l’aiguille on repique en-arriere commeau précédent. Fig, 13. 14. & 15. Point à rabattre fur la main piquant le haut-en-bas & de bas-en-hauten-avant les points drus espacés & également. Fig, 16. 17. & 18. Point à rabattre fous la main commele dernier au-lieu qu’ayant percé l’étoffe supérieure on pique-l’étoffe inférieure par-dehors, ensuite on pique les deux en remontant. Fig, 19. 20. & 21. Point à rentraire comme le point à rabattre fur la main se faisant en deux tems en retournant l’aiguille avant tout il faut joindre à point fimple les deux envers l’étoffe retournée on ferre de ce point les deux retours il faut pour cela très-peu d’étoffe &les points très-courts. Le point perdu n’eft qu’un point-arriere ajouté au precédent. Fig, 22. 23.& Point traversé, couture à deux fils croisés. Fig, 25. A, premiere opération; point coulé ou la passe, c’eft la boutonniere tracée de deux fils. B, la passe fermée du point de boutonniere. C, la passe achevée & terminée de deux brides à chaque bout quel’on enferme de deux rangs de points noués
Google translated:
BOARD IX. Sewing stitches. Fig, 1. 2. & 3. Elevation & places from above & from the fronten point pricking the two fabrics from top-to-bottom & bottom-to-top. Fig, 4. 5. & 6. Side point bringing the wire in-bursts from outside after stitching the two fabrics. Fig, 7. 8. & 9. Point-back or back-point, pushing up and down in the middle of the back-stitch after dipping from below upwards. Fig, 10. 11. & 11. Point laced like the point-back, place which it is made in two tenses, returned to the top, turns the point, and turning the needle backwards. Fig, 13. 14. & 15. Point to be folded on the hand, stitching up-down and down-up in front of the thick points spaced & equally. Fig, 16. 17. & 18. Point to be folded in the hand as the last one instead of having pierced the upper stuff, the lower stuff is thrown out, then the two are stitched upwards. Fig, 19. 20. & 21. Point to point as the point to be folded on the hand being done in two times by turning the needle before all must be joined at the same time the two to the returned fabric we iron this point both returns require very little material and very short points. The lost point is only a back-point added to the previous one. Fig. 22. 23. & Crossed point, cross-stitched seam. Fig, 25. A, first operation; cast point or the pass, it is the buttonhole traced two sons. B, the closed pass of the boutonniere point. C, the pass is completed & completed with two straps at each end which enclose two rows of knotted stitches
Figures 13. 14. and 15. Overhand hem stitch piercing from top-to-bottom and from bottom-to-top in front, the stitches densely spaced and even. Figures 16. 17. and 18. Underhand hem stitch [is] like the last, except that having pierced the upper fabric one pierces the lower fabric at the outside, one pierces the two together fortifying.
The Encyclopedia of Diderot & d’Alembert Collaborative Translation Project.
Fig, 1. 2. & 3. Points noués simples de neuf différentes formes. Fig, 4. Points noués doubles de trois différentes sortes. Fig, 6. & 7. Points croisés de simples & doubles de neuf différentes sortes.
Google translation:
Fig, 1. 2. & 3. Simple knotted stitches of nine different shapes. Fig, 4. Double knotted stitches of three different kinds. Fig, 5. 6. & 7. Cross points of single & double of nine different kinds.
To be honest it is the section on linen items that has nice clear hemming illustrated.
FIGURES Fig, 1. Le point de surjet. Fig, 2. Le point de côté. Fig, 3. Le point-arriere ou arriere-point: Fig, 4. Le point devant. Fig, 5. La couture rabattue. Fig, 6. Le point noué ou point de boutonniere. Fig, 7. Le point de chaînette. Fig, S. Le point croisê. Fig, 9. Peignoir en pagode: Fig, 10. Bonnet piqué. Fig, 11. Coëffure de dentelle. Fig, 12. Coëffure à deux rangs ou à bavolet. Fig, 13. Grande coëffe en mousèline. A coëffure en papillon sur une tête de carton.
Google translation:
FIGURES Fig, 1. The overlock stitch. Fig, 2. The side point. Fig, 3. The rear-end or back-point: Fig, 4. The point in front. Fig, 5. The seam folded. Fig, 6. The lockstitch or boutonniere. Fig, 7. The chain stitch. Fig, S. The point crossed. Fig, 9. Bathrobe in pagoda: Fig, 10. Quilted hat. Fig, 11. Scallop Coif of lace. Fig, 12. Coeffure Coif with two rows or bolster. Fig, 13. Large mussel cockerel mouseline coif. A butterfly coif on a cardboard head.
(Update June 2024: I have written and visual evidence that neccesitates reworking all these images and text. The update will be on my research site soon.)
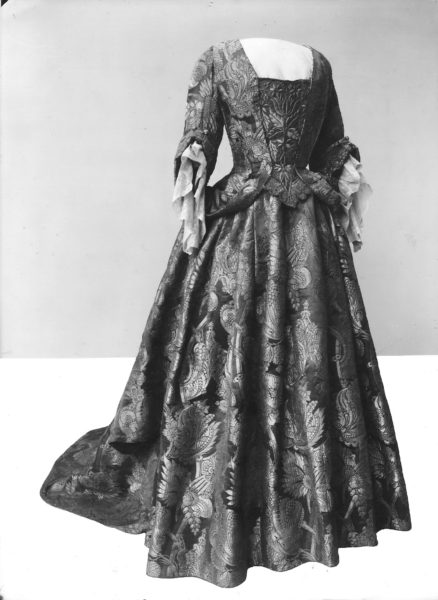
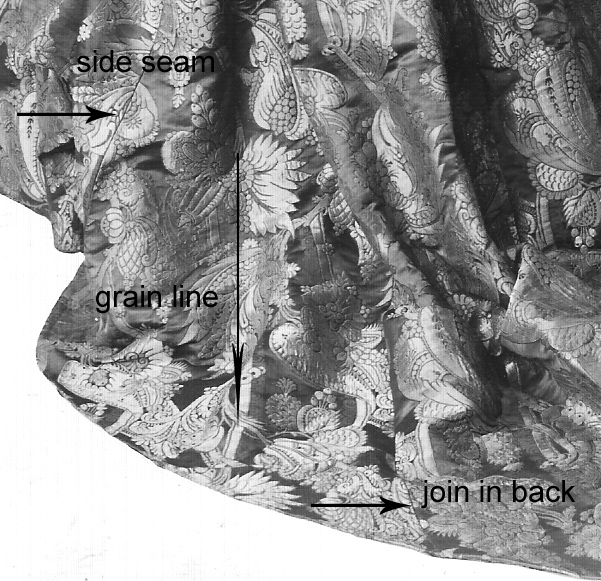
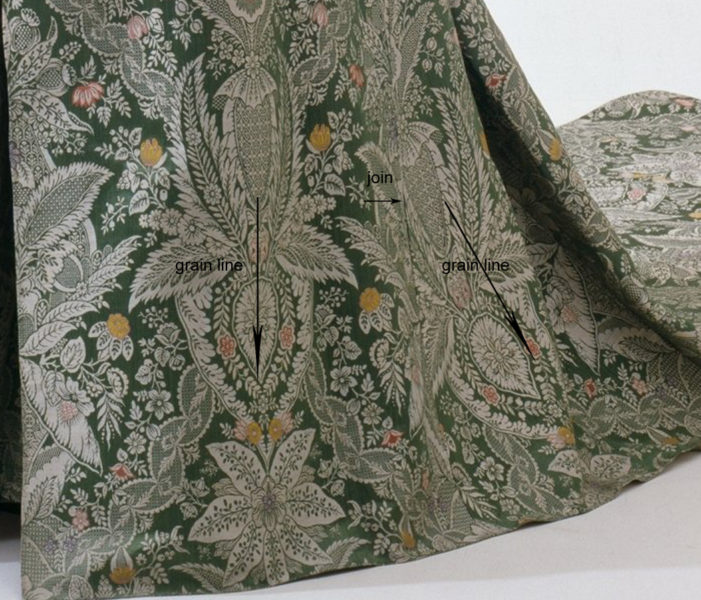
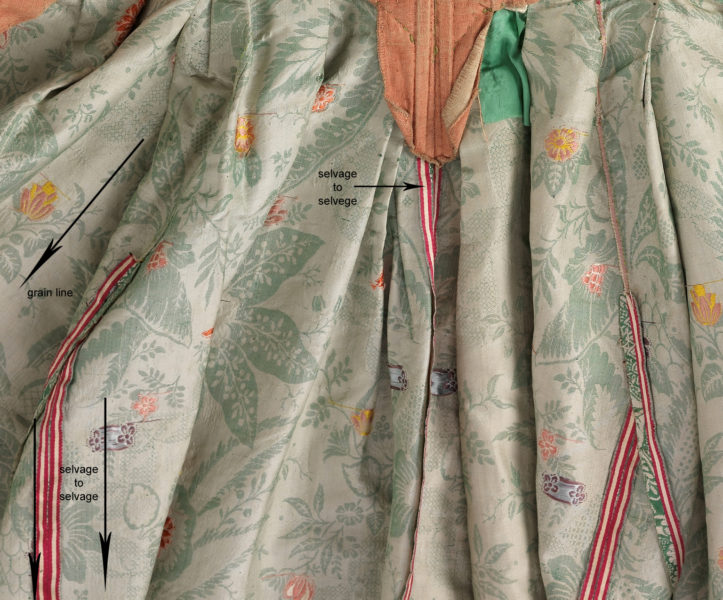
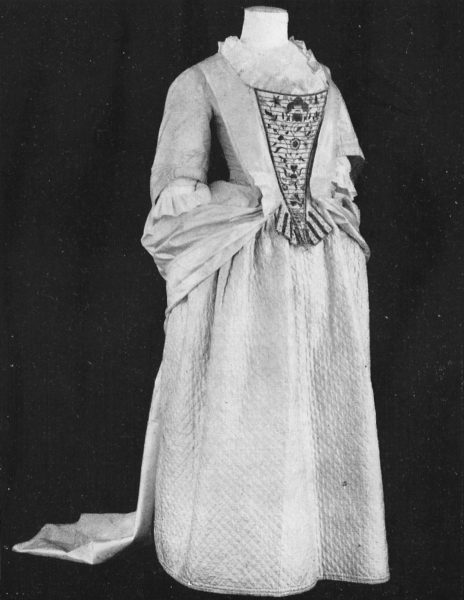
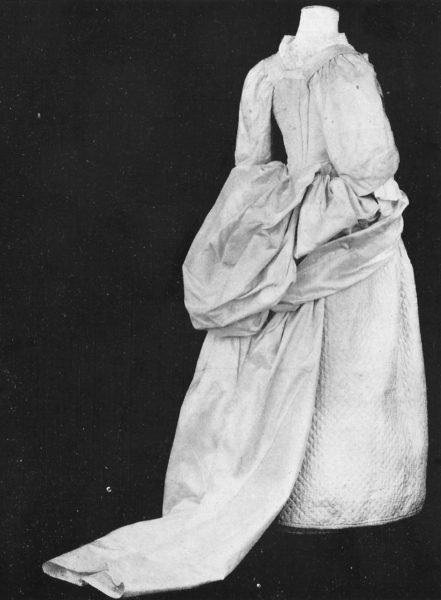
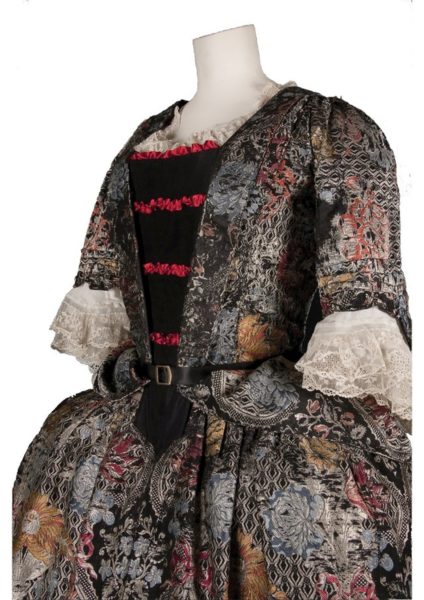
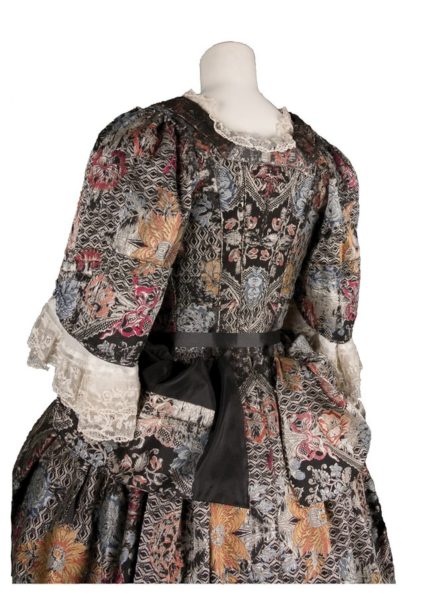
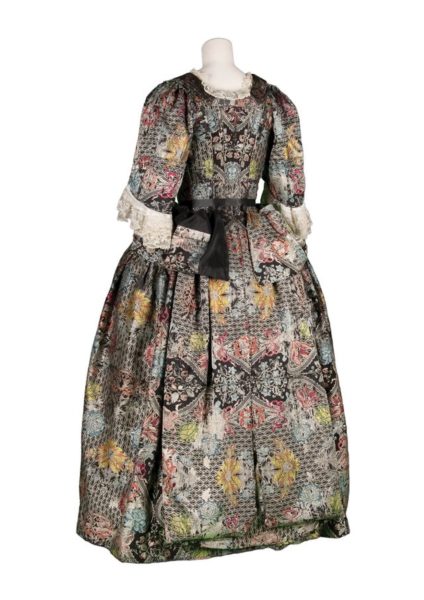
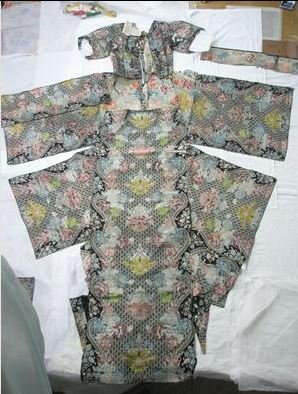
The mantua as often described is a garment with a very unique construction. It puts all the side skirt shaping on a single wedge of fabric, made of several widths of fabric, entirely in line with the front panels. The angled top edge lined up with the side of the back, the short piece (with the grain) in line with the front. This leaves the bottom of the piece to the hem that keeps the grain perpendicular to the floor no matter how long the train becomes.
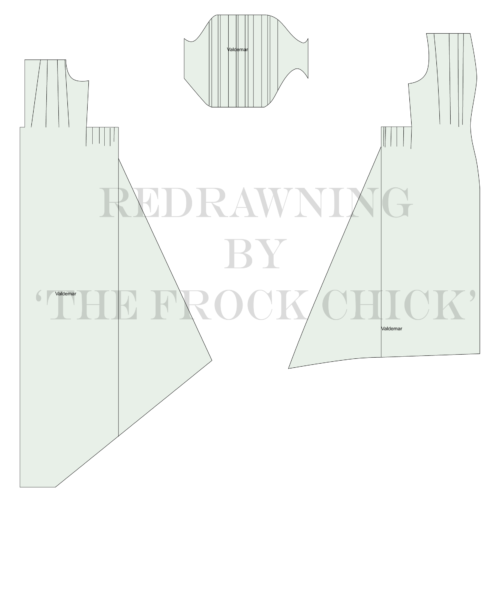
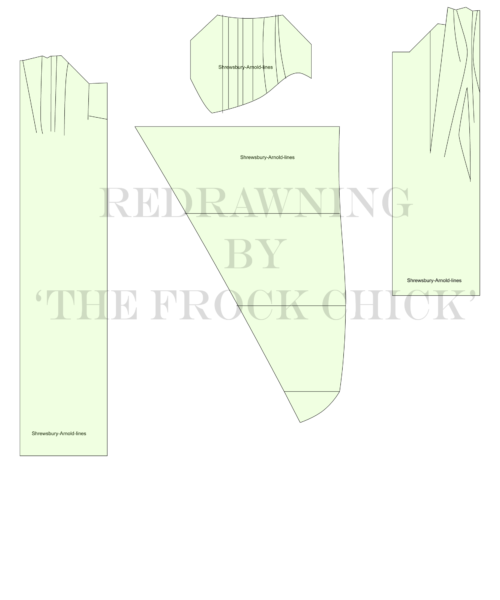
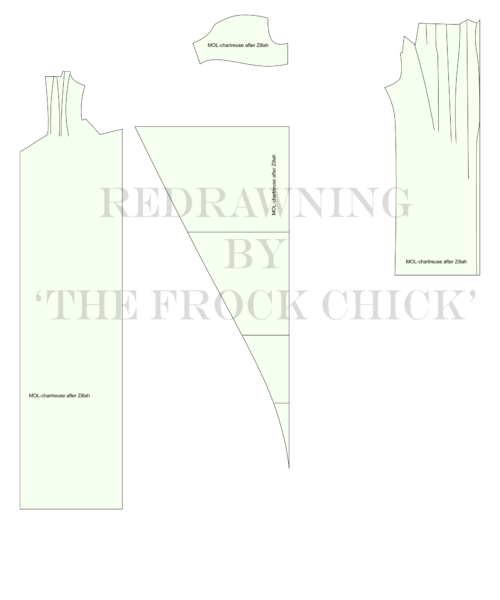
To create my own pattern I collected and redrew every pattern of an extant garment published and redrew them to the same scale (1/4) and overlaid them to understand the interplay between each pattern piece. I ignored facings, cuffs, and petticoats and focused on the over garments.
All current “mantua” patterns overlaid to show the proportions of each.
Pattern type 1
A traditional method of dividing the side fullness between the front and back can be seen in the patterns of Albayzeta from 1720. Included are several “ropa de levantar.” The
edited from: Geometria y trazas pertenecientes al oficio de sastres …. Juan Albayzeta por Francisco Revilla, 1720 – 95 pages
This pattern is for a garment with a very long train, though there is also a secondary hemline drawn where the skirt back would just touch the ground- most of the patterns for “rope de levantar of this book are of the shorter type.
Of the extant garments that have been patterned the Danish gown most closely resembles this. It’s possible to find the parallel seams joining fabric widths as well as a seam between the two diagonal sides.
Moden i 1700-årene Author: Ellen Andersen Publisher: [København] : Nationalmuseet, cop. 1977. Series: Danske dragter
The skirt is narrow and is worn with a very solid and full underskirt. This arrangement could mean the best display of the brocade pattern was at the side back.
Pattern type 3
Of the mantua type we are left with several garments in both English and American museums all with the wedge shaped piece matched to the front..
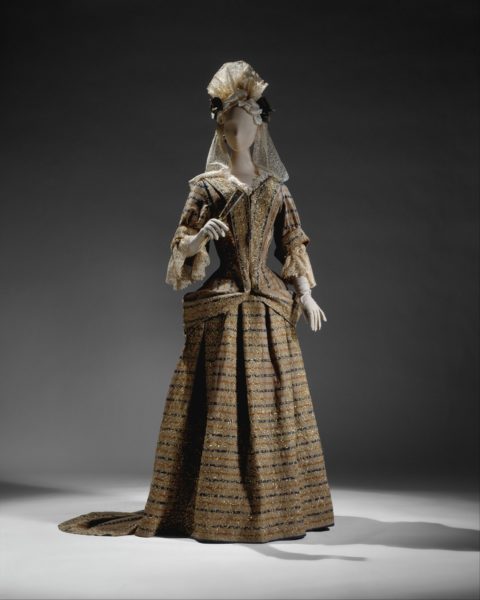
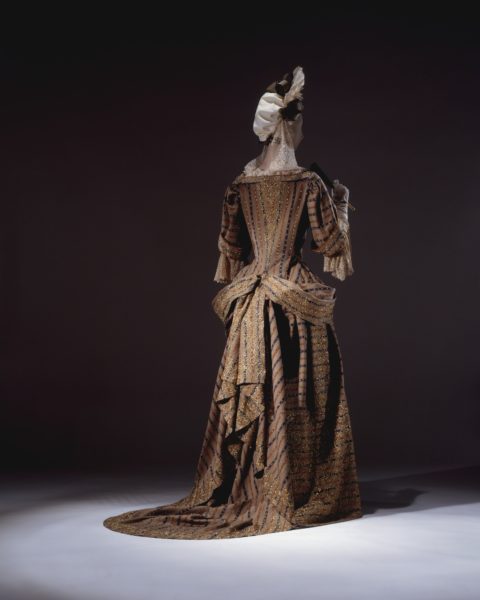
The earliest example appears to be the Kimberley gown held at the Metropolitan Museum in New York. The earliest date appears to be 1695.
Mantua Date: late 17th century Culture: British Medium: wool, metal thread Credit Line: Rogers Fund, 1933 Accession Number:33.54a, b
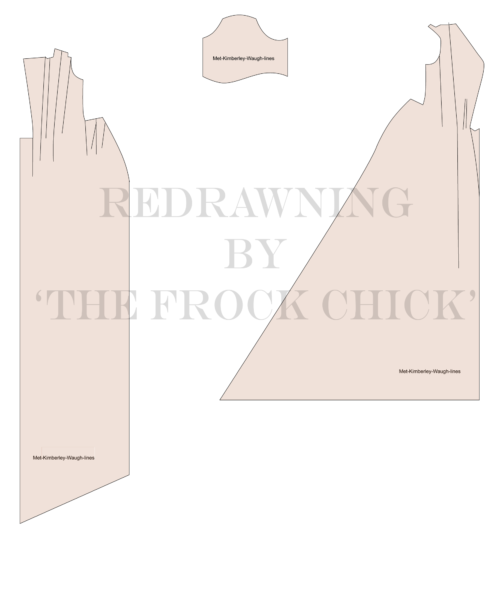
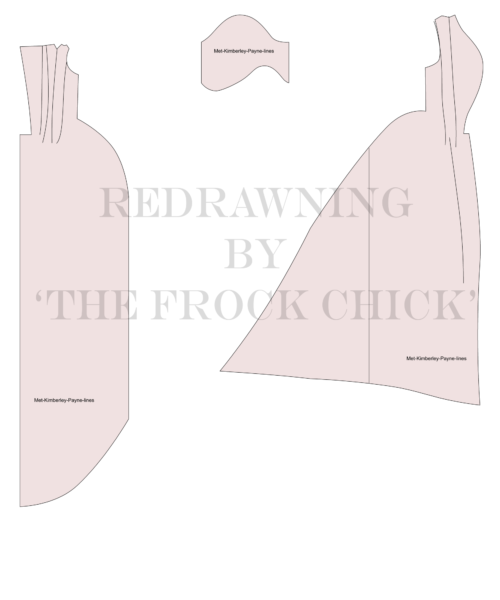
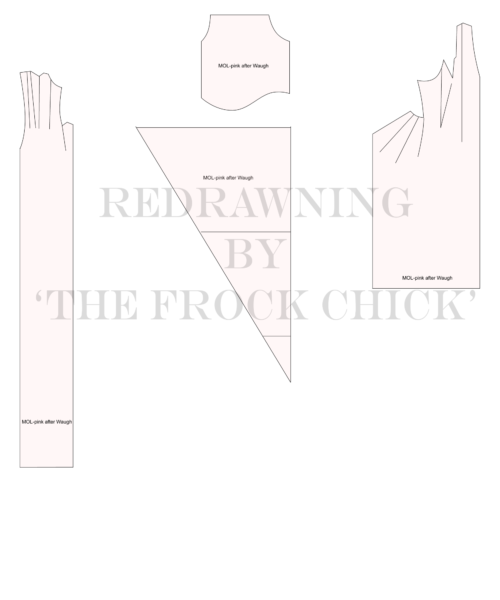
This garment has been pattern by both Nora Waugh and Blanche Payne, they differ slightly but the principle is the same and in both patterns the side fullness is entirely in line with the front panel.
My redrawing after a pattern in The Cut of Women’s Clothes, 1600-1930 by Norah Waugh- note there is no join line in this draft.
My redrawing after a pattern in History of Costume by Blanche Payne-note this join line is in the original draft.
History of costume, from the ancient Egyptians to the twentieth century. Drawings by Elizabeth Curtis. Author: Blanche Payne Publisher: New York, Harper & Row [1965]
I have divided the pattern so that the shapes can be compared more easily to the other garments- this garment has the sleeves cut with the body. The pattern can be easily put back as the dividing lines are the only diagonal lines in the draft.
Of special interest is the length of the front of the mantua. It is quite short (see image of overlaid pattern drafts.). Holme confirms that this is a common feature of mantua.
“A mantua is a kind of loose Coat without stayes [sic] in it, the Body part and Sleeves are of many fashions as i have mentioned in the Gown Body; but the skirt is sometimes no longer than the Knees, others have them down to the Heels. The short skirt is open before, and behind to the middle.”
This next garment from 1720-1730 and is housed at the Museum of London and patterned by Zillah Halls in Women’s Costumes 1600-1750: London Museum. This garment is not currently digitised or on display.
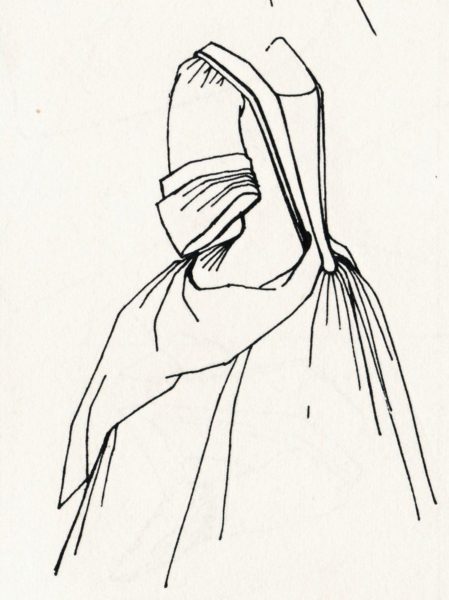
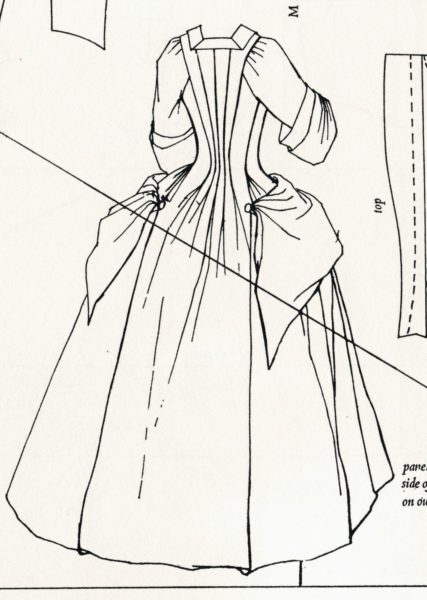
Another garment at the Museum of London was patterned by Nora Waugh, but not photographed. It is from 1735-1745 and uses the same construction. The train has been pinned up to the waist in the illustration but the pattern does not indicate any change in the construction.
And again this mantua is shorter at the front than the anticipated petticoat hemline (see image of overlaid pattern drafts.)
These are unfortunately the only garments with patterns I have been able to find but there are several more that have been catalogued and the skirt layout captured in photographs.
Manteau without patterns
The Metropolitan Museum has another early mantua example and the photographs do suggest the construction is of a kind- comparing the alignment of the pattern to the outside of the side back join in fabric shows it is in line with the hem not the seam.
Mantua Date: ca. 1708 Culture: British Medium: silk, metal Credit Line: Purchase, Rogers Fund, Isabel Shults Fund and Irene Lewisohn Bequest, 1991 Accession Number:1991.6.1a, b
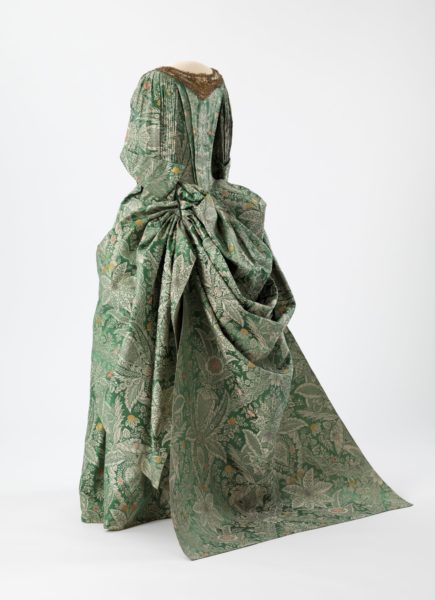
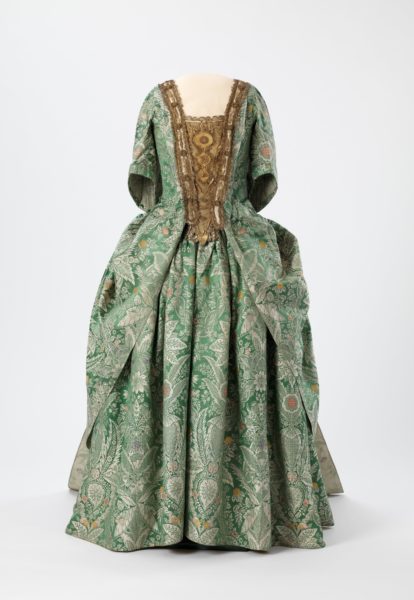
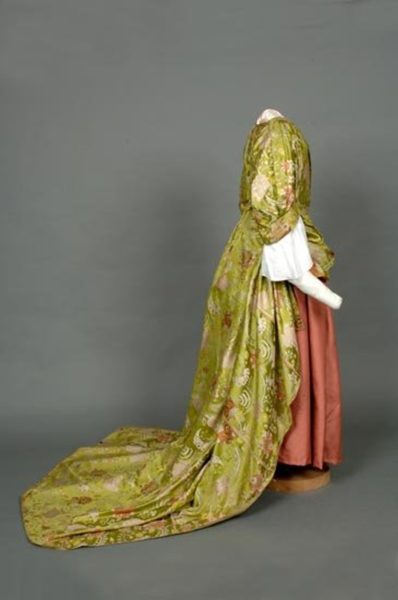
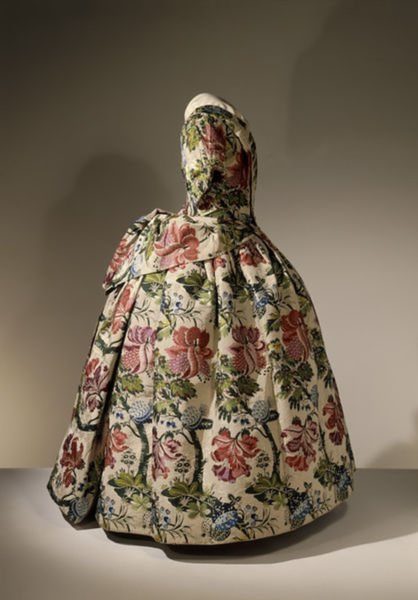
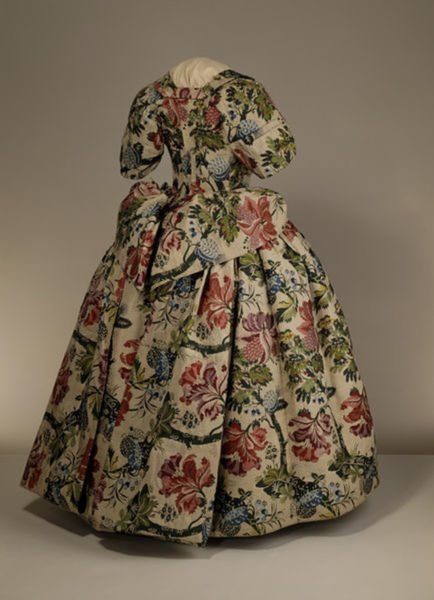
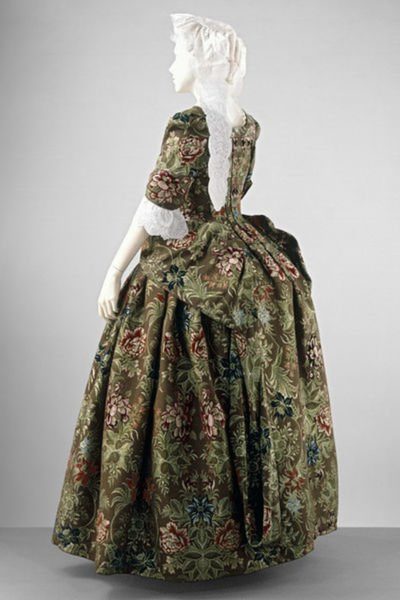
A mantua in the Victoria & Albert Museum in London has been dated to 1733-1740 based on fabric (earlier date) and cut (later date). This gown has been photographed to show the construction of the skirt. This photo shows the brocade has been reversed from below hip level of the back panels and most of the side panels. This is so that only the face of the brocade is seen when worn and pinned in place.
Mantua Place of origin: Spitalfields (probably, woven) Great Britain (made) Date: 1733-1734 (woven) 1735-1740 (made) Artist/Maker: Unknown Materials and Techniques: Brocaded silk, hand-sewn with spun silk and spun threads, lined with linen, brown paper lining for cuffs, brass, canvas and pleated silk Credit Line: Given by Gladys Windsor Fry Museum number: T.324&A-1985
The Lincolnshire Mantua has been dated to 1735 based on the fabric and over all pattern pieces. This particular mantua has the train and most side panels reversed so that when pinned for display only the face of the brocade is seen.
Mantua dated after these examples can be recognised by the folding of the train which follows the folding of the Lincoln mantua and the floral brocades mantua in the V&A as above.
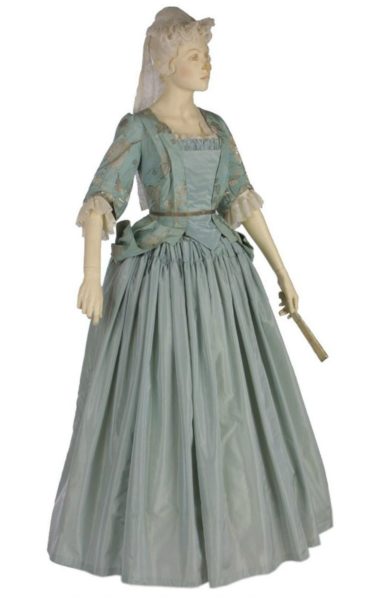
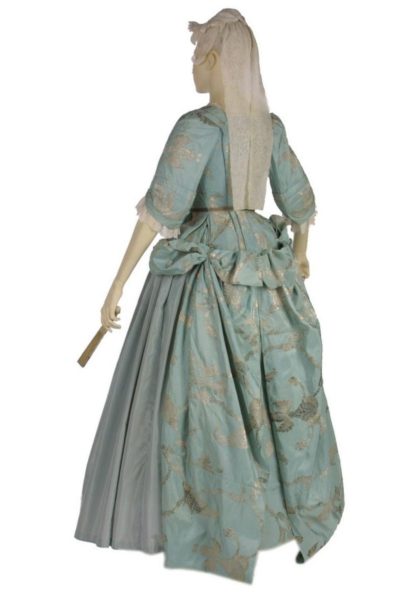
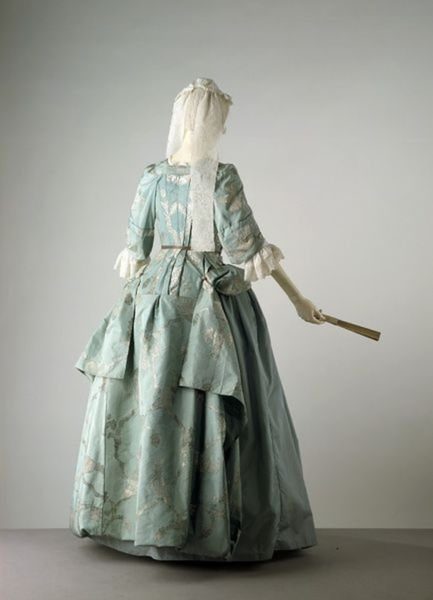
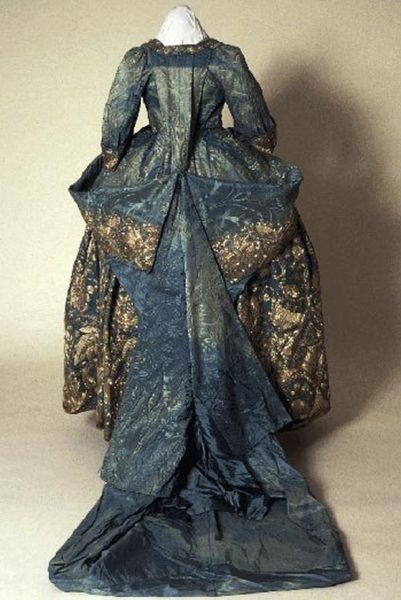
One of the earliest is a blue silk mantua at the Victoria and Albert museum. From the 1720s it retains the extra length in the train despite being pinned up.
Place of origin: Spitalfields (textile, weaving) England (mantua, sewing) Date: ca. 1720 (weaving) 1720-1730 (sewing) Artist/Maker: Unknown Materials and Techniques: Silk, silk thread, silver-gilt thread; hand-woven brocading, hand-sewn. Museum number: T.88 to C-19788
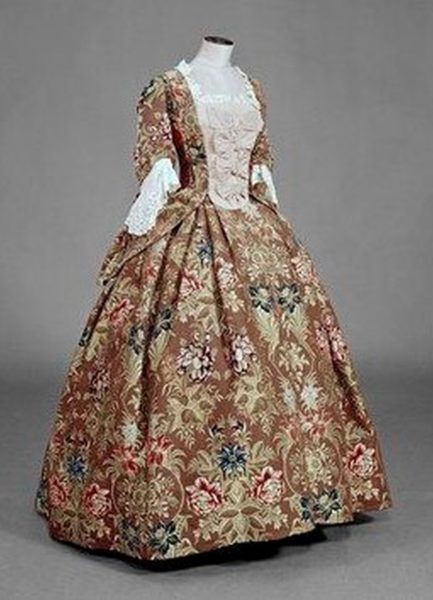
A brown brocaded silk mantua is also of this earlier type and is dated to 1732-1740.
Place of origin: Spitalfields (textile, weaving) Great Britain (ensemble, sewing) Date: ca. 1732 (weaving) 1735-1740 (sewing) 1870 – 1910 (altered) Artist/Maker: Unknown Materials and Techniques: Silk, silk thread; hand-woven brocade, hand sewn Museum number: T.9&A-1971
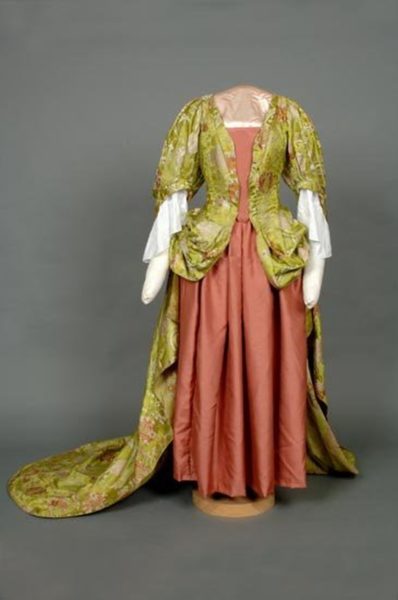
Other garments described as mantua are harder to confirm from the photos.
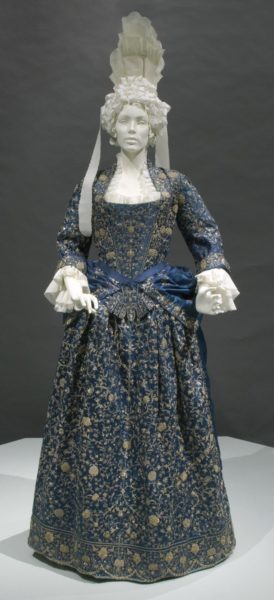
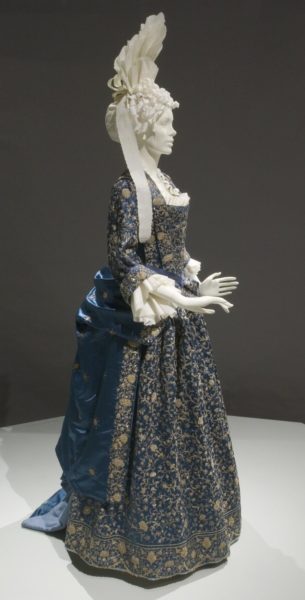
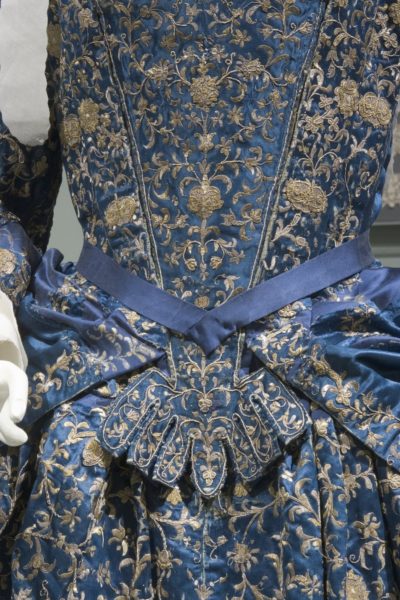
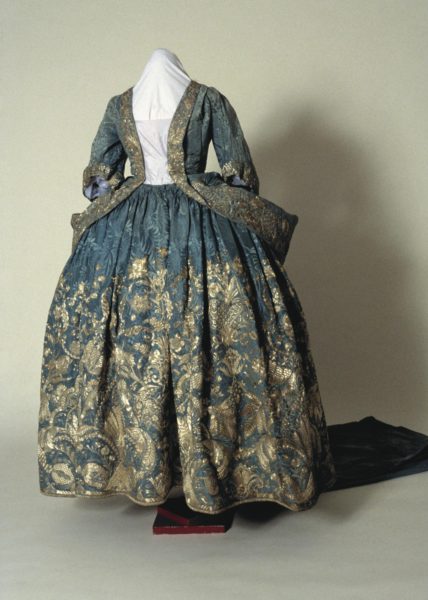
The earliest is held at the Los Angeles County Museum of Art with a date of 1700. It is perhaps the most stunning example of its kind. A deep rich blue silk satin, the petticoat completely covered in metal embroidery, the sleeves and stomacher ditto, only the train seems to be more sparsely covered.
Woman’s Dress (Mantua) with Stomacher and Petticoat Italy, circa 1700 Costumes; principal attire (entire body) Silk satin with metallic-thread embroidery Center back length (Dress): 67 in. (170.18 cm) Length (Stomacher): 16 1/4 in. (41.28 cm) Center back length (Petticoat): 41 3/4 in. (106.05 cm) Costume Council Fund (M.88.39a-c)
A stunning embroidered mantua is held at the National Museum of Wales, dated to the 1720s though much of the train has been removed during the nineteenth century.
COLLECTION AREA mwl ITEM NUMBER 23.189.1 ACQUISITION Donation MEASUREMENTS height (mm):1400 width (mm):2000 (max) depth (mm):1500 (max) TECHNIQUES metal thread embroidery hand sewn weaving MATERIAL damask (silk) metal thread silver parchment flax (spun and twisted) silk (spun and twisted) LOCATION In store CATEGORIES Court
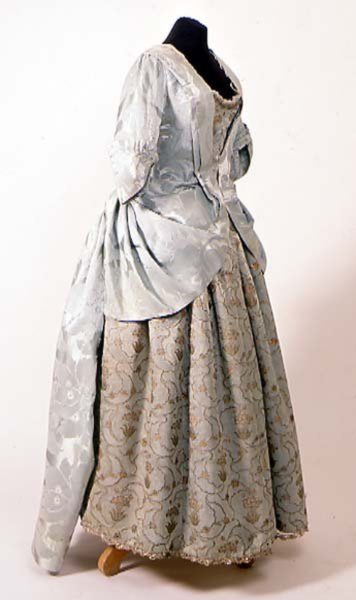
A pale blue damask(?) mantua is held at the Manchester Art Gallery and appears to also be sewn so as to allow the face of the brocade to always be arranged outwards.
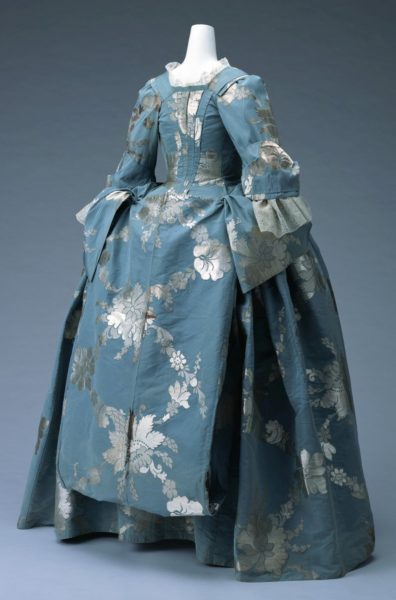
Another blue and silver mantua is held at the Kyoto Costume Institute and again has skirt panels reversed so as to always display the face of the brocade.
Dress (Mantua) 1740-50s – England Material Blue silk taffeta brocade with botanical pattern, buttons to tack train; matching petticoat. Dimension Length from the hips 183cm (Train) Inventory Number(s) AC10788 2002-29AB
While this garment has been dated to the 1750s i believe it is somewhat earlier. The skirt as displayed does not fit well suggesting it was not worn over wide hoops. The train has been folded and appears to show the fabric has been reversed in a similar manner to the above folded mantua trains. So it could be 1720-1740.
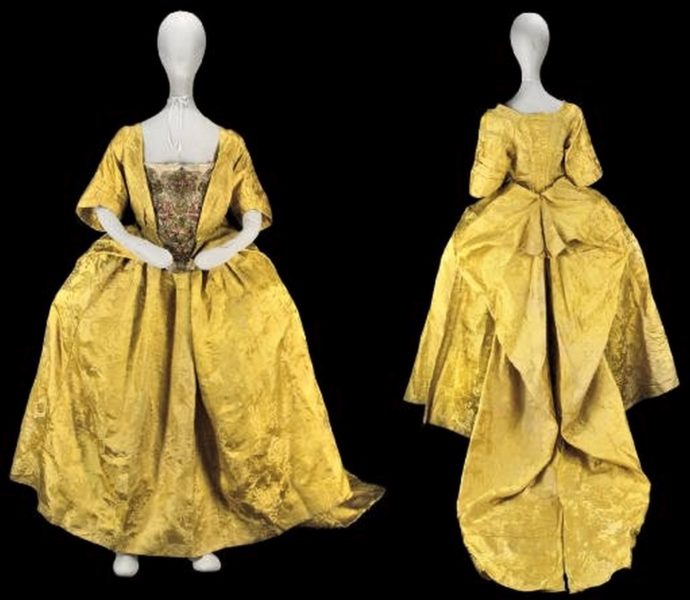
A COURT MANTUA OF CHINESE IMPERIAL YELLOW SILK DAMASK, THE SILK CIRCA 1740, THE MANTUA 1750S the bodice with long sweeping train of elaborately folded damask buttoning in swags onto two silk covered buttons at the small of the back, the bodice re pleated as a closed robe, the petticoats re-strung, shown here worn with a stomacher which is part of lot 141
This is a hard time of the year. Three years ago today I found out Mr Boo had cancer and we had maybe days. I’m not going to lie, it has taken a long time to deal with the guilt of failing him on top of other expected elements of grief.
Counseling really isn’t something people think of for a pet, but I now wish I had asked for some as it was so much worse than I had ever experienced. I’m trying to do justice to his life as he really was an amazing cat.
He was abandoned as a kitten. And he was abandoned at a very early age, he was certainly not of an age kittens are adopted at.
He was also deaf. So I had to learn along with him how to signal to each other, I also had to teach him to purr, how to knead, and just in general our bond of trust was pretty profound.
And I also had to come up with a name for him, he was never going to hear it so his name actually was a very specific head waggle, a series of stomps on the ground on occasion, and then his legal name was Bolero.
Not after the Ravel version, from Moulin Rouge. It was on TV in the first few days he was with me and it seemed very apropo for the tiny little bundle of very determined little scrapper who had a very set idea of what he was going to do.
Here he is warming himself on some clay I had cleaned by heating and straining and left to cool on the kitchen floor in greaseproof paper.
While sewing silk.
Certain that the plastic bag held secrets.
Finally accepting baby Mordin was not actually a monster.
And my last project with him was Elsa while he was recovering from surgery for skin cancer. So yes Elsa has a lot of emotion for me.
I have finally made my way into my written references again after taking a short break. I have a few Really Big ideas about some things. So I will continue to get the timeline sorted, because that then helps figure out how much trust to put in Weiditz’s books (hint, lots, really lots even if there is some fudging and errors.)
Meanwhile I have started putting the lining into my Maria of Cleves gown because it’s so gorgeous and because it’s basically everything in my pattern book is going to be a really good example of what it is about 16thC tailoring that has my focus.
Ultimately it’s pretty much the start of large scale production. I mean the dowry of marie Leonore includes fully cut robes, partially cut robes, and fabric for robes.
To me this is absolutely evidence of what I suspected which is that by this stage garments were not as tailor made as we think. All the Spanish manuals give specific layouts and most extant garments have uneven seam allowances in specific places. And these pretty much are the same right up until the 1920s or so when S’ports” clothing became our standard. No fit, all on a straight front line.
Before then you see curved fronts, often with a facing carefully shaped and then sides where the front and back seam allowances do not match.
So what Marie Leonore’s dowry is an outcome of tailors using measurements to get fabric cut to approximate size, sent to embroiderers/trimming or for journeymen to sew down guarding.
Then it’s mostly assembled and final fitting happens at quite specifically side/sideback, and shoulder.
My pattern book is pretty much all based on a well fitting kirtle made from a 4 gore skirt, a single back bodice piece, two front bodice pieces and really importantly separate straps. All of the kirtles in all the books I have are cut off right where I cut mine. I do use a separate shoulder for my sleeved dresses too as it makes for the most amazing stable neckline.
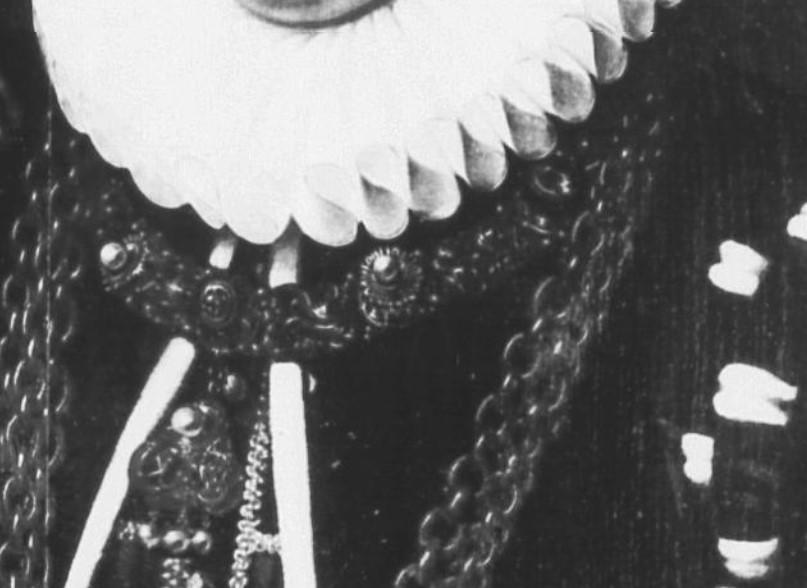
I am currently making over all my jewelry for my Cleves ensemble so these are the references I am using.
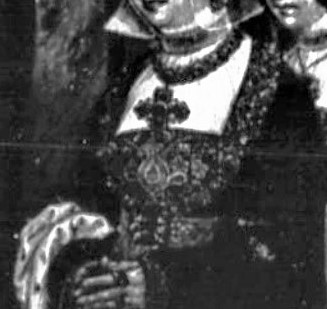
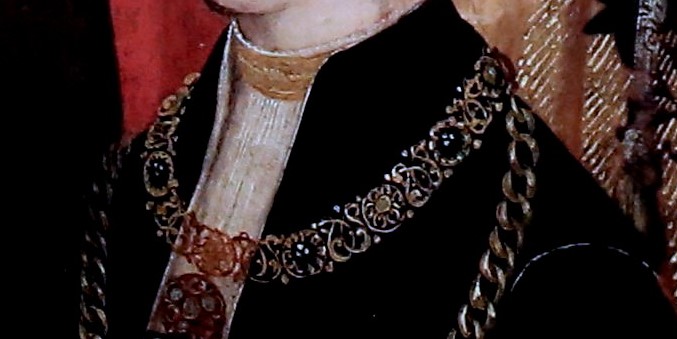
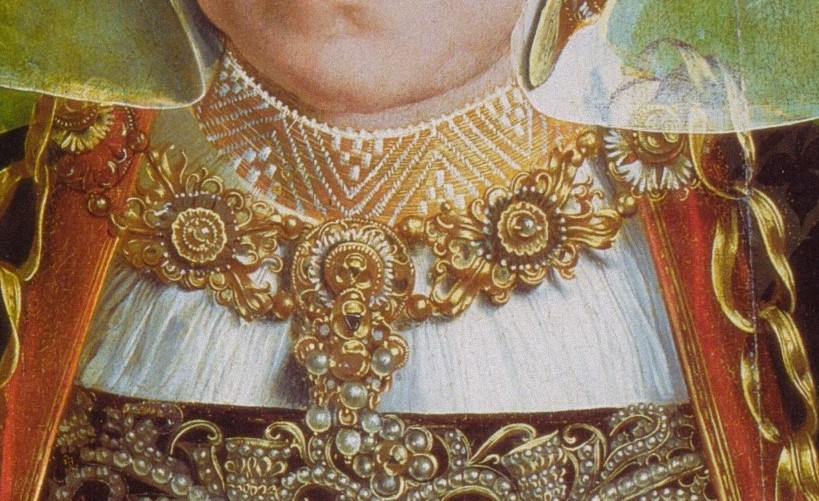
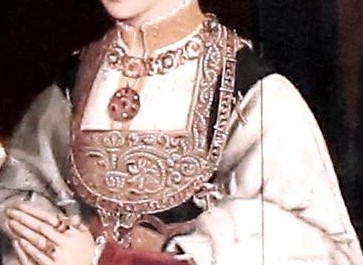
One of the accessories Anne of Cleves wears is a striking collar like necklace made from wide stylised flowers set with large round gold beads between.
1539 nrw holbein anne portrait halsband1539 nrw holbein anne portrait miniature halsband1539 nrw bbda anne bernel halsband
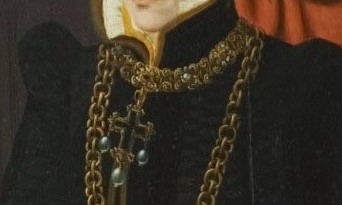
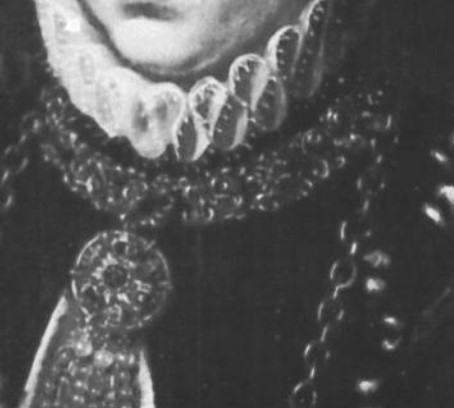
This last version is most interesting as it matches so very closely to several other halsbander worn in cologne. Here are similar examples in chronological order.
1520 nrw unbek flugel frau mit 8 tochter 1 halsband (Also a wide kette around the gown opening)1520 nrw bbda beweinung christi halsband (a more standard kette worn over her shoulders as well.)1540 nrw bbda sibylla kessel halsband (A very wide ribbon type of kette outside her neckline)1538 nrw bbda flugel wolff frau mit 4 tochtern 1 halsband (compare her longer kette here to the extant examples below.)1565 nrw bbdj catharina von seigen geb kannegeisser halsband1575 nrw geldorp elisabeth von hackney halsband1587 nrw geldorp katharina von gail halsband
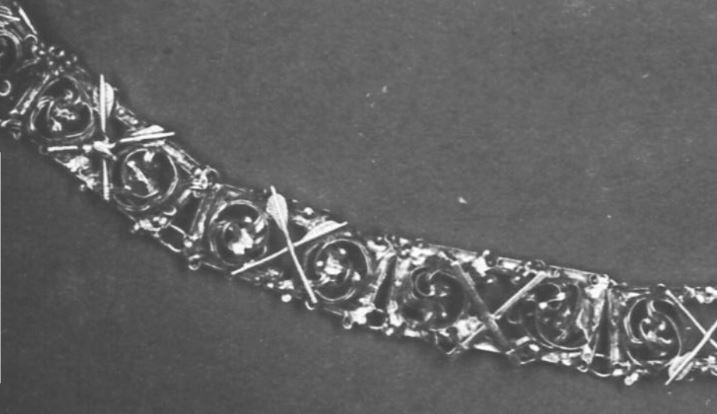
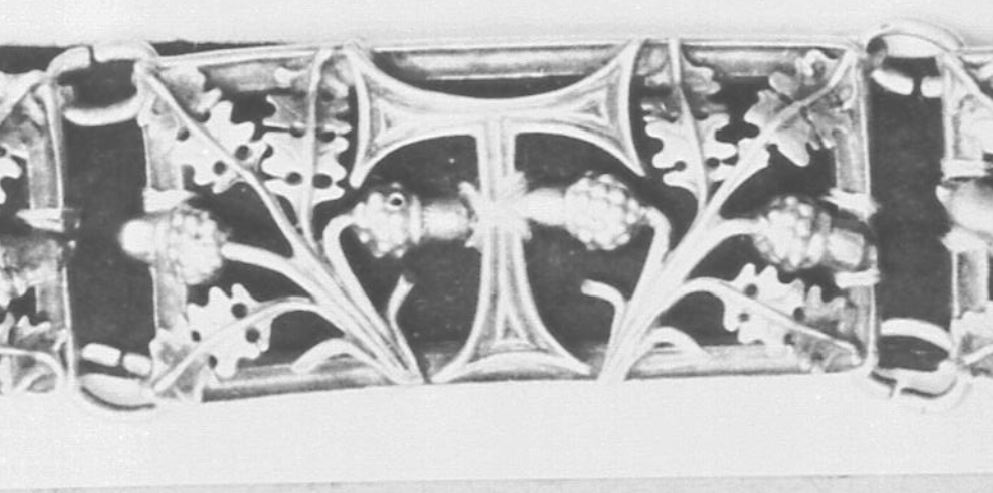
Of these most use a floral centre of some sort (passionflower maybe?) in a rounded/squared open worked gold with round gold beads/balls, at the points that the sections connect to.
Of the extant collars and gurdeln in the Nordrhein several use a hinge join between sections.
hinge: guertel heiligin anna, c1500 Dueren, St AnnaHinge: schuetzenkette, Goch, St Antonius, Emmerich
While others, usually the more open worked pieces, use a loop and ring.
Loop and ring: schuetzenkette sankt georgs bruderschaft, KleveLoop and ring: schuetzenkette sankt antonius bruderschaft, Kleveloop and ring: Schuetzenkette St Michael Bruderschaft, Goch
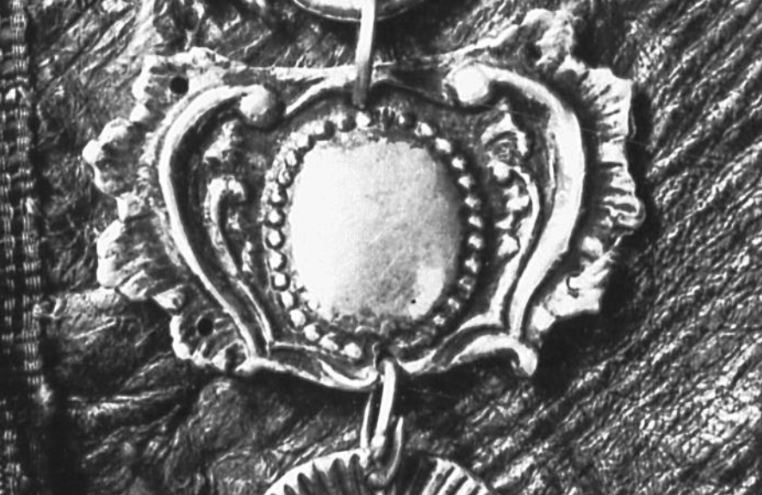
One final example uses loop and ring but further stabilises the pieces with stitches to a fabric base.
holes in each corner, thread in upper right corner and lower right corner: kette sebastians bruderschaft, Kalkarthread stitched through each loop at each corner: kette sebastians bruderschaft, Kalkar
I can’t seem to find the same kind of fastening between sections as used in the portraits but I hope also that these images help illustrate how very fine gold and silverwork was in this region and it was especially on display in these halsbander whether for personal or religious use. I also believe this kind of work was used on other accessories and my next post will deal with this.
Also of note, in this region a long kette (chain necklace) was worn but was usually of a single chain, occasionally of the latribbon type seen elsewhere but more often a simple solid oval ring, or ring with a slight twist to lay flat.
So while looking through the tapestry images I did spot two more half length bishop style sleeves. Well… one that appears to be:
And another that I think is a gathered upper to a fitted lower- but it is in a cloth of gold that is so close to mine :):
So I am going to fit and cut the bodice and sleeves this week of my Maria of Cleves gown. But I am also *this* close to making the flaming orange dress because why not.
There are days my voice is Glinda clear, I mean bubbly and floaty and I can do trills and decorations. And then there are days like today. I think it is the RA. Inflammation seems to fit the bill.
I can at least sing early music. It just does not sound like me. It sounds somewhat appropriate if you think of reed instruments, but it’s not what I trained to get.
But, there are days where my voice is what I trained it to be. So I guess I have two voices due to RA. I have to think of it like that because I can’t predict exactly what day will be what voice and it’s not ideal for singing for an audience. I miss theatre so much. So much.
I did also spend a long time putting all my info for each and every portrait I have. And I still have a few hundred unattached files.
I also cut my Maria of Cleves gown lining, it’s been de-coloured and I will need to put it through a bluing wash after it’s washed properly.