Tag Archives: sfx

MALEFICENT TABBARD TESTING

MALEFICENT TABBARD TESTING

by admin, July 28, 2014

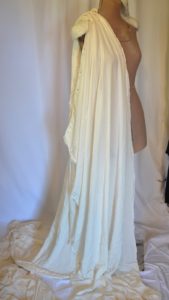
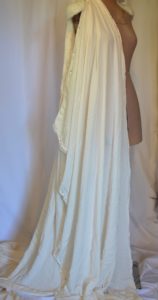
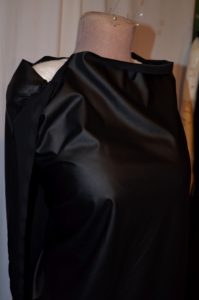
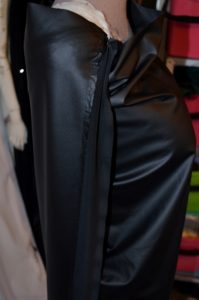
My super soft crepe for the Hindi Satine costume has done stunt duty for the tabbard pattern. If I were able to dye this a lovely rich black I’d just go and use this for the actual lining. sadly there is not enough to do so even if it were cost effective.


It is both easy and not easy. I really wanted that accordion effect down the side and to direct the majority of the folds to the front. I am really happy with the front but the back really needs some work. It needs to be shaped differently to allow for the cloak to fit smoothly over the top. Sigh. But I will be able to grab the pattern of this before I start to  try to work on that. But at this stage, yes it looks like about 11 yards of fabric is needed. Full width fore fronts and backs (6m) and then about 2 yards each side for the back panels that turn in to the cloak. Maybe more as there is a strange gore CB that may hide a good fold of fabric.

Leave a Comment

Filed under projects: media recreations, Uncategorized

MY FABRIC ARRIVED, BLISS :)

MY FABRIC ARRIVED, BLISS 🙂

by admin, July 22, 2014

So perfect!

http://www.mjtrends.com/products.Stretch-Black,Matte-Vinyl,Fabric#.U829YPmSyao


It really is stretchy and it really does have that texture 🙂 Very good vertical stretch in fact more stretchy than horizontal 🙂

I’ve been a fan of their product for years, and have used it for all my Shiny Butt catsuits:

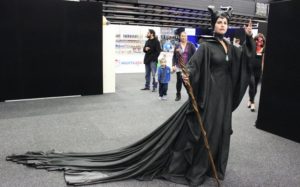
Catwoman, Witchblade, Mara Jade, Blood Dragon, Shae Vizla., Regina/Maleficent stunt costume.

So I wasn’t too concerned about the quality but I was unsure how well the texture would show. And it really is as advertised 🙂


So leather onsie will get done in the most perfect fabric available 🙂 Also the emails you get are lovely 🙂 I do now wish I’d grabbed the spiral steels at the same time but never mind 🙂


As a comparison:

http://arts.nationalpost.com/2014/05/31/magnificent-maleficent-high-fashion-costume-design-for-angelina-jolie-in-disneys-dark-new-film/


So not the exact match but close and really good. I think there is some hue and contrast shift here, and the colour of the stretch vinyl is a warm black. Not charcoal, not raven black but still on the warm muted side of the richest deepest black.


1 COMMENT


    • KRISTEN

      REPLY

    • July 22, 2014

    Looks great though! Just wish shipping from MJtrends wasnt so expensive to the UK.

Leave a Comment

Filed under projects: media recreations, Uncategorized

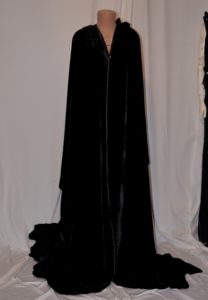
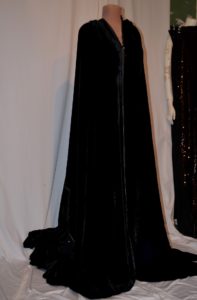
MALEFICENT FABRICS :)

MALEFICENT FABRICS 🙂

by michaela de bruce, July 25, 2014


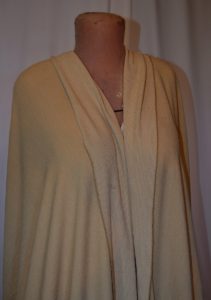
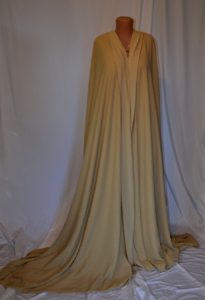
I remembered O have a lovely crepey fabric in stash 🙂 It’s what I used for my Rachi so I can hopefully make the moors robe and a circle skirt to go with my Rachi robes to make a custom jedi 🙂

Velvet… omnomnomnomnom.


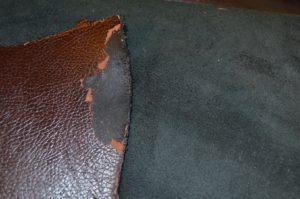
Leather for the boots! This brown pvc coating does come off (with a solvent)


Perfect finish and weight for functional boot covers. Who am I kidding. I’ll make a full boot upper!


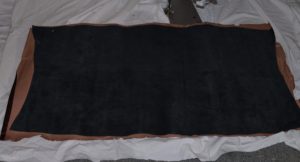
The MJ Trends stretch matte PVC. This is amazing! Super stretchy much softer than it looks here, I have not stretched it as I do not want to pin through the fabric. But I have tested it against their shiny butt stuff and it has a very similar stretch. Slightly more vertically though. So a light single knit backing with a light but good coating. I have a few samples to send to locals to get a feel. I may be able to post small 5cm by 10cm pieces to others as well.

Well worth the money and shipping. It’s fully tracked so it is pretty much dollar for dollar fabric/shipping. This is why I didn’t get spiral steels at the same time. Now I wish I did!


1 COMMENT


    • KRISTEN

      REPLAY

    • July 25, 2014

    OOh that fabric does look amazing plus all the drapy fabrics in your stash!

Leave a Comment

Filed under projects: media recreations, Uncategorized

MALEFICENT NOTES

MALEFICENT NOTES

by michaela de bruce, July 13, 2014

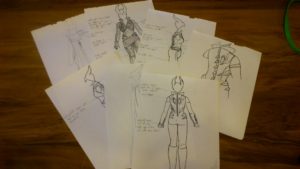
Just some sketch notes, I do line art rather than full sketches so as to clearly define seams and edges. Inext stage is to get more specific in terms of exact position. The detail page of the back is for when I see the film again and get proper notes. The lower back is very poorly documented in current publications so I’ll have to hope the doll is accurate or that I can get those costume details from the big screen 🙂
The DVD cover has been released so hopefully it will be out soon enough to use for references!

Leave a Comment

Filed under projects: media recreations, Uncategorized

I AM GLAM 70S ROCKER

I AM GLAM 70S ROCKER

by michaela de bruce, July 11, 2014

PVC and feathers!

So I need a pair of coveralls desperately. I finally tossed the pair that were basically held together with old resin.

Leave a Comment

Filed under projects: media recreations, Uncategorized

Head cast update

Head cast update

I am very slow at this, yay for the fatigue and the pain hitting at different times, anyway:

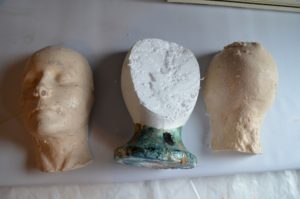
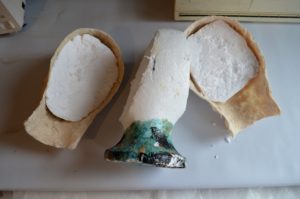
Casts trimmed and prepped for putting together:

Cunning use of a foam wig head to make the side match up:

Single layer of thick matting around the seam- yep it’s pretty open.

The neck does meet and that was where I made sure to get the two parts together.

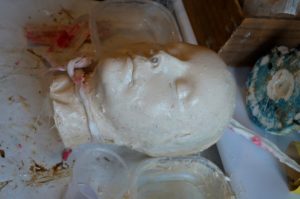
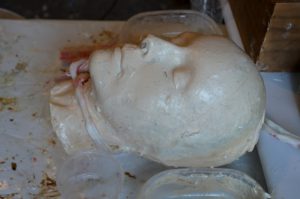
So this is basically me with my hair being a bit of a pain and filling out the sides. My separate ear pieces are still in plaster.


The ears should be able to be tackled tomorrow. The plaster is breaking down nicely.

Still disconcerting seeing my stressed out smile. Sheesh. It’s actually in part due to my vampire fangs and in part due to jaw tension. If anyone ever sees me making faces while at a photoshoot, this is what I am trying to avoid.

Also it’s a bit genetic. My brother has the same turned up corners. I think we both get people assuming we are smirking.

No but seriously I thought I’d have a frown and pursed lips based on this thing, not looking like some renaissance painting of a saint.

Leave a Comment

Filed under Uncategorized

self made head cast

SELF MADE HEAD CAST

by michaela de bruce, July 6, 2014

So I will do a proper tutorial including these images as soon as I am able to pull out the alginate- which due to the process I used will not be for a while. If at all.

So.

Materials:

Alginate, mixing containers, plaster bandages, measuring cups. Also a swimming cap (leaves a clear line in the the impression to help match up sides, also no need to glue it) and a wide straw, split, taped into an oval in cross section to fit my nostrils, cut into small sections.

Mental Prep:

I am claustrophobic and was alone so I made sure my work room was safe. This meant having my computer/entertainment area away from the work area in case of splashing.

I also played a movie I know very well, has no loud noises and I could use to time. This is to reduce panic related issues while totally enveloped in the alginate. “Okay I will wait to the end of this scene before seeing if it is cured”.

I also put on coveralls but kept a warm layer on underneath. I couldn’t have the heater on due to risk of anything going wrong with it while I had water and had to move while unable to see.

So the main risk factors in doing this are panic related or lack of prep work. So make sure everything is in place and you have a plan for just in case. I didn’t want to waste the product but knew I would if I wound up with the stuff up my nose or in my eyes.

Step 1:

Plaster support/mother, back of head

I started by making a plaster shell for the back of my head and for my face. I knew I could just use the bandages straight on my swim cap and skin if I made sure to use a petroleum jelly. This is the same process I I did for my playdough and plaster mold, but this is far more successful as the plaster bandages cure fast and very light. This shell would then be close enough to use alone if there was no alginate left over.

So I cut long and short strips. I used two long strips to define the line from top of head down sides over my covered ears and to the side of my neck. Then filled in the back, with shorter section across and longer strips vertically.

Plaster support/mother, front of head

The face was going to be another issue. From  previous experience I knew I would need the mother to be bigger in all directions but not too big. The volume would be filled with alginate and I didn’t want to waste it. So I looked at my other headcast and realised it was perfect due to the amount of clay on there for the silurian. So I laid up the plaster bandages, making sure to not press it right on the clay. I also made sure to leave breathing holes for my nostrils:
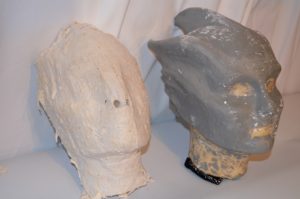
I also knew where my jaw line and ears were so was able to align the edges to match the edges of the back of the mold.

Leave the two parts to dry. While best advice is to leave until bone dry I used mine while still damp as it is Auckland and winter so everything is cold and damp anyway. Also the wetness allowed the alginate to really grip and stay put on the inside.

If you don’t happen to have such a head cast already prepared then it is possible to build up clay on a foam wig head, just measure as you go to make sure you have enough room.

Step 2:

Alginate mixing:

Alginate is a bit like plaster in that it can have a long mix time then suddenly fast gel time. I tested a small amount the day before and decided it was easiest to mix by hand as if I was working with a firm tempora and trying to work out lumps.  And you will get lumps.  General advice is to get rid of them with a mixing bit on a drill but I found even if it was lumpy like porridge it still worked.

Test straws for nasal comfort. Do this a few times to get used to them. I had to use the largest straw I could find.

Head prep:

I put my tiny pony tail right at the crown as it is easy to see even under a bald cap. This means I can knock it out when I tidy and trim the cast. Then a fishnet hair cap to hold stray hair and also make the swim cap easier to move without pulling on your hair. Finally the swim cap. I trimmed a shallow D out of the front so as to leave my forehead free of tension and reveal a tiny portion of my hair line- I have a widows peak that does make wigs and prosthetics sit lower than they should.

Then petroleum jelly over your face and neck!

Alginate layup:

You need to work fast! As soon as it gets to the tacky stage start filling in the front of the face and spread from the centre up and to the edges. Work very fast. Trying to get the straws through the holes took me a long time due to a single strand of the strip that caught several times.  Blow alginate out of the straw from the plaster side (ie in to the inside) as that is the shortest route out.

Then lean forward while bringing the face mold up to you, with one hand support the mold, with the other wiggle the straws until you find each nostil and then if they are on place carefully press your face in. I also distorted the plaster mold a bit so that it would draw out air trapped inside.

As I had straw problems I wound up with the alginate curing within 30 seconds. Which was great as I did panic a bit and the alginate separated easily from my skin.
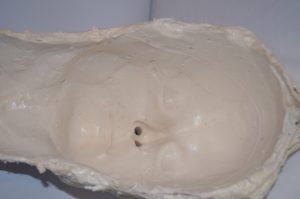
As this was my first try and the alginate was already gelling I had to mix an extra cup to fill in the gaps at the side. But it was easy to do and the alginate did self adhere as I did not wait too long between each step. Alginate will not self adhere when cured.

Then I repeated the process for the back. And while it was still very damp I put the front half on (straws pulled out as there were now nice big holes to breathe through) and aligned the two parts. Then I left the front half rest while the back half cured on my back. it was a wetter mix so took longer to cure. It also stuck to me a bit more than the front.

Step 3:

Casting:

I used epoxy fibreglass resin. With a mix of West Systems microballoons and colloidal silica to make it to a slurry. I tinted it to a pale pale flesh colour, which has since been taken over by the colour of the microballoons.

I used 600ml of resin and about a cup of filler (1/2 and 1/2) then as it was sluming I used chopped strand filler to press and move the resin up the sides.

I tested drying the back mold and forgot to do this for the front. In fact it was fine. Epoxy is not inhibited by water but it won’t cure through water. So you just need to make sure you don’t move the resin too much on the inside.

Today I separated the parts and there is still some curing to go- I did not speed up the cure with heat as I did not want to lose the alginate cast due to it drying out. In the shade on a cold damp day epoxy is very resistant to curing!
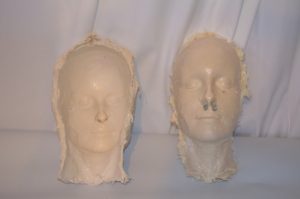
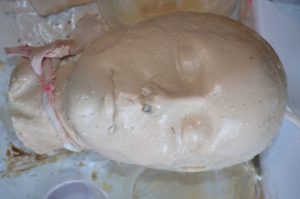
Above mold and cast. with straw stoppers.

Back, wrinkles of swim cap and hail tail and air bubble can be sanded out.
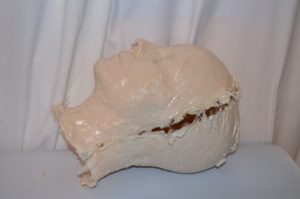
Once the fibres are trimmed these edges will lie closer together. I can see the line of the bald cap so can align where that appears on each half. This also gives me the location for my ears.

My ear casts are still locked in plaster. They are soaking in water and baking soda to break down the plaster.


And don’t freak out when you see your face from the outside! I was surpised how narrow my face is but yeah, those are my eyes, nose and mouth.

Leave a Comment

Filed under garment construction, projects: media recreations, Uncategorized

I have playdough! And something gluey and lumpy, but all pink!

I have playdough! And something gluey and lumpy, but all pink!

I did the traditional stovetop method. Word of caution though: Start with cold water and sift the flour!

The lumpy gluey stuff is probably the softer thus better option for a fine detail face impression, I can cope with oiling up my face so it doesn’t stick yeah??? But the lumps are making it less ideal.

The brighter smoother stuff is better fo actual dough.

Oh another hint. Probably boil the salt and water first to dissolve it fully, let cool and then sift in the flour and cream of tartar.

http://www.instructables.com/id/How-to-Make-Playdough-Play-doh/

Sooo pressing face in dough before or after hair colouring…..? I think before…

Leave a Comment

Filed under projects: media recreations, Uncategorized

by michaela de bruce, May 26, 2014
https://www.tumblr.com/invisiblemoose/86719450287/absolutely-stunning-maleficent-cosplay-d


6 COMMENTS


    • REPLY

    • May 26, 2014

    You ROCK! As always.

      • ADMIN

        REPLY

      • June 26, 2014

      Thank you 🙂

    • KRISTIN

      REPLY

    • June 4, 2014

    This is hands down the best maleficent costume I’ve seen! Wonderful job. I want one 🙂

      • ADMIN

        REPLY

      • June 11, 2014

      Thank you 🙂 Super fun to wear, a total pain to make but worthwhile 🙂

    • CHANELLE

      REPLY

    • June 25, 2014

    I love this!!!! Is the headpiece available for purchase?

      • ADMIN

        REPLY

      • June 26, 2014

      Thank you 🙂 I still have my molds and am thinking of doing a number of casts while I have the product (finally got a large amount of aerosil/cabosil which makes it lay up easily in a curved mold and not run out everywhere!

Leave a Comment

Filed under projects: media recreations, Uncategorized